The canvas
The canvas is the big picture in the middle of Design. It shows your surfaces as the projector sends them out, or over the photo of your room after a scan. You select, move and reshape surfaces here, zoom in to line edges up to the pixel, and undo anything with Ctrl + Z.
Advanced the projector switch and +, the Input view
1The Design screen
Design has four parts. You work on the canvas in the middle; everything else is about what you select there.
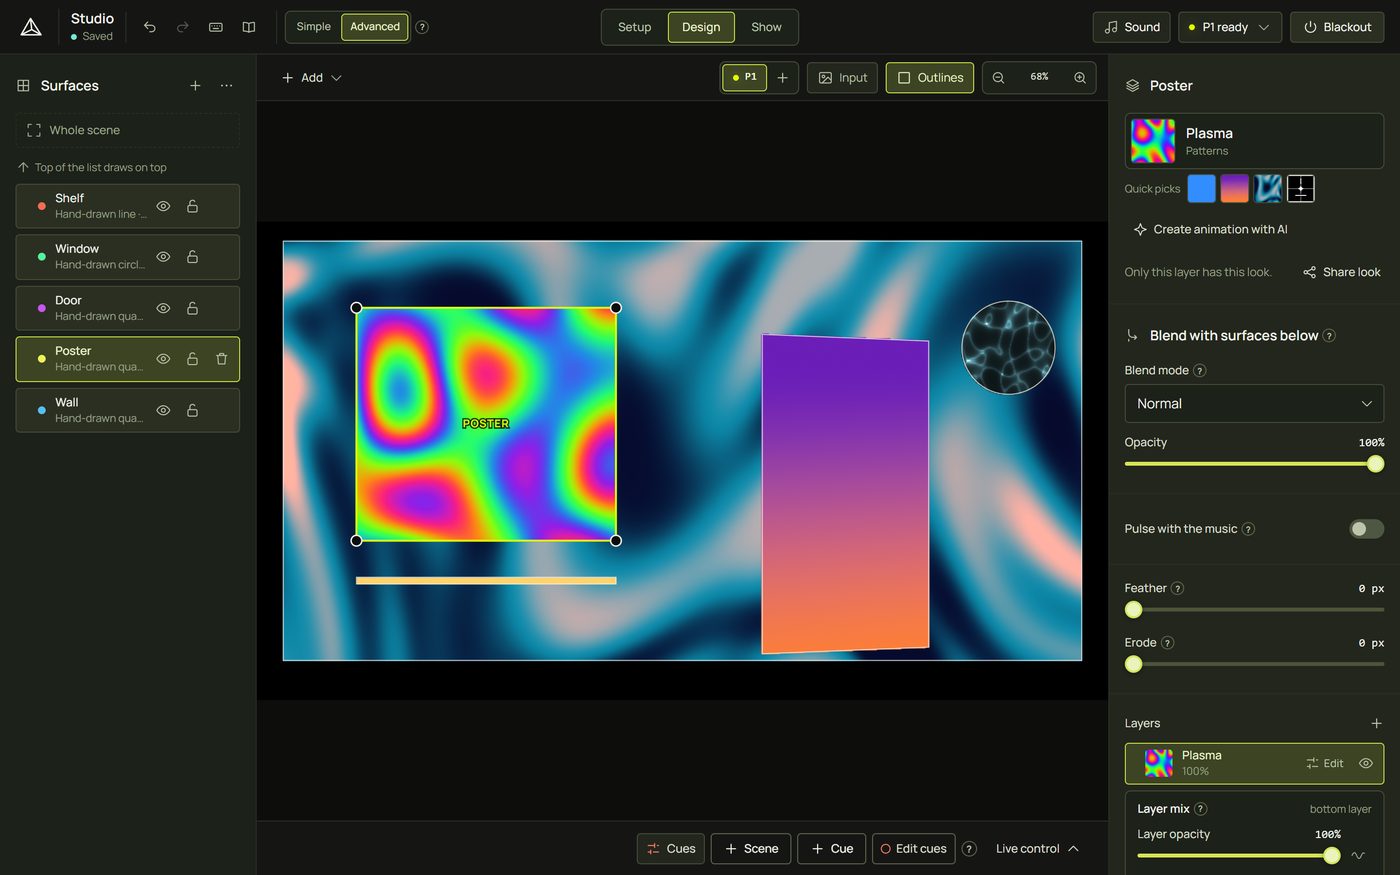
- The Surfaces list (left) has every surface, group and mask. The top of the list draws on top. See Surfaces list and groups.
- The canvas (middle) shows the picture and lets you edit it. Its tool bar sits above it.
- The inspector (right) shows the settings of what you selected: a surface, a group, a mask or a projector. With nothing selected, it shows the project's own settings (name, brightness, gamma).
- The strip (bottom) keeps your scenes and cues. See Scenes and cues.
The canvas tool bar

| Button | What it does |
|---|---|
| Add | Adds a shape at once, ready to drag onto your object. See Shapes. |
| P1 + | Advanced Chooses which projector you are designing for, or adds one. Simple mode shows the switch only when a project has two or more projectors. See Several projectors. |
| Camera Projector | Switches the view (next section). Only there after a scan. |
| Input | Advanced Opens the Input view: which part of a picture each surface shows. See Position, fit and input mapping. |
| Outlines | Shows or hides the faint outlines of the surfaces (section 8). |
| Masks | Only there when this projector has masks. Shows or hides the masks' dashed outlines. |
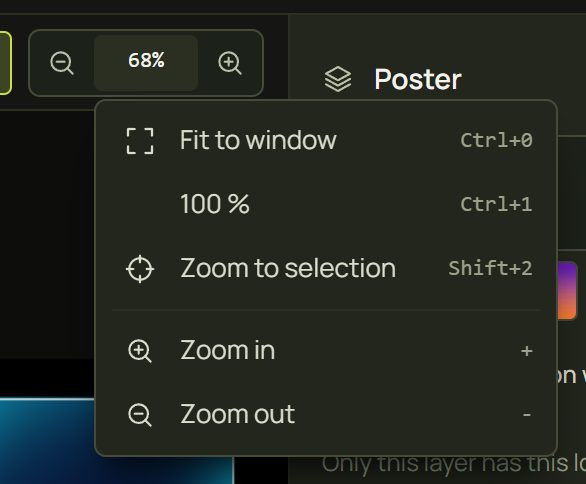
| − 68% + | Zooms out and in. The percentage opens a menu with Fit to window, 100 % and Zoom to selection. |
2Camera view and Projector view
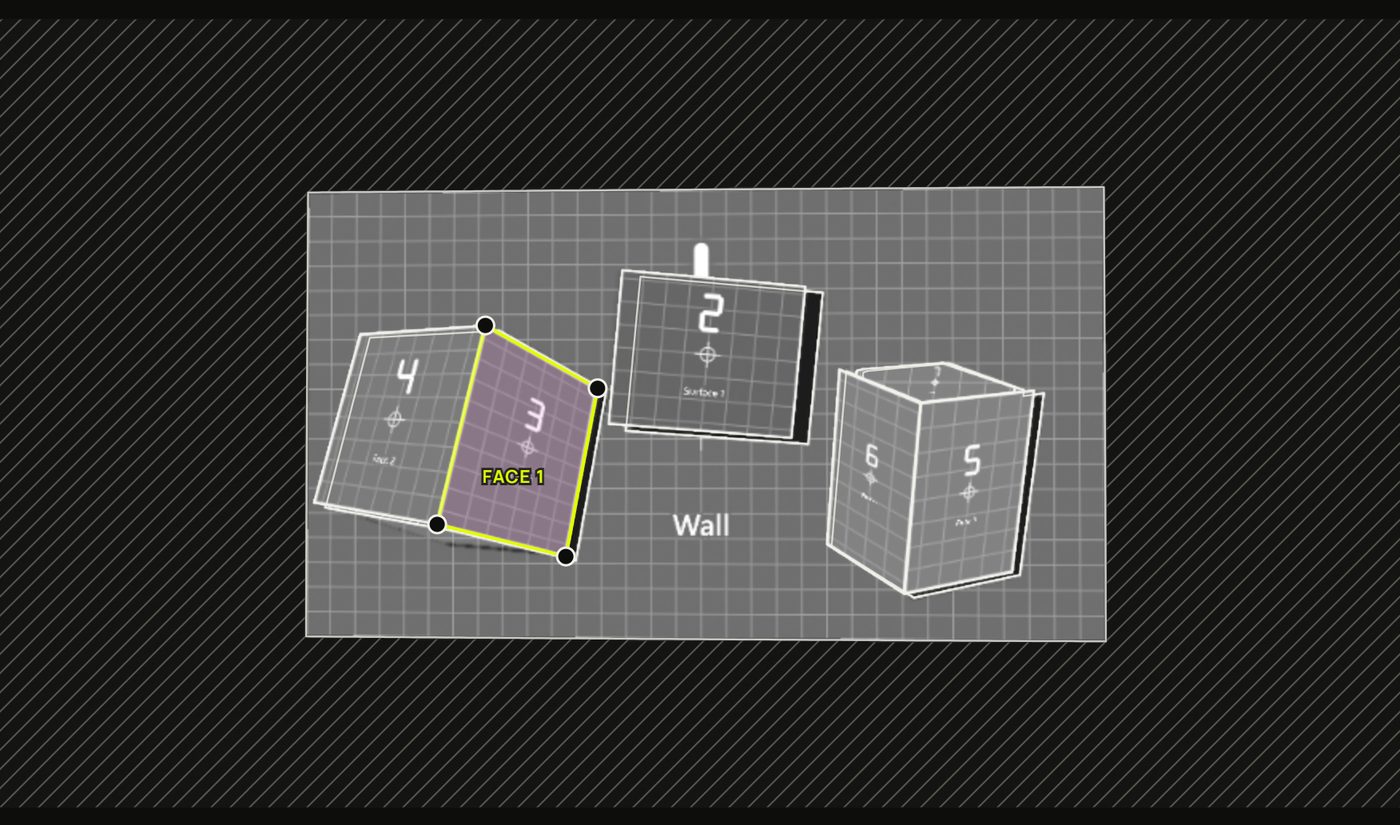
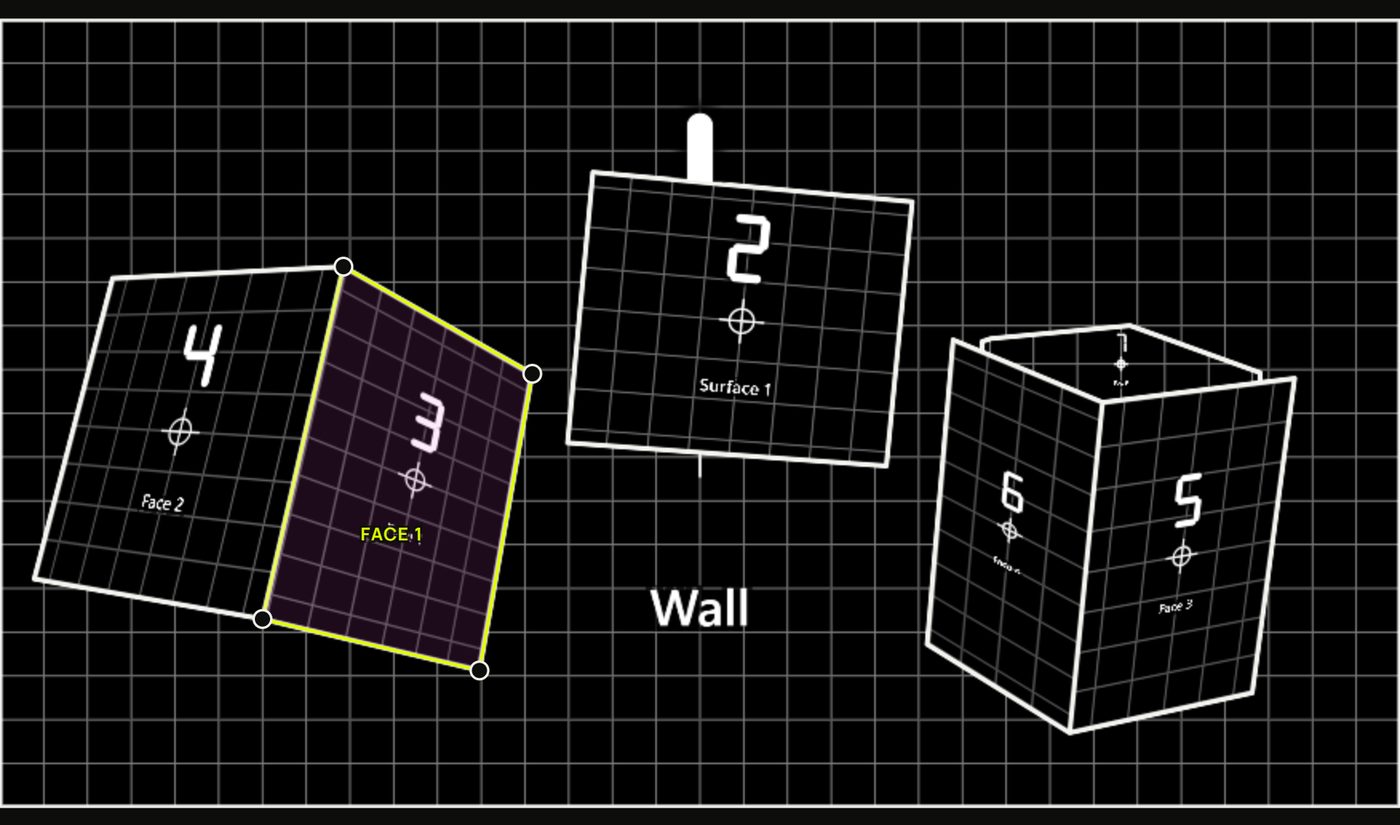
The canvas can show your design two ways.
- Projector view shows exactly what the projector sends out: every surface on black, hand-drawn or scanned. It is always there, and it's the only view in a project you drew by hand.
- Camera view appears after you scan the room with your phone. It shows the scan photo with your surfaces drawn over it, where the camera saw the light land. Everything outside the projector's picture is hatched: the projector can't light it.
- Press Camera or Projector in the canvas tool bar. You can also right-click the canvas ▸ View ▸ Camera view or Projector view.
- Edit in either view: a corner dragged in the camera view lands on the same spot of the real object in the projector view.
3Zoom and pan
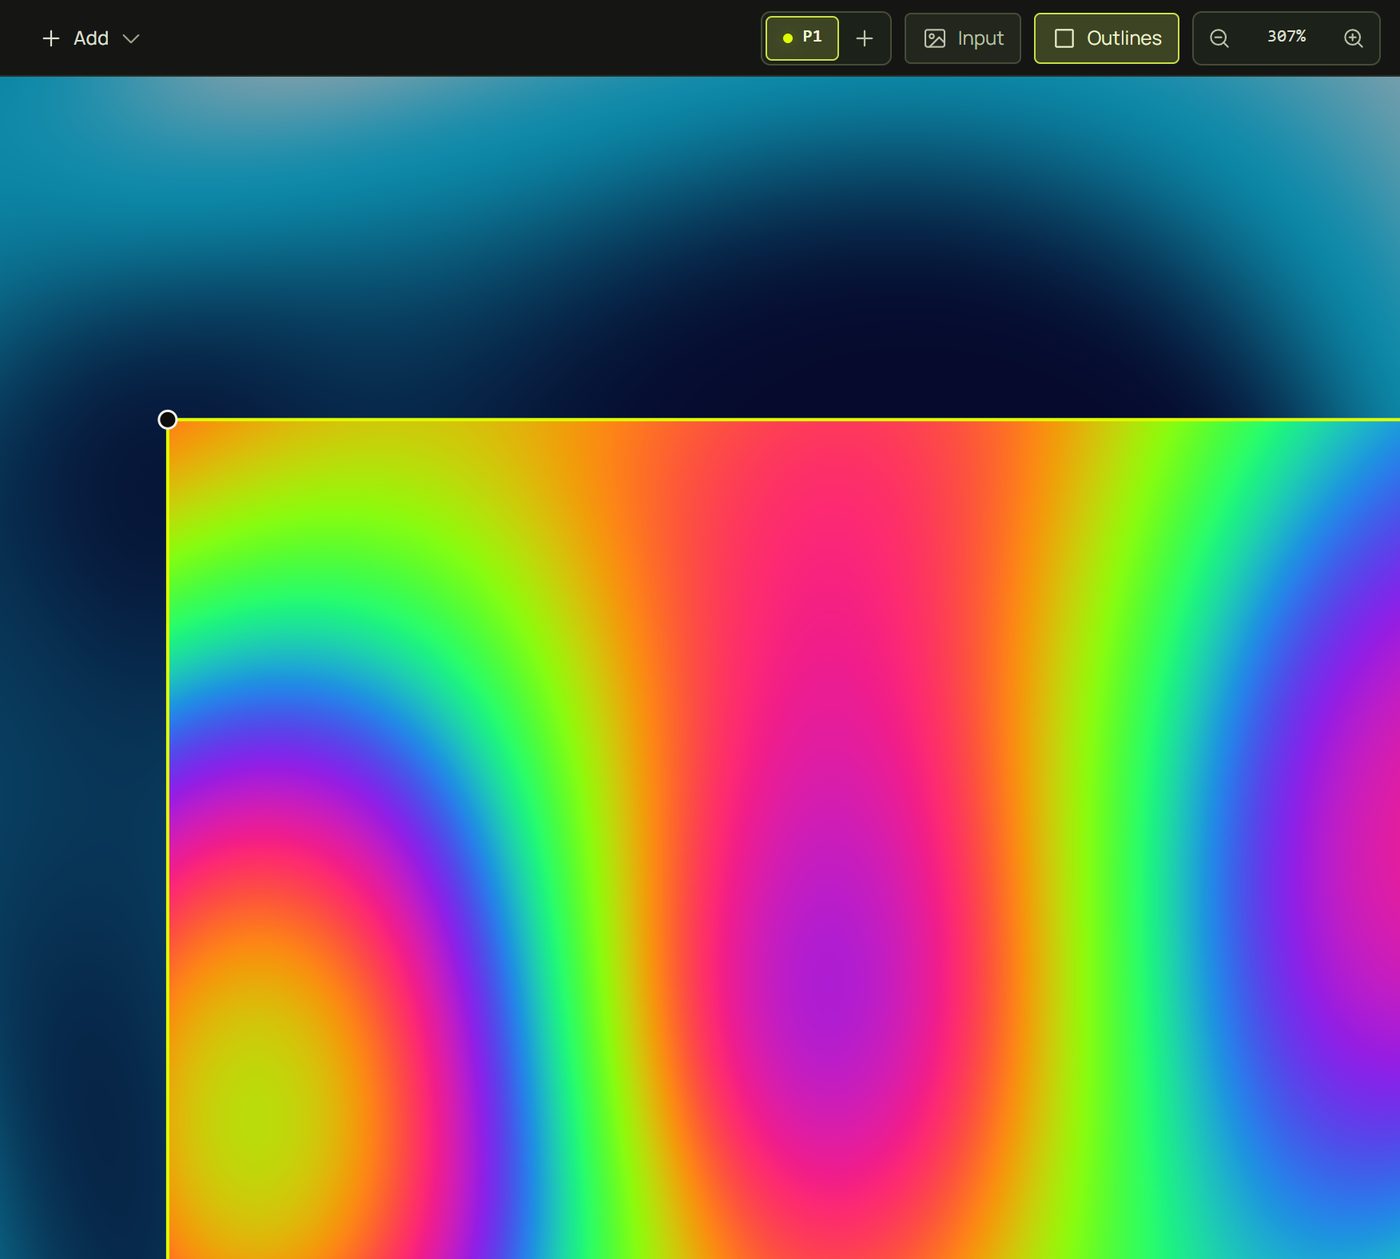
Zoom in to place corners exactly; zoom out to see the whole picture. Handles, labels and outlines keep their size on screen at any zoom, and edges stay sharp.
| To… | Do this |
|---|---|
| Zoom in or out | Turn the mouse wheel over the canvas: it zooms about the pointer. Or press + and -, or use the − and + buttons. |
| Zoom on a trackpad | Pinch, or hold Ctrl while you scroll. (Ctrl + wheel always zooms.) |
| Pan (slide the picture) | Hold Space and drag, or drag with the middle mouse button. On a trackpad, scroll with two fingers. Shift + wheel pans sideways. |
| See everything | Ctrl + 0 or Shift + 1 (Fit to window). |
| Zoom to what you selected | Shift + 2 (Zoom to selection). |
| One pixel per pixel | Ctrl + 1 (100 %): one projector pixel (camera view: one camera pixel) per screen pixel. |
| Touch screen | Pinch and pan with two fingers. |
4Select surfaces
- Click a surface to select it. Its outline turns lime, its corners or points get handles, and the inspector shows its settings.
- Shift-click or Ctrl-click (⌘-click on a Mac) another surface to add it to the selection. Do it again to take it out.
- Click an empty spot or press Esc to select nothing. The inspector then shows the project's settings.
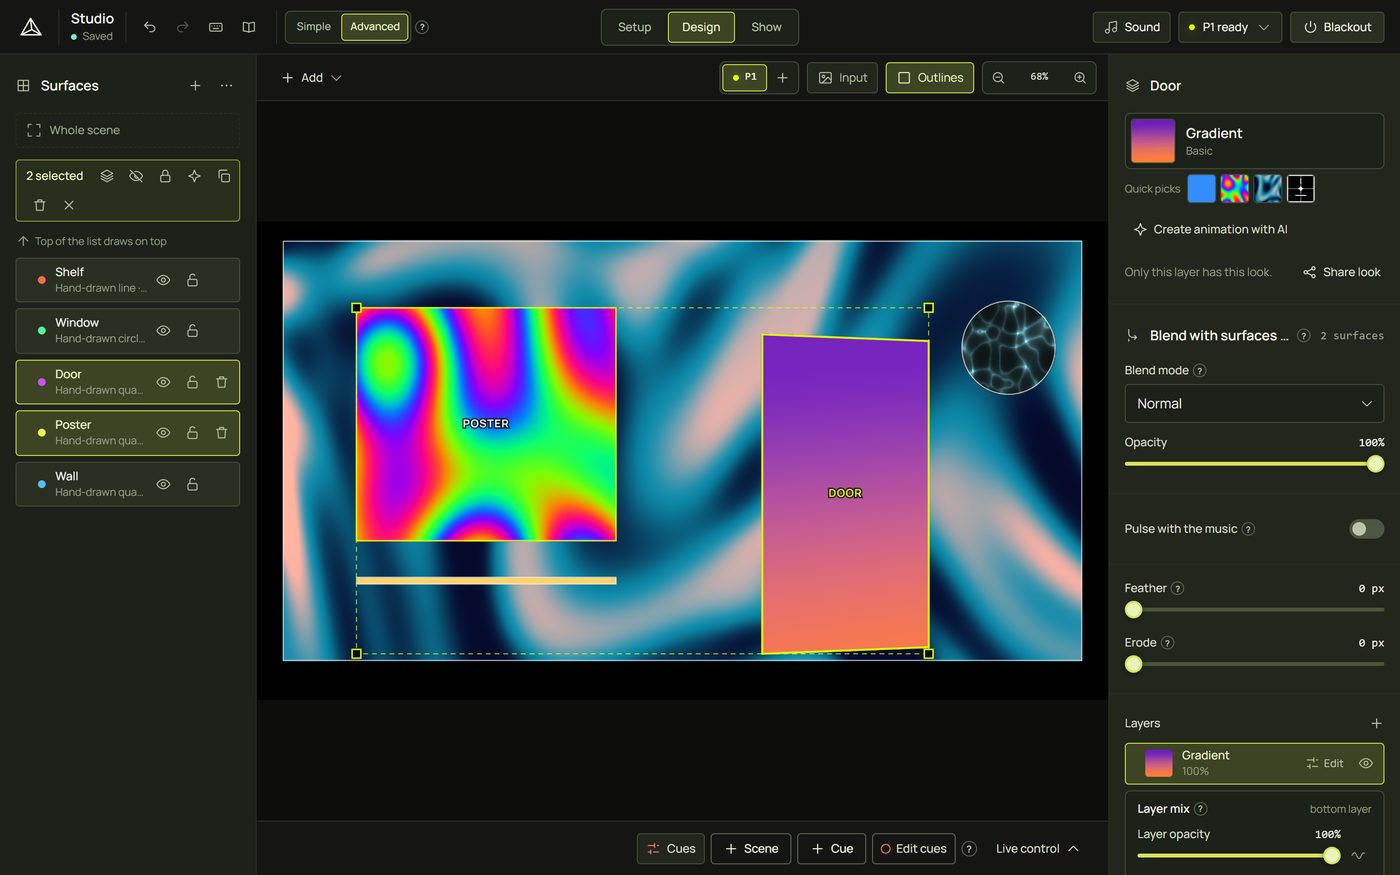
- Ctrl + A selects every surface of this projector (masks are left out).
- Alt-click a surface that is in a group to select the whole group; keep the button down to drag the group.
- You can also select in the list: click, Ctrl-click and Shift-click work there too. See Surfaces list and groups.
- Locked surfaces can't be clicked: the click goes through to whatever is under them. That's handy for a finished background wall.
5Move and reshape
| To… | Do this |
|---|---|
| Move a surface | Drag inside it. Hold Shift to keep the move straight (across or up and down). |
| Reshape it | Drag a corner or point handle. Shift keeps the handle's move straight (a circle's box stays square). See Shapes. |
| Move several | Select them, then drag any one of them. They move together as one undo step. |
| Scale several | Drag a corner square of the dashed box. They scale about the opposite corner; Shift keeps their proportions. |
6A surface under another one
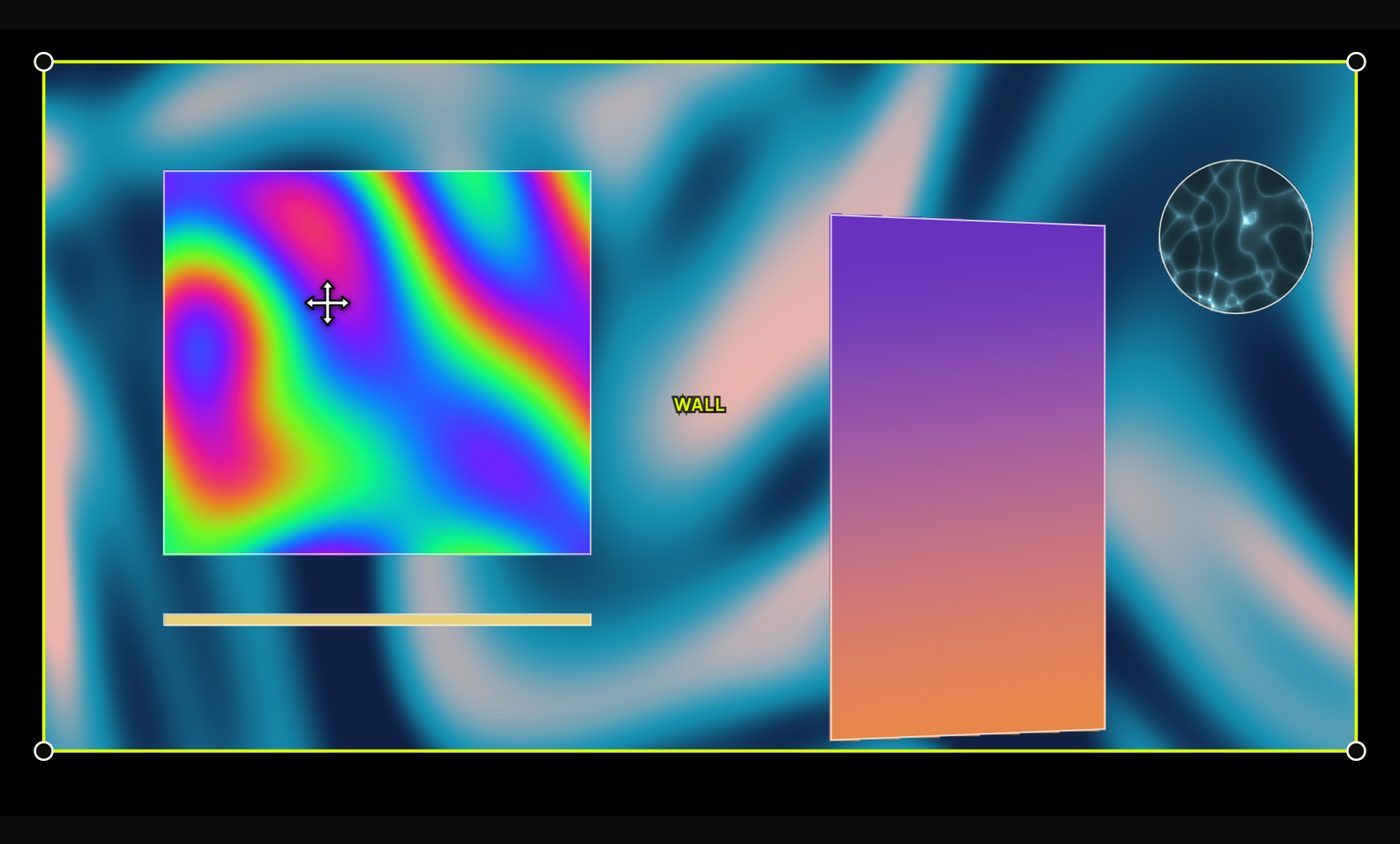
A big surface, such as a wall, often sits under smaller ones. You can still drag it by pressing on a spot that another surface covers.
- Select the lower surface: click its row in the Surfaces list, or click it where nothing covers it.
- Hover over it. Where another surface is on top, the canvas shows the name of the surface a drag would move: the selected one.
- Press inside it and drag. The selected surface moves, not the one on top.
7Nudge with the arrow keys
The arrow keys move the selection by 1 projector pixel; Shift + arrows move it by 10. The step is the same at any zoom, so zoom in to watch small moves.
- What moves: the point you last pressed (its handle has focus), otherwise the whole shape. With several surfaces selected, they all move.
- Back to the whole shape: press inside the shape, or press Esc once.
- A quick burst of nudges is one undo step.
8Outlines, masks and names
The canvas marks your surfaces so you can find their edges even when their looks are dark. These switches change what it marks; none of them changes what the projector shows.
- Outlines shows or hides the faint outlines round each surface, hand-drawn or scanned, in both views (and the grid lines of meshes you aren't editing). The selected surface always keeps its lime outline.
- Masks appears when this projector has masks. Off, the masks' dashed coral outlines are hidden and can't be clicked, except the selected one. See Masks.
- Names: the canvas names only the selected surface and the one under the pointer. Right-click the canvas ▸ View ▸ Surface names shows every name.
- Preview quality (right-click ▸ View): Auto runs the preview light while a projector window is open, so the projector stays smooth; Smooth is always full rate; Light is 12 frames a second at half resolution.
9Undo and redo
Almost everything you do in prism can be undone: moves, shapes, looks, settings, groups, deletes. Each gesture is one step, so a whole drag undoes in one go.
- Press Ctrl + Z to undo, and Ctrl + Shift + Z (or Ctrl + Y) to redo. Or use the curved arrows in the top bar.
- Hover an arrow to see what it will undo, for example Undo: move Door (Ctrl+Z).
- A note at the top of the canvas says what was undone.

10Right-click menus
Right-click anything for what you can do with it: the empty canvas, a surface, a point, an edge, a row of the list, a layer. On a touch screen, press and hold. From the keyboard, press Shift + F10 or the Menu key.
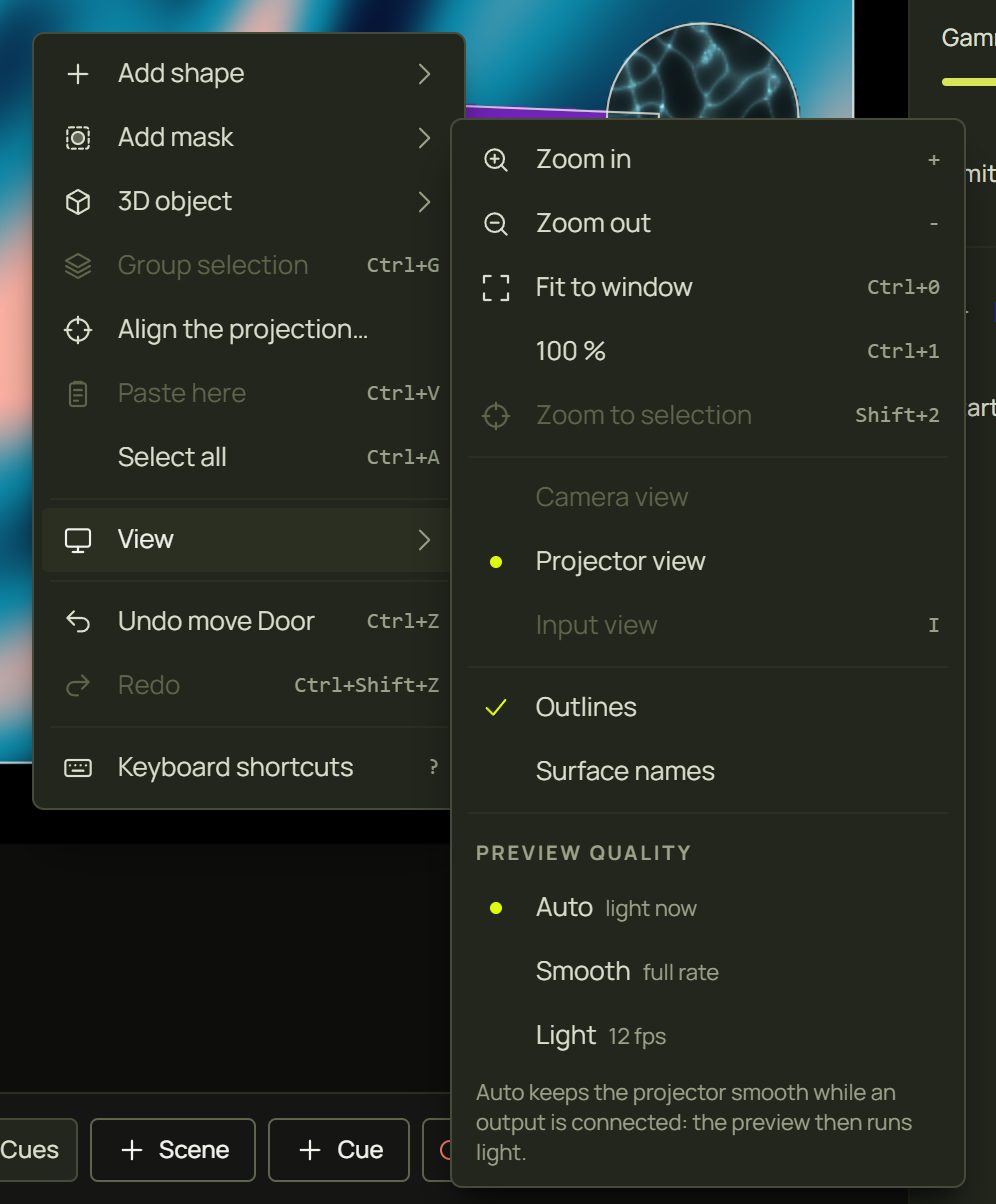
- A shape added from the canvas menu lands where you right-clicked.
- Greyed items say why when you hover them, for example Select a surface first.
- Align the projection… and Input view are Advanced.
11Hints and tips
- Zoom to the selection, then back. Shift + 2 fills the canvas with what you selected; Ctrl + 0 shows everything again.
- Background first, then lock it. Place the big wall surface, then lock it (the padlock in its row). Clicks then go through it to the surfaces on top.
- Drag big surfaces from the list. Select a wall in the list, then drag it on the canvas anywhere, even over other surfaces.
- Nudge with the projector on. Open the projector window and use the arrow keys: 1 pixel at a time is easier to judge on the real object than a mouse drag.
- Many surfaces? Turn on Surface names (right-click ▸ View) so you always know which is which.
- A slow computer? Set the preview to Light (right-click ▸ View). The projector itself keeps its full quality.
12When something looks wrong
| You see | Why | Fix |
|---|---|---|
| The wheel slides the picture instead of zooming | A trackpad, or a smooth-scrolling mouse, scrolls rather than clicks, so prism pans. | Hold Ctrl while you scroll, pinch, or press + and -. |
| A surface can't be clicked | It is locked, or in a locked group: clicks go through it. | Unlock it with the padlock in its row of the list. |
| A click selects the wrong surface | Another surface is on top there. | Select the one you want in the list, then drag; or right-click ▸ Select ▸ Under the cursor. |
| Pressing Space played a cue | Space is GO in Design. Over the canvas a quick tap still fires it. | Hold Space and drag to pan, or drag with the middle mouse button. |
| There's no Camera button | The camera view needs a scan; projects drawn by hand only have the projector view. | Scan the room (Setup ▸ Scan), or keep working in the projector view. |
| The arrow keys move one corner, not the shape | A point has the focus since you last pressed it. | Press inside the shape, or press Esc once. |
| The picture is off to one side or tiny | You zoomed or panned away. | Ctrl + 0 fits it back. |
| Ctrl + Z changed some text instead | The cursor was in a text field. | Click the canvas, then undo. |
13Mouse and keyboard
| Action | How |
|---|---|
| Select | Click · Shift- or Ctrl-click to add or remove · Ctrl + A all · Esc none |
| Select a group | Alt-click a member (keep holding to drag the group) |
| Move | Drag inside · Shift keeps it straight · arrows 1 px · Shift + arrows 10 px |
| Zoom | Mouse wheel · Ctrl + wheel or pinch · + = in · - out |
| Fit · 100 % · selection | Ctrl + 0 or Shift + 1 · Ctrl + 1 · Shift + 2 |
| Pan | Space + drag · middle-button drag · two-finger scroll · Shift + wheel sideways |
| Undo · redo | Ctrl + Z · Ctrl + Shift + Z or Ctrl + Y |
| Menus | Right-click · press and hold · Shift + F10 |
| Input view | I Advanced |
| All shortcuts | ? |