Scenes and cues
A show is a series of looks. Save each look as a scene, put the scenes in order, and press GO to crossfade from one to the next, by hand or by themselves after a time or a number of beats. Cues are smaller: they change only a few settings on top of whatever shows, when you fire them.
Advanced cues, curves, automation, triggers, notes
1Scenes and cues
| A scene | A cue Advanced | |
|---|---|---|
| Keeps | The whole look: every surface's looks and settings, visibility, opacity and blend, and the automation running. | Only the settings you put into it, for example the Wall's colour and the Door's brightness. |
| When fired | Everything crossfades to the scene. | Only its settings change; everything else stays as it is. |
| Its tile's badge | Layers icon | Sliders icon, in red |
| Made with | + Scene | + Cue, then Edit cues |
| Fired by | GO (in the GO order), a click, a trigger | A click, a trigger, a key, MIDI or OSC; GO only if you put it in the GO order |
The GO order is the row of scenes that GO plays, left to right. It is the Scenes row. Cues sit in their own Cues row and fire only when you click or trigger them.
2The strip
The strip runs along the bottom of Design's canvas. It holds the GO order and the buttons to run it.
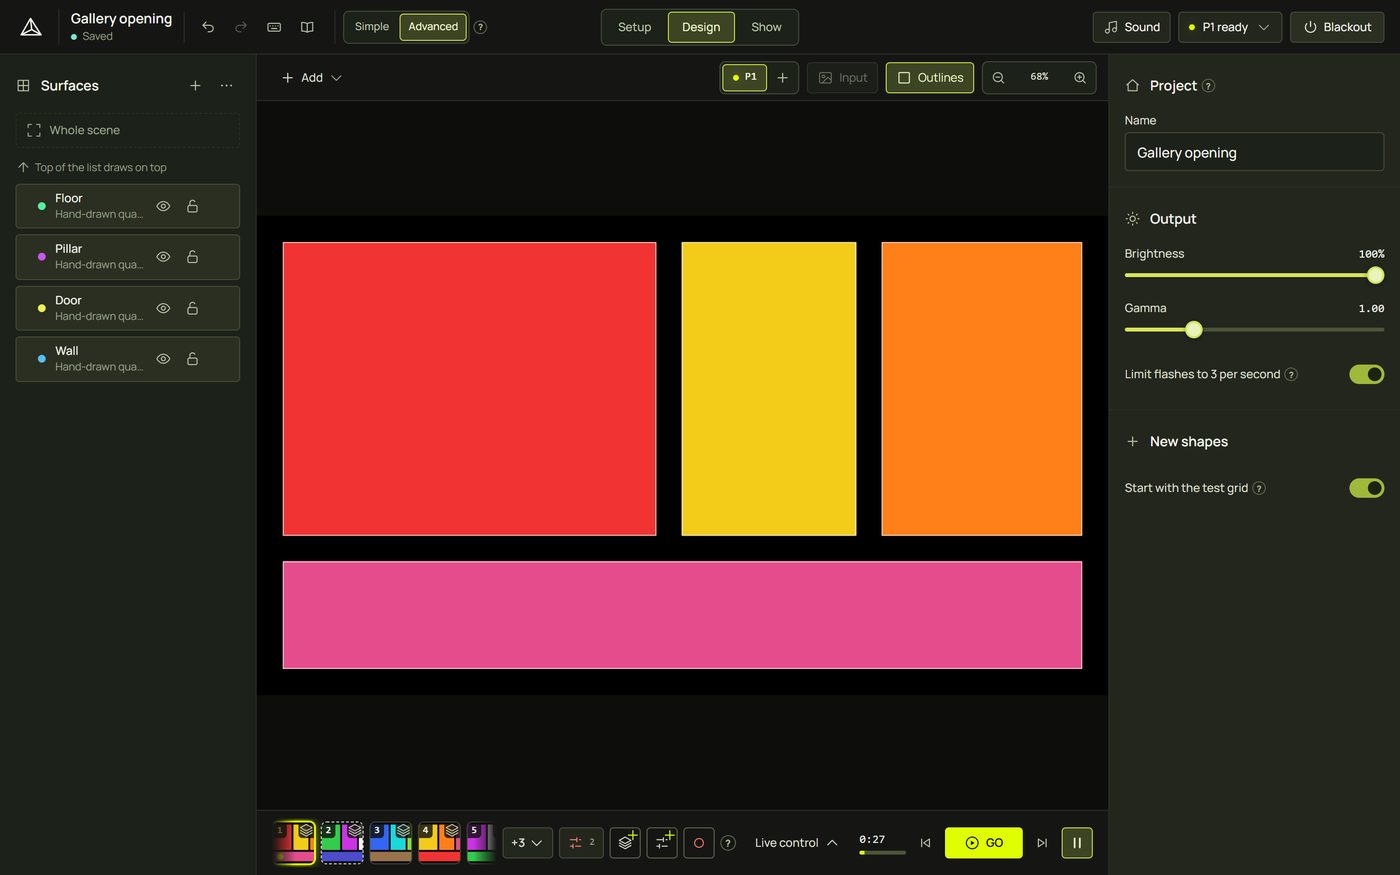

- The tiles scroll sideways with the mouse wheel; the one that fires scrolls into view.
- When the strip is short of room (as here, beside the inspector), + Scene, + Cue and Cues show as icons: a layers icon with a small +, a sliders icon with a small +, and the red sliders icon with the number of cues. Point at one for its name. Narrower still, they move into a … menu, and GO moves to a line of its own: nothing ever covers it.
- In Simple the strip keeps the scenes, +N ▾, + Scene, Update and GO with previous and next. A project with cues shows an “Advanced · N cues” chip that brings the Cues button back.
3Save scenes
- Make a look: looks on your surfaces, their settings, blends, music reactions.
- Click + Scene in the strip. A tile appears at the end of the GO order, named Scene 1, Scene 2… with a picture of what the projector shows.
- Change the look and click + Scene again for the next scene, and so on.
- Press GO to play them in order.
4The tiles
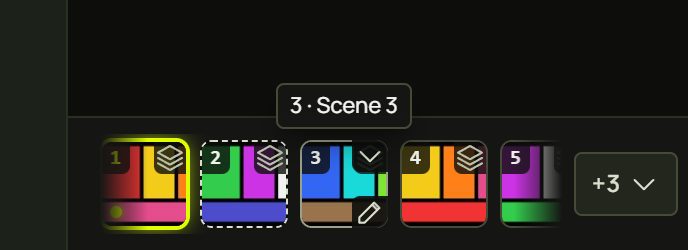
Each scene or cue is a square tile with its picture. The top left shows its number in the GO order; the top right its kind (a scene or a cue).
| You see | It means |
|---|---|
| A lime ring, glow and dot | It is showing now. |
| A dashed outline | It is next on GO. |
| An orange dot | What shows has changed since it fired (Update and Revert). |
| A red ring | It is selected for Edit cues. |
| A lavender timeline badge and a thin bar along the bottom | It has a timeline; the bar is its progress. |
| Dimmed | A scene outside the GO order: GO skips it. |
- Click fires the tile and selects it. Ctrl/⌘-click and Shift-click select without firing.
- Point at a tile to see its name and its buttons: ▾ its menu and ✎ its options. Bigger tiles (Live control, the popovers) also have a camera button: Update image.
- Double-click opens its options without firing it: in Design a click fires once the double-click time has passed (about half a second); in Show a click fires at once. ✎ opens the options too. Right-click opens its menu.
5GO, previous and next
- GO (or Space) fires the next tile of the GO order, with its own crossfade, and turns following on (see the next section). Its tooltip says what it will fire, for example “GO: fire 2 · Scene 2” (step 2 of the GO order, Scene 2).
- Previous ⏮ and next ⏭ fire the neighbours of the tile that shows.
- The follow pause ⏸ (S, Stop following) holds the look: nothing moves on by itself until Resume following ▶ or GO.
- Next on GO (a tile's menu, or its options) makes that tile fire on the next GO, out of order. It clears once it fires. It shows as on only for a tile picked this way (the tile GO fires anyway has a dashed outline).
- Loop is on by default: after the last tile, GO starts again. With Loop off, GO at the end says “End of the GO order…”. Shuffle makes GO and follows pick a random tile (never the same one twice in a row). Start on open starts the GO order when the project opens, for installations. They are in Live control ▸ Scenes & cues.
6What follows: wait, time, beats
Each tile of the GO order decides what happens after it fires. Open its options (✎) and set Then:
| Then | What happens |
|---|---|
| Wait for GO | The default: it stays until you press GO. |
| After time | It fires the next tile after Fire the next step after: from 1 second to 30 minutes (30 s by default). |
| After beats | It fires the next tile after a number of beats of the tempo: the next beat, 2, 4 (1 bar), 8, 16 (4 bars, the default), 32, 64 or 128 beats. |
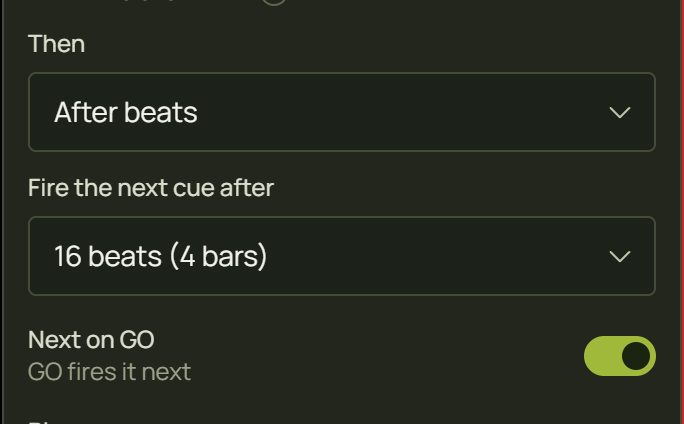
- The countdown starts when the tile fires (its crossfade included) and shows in the strip, for example 0:28 or 3 beats.
- Follows only run while following is on (after a GO). The follow pause holds them.
- Firing a scene or cue another way (a click on a tile outside the GO order, a cue, a trigger) restarts the current countdown.
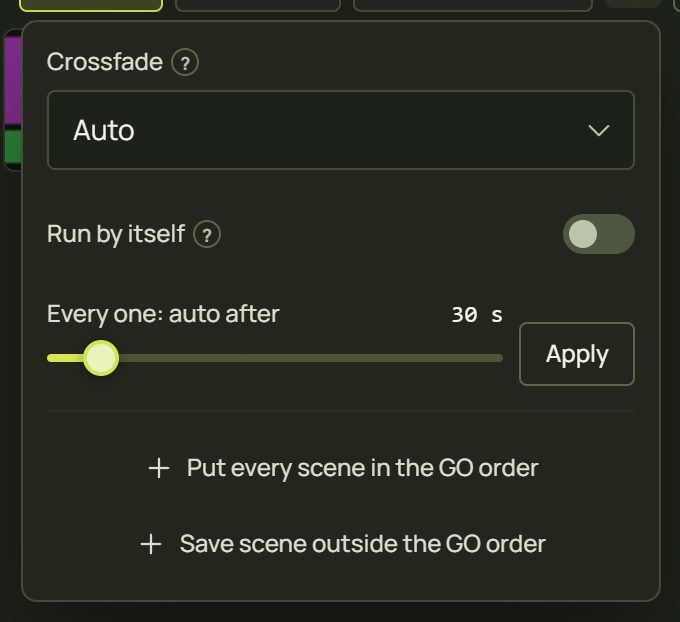
- Run by itself (Live control ▸ Scenes & cues ▸ …) sets every tile to move on after the same time, turns Loop on and starts: a slideshow in one switch.
7Crossfades
| Setting | What it does |
|---|---|
| Crossfade | How long the change takes: 2 s by default, up to 30 s for a tile of the GO order (5 s for scenes and cues fired directly). 0 is a cut. |
| Curve Advanced | Linear: even crossfade, Ease in: starts slowly, Ease out: ends slowly, S-curve: slow start and end. |
| Crossfade quality Advanced | Same as the show (the show's choice, Auto by default), Auto (Light when the look is too heavy for the graphics to draw two at once), Full quality (both looks keep moving while they fade: the most work), Light (smooth on heavy shows) (fades from a still of the outgoing look). |
The show-wide quality is under Live control ▸ Scenes & cues ▸ … ▸ Crossfade.
8The options panel
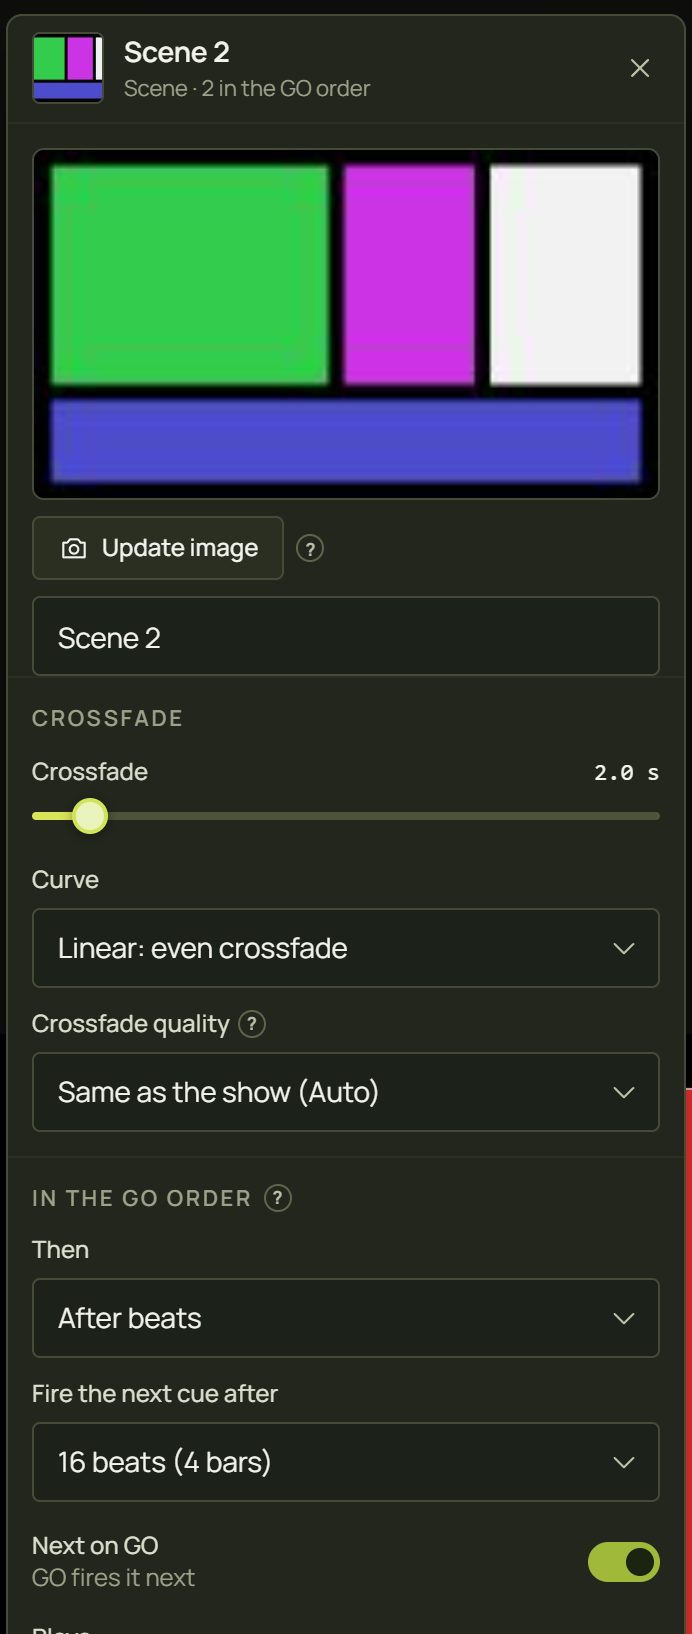
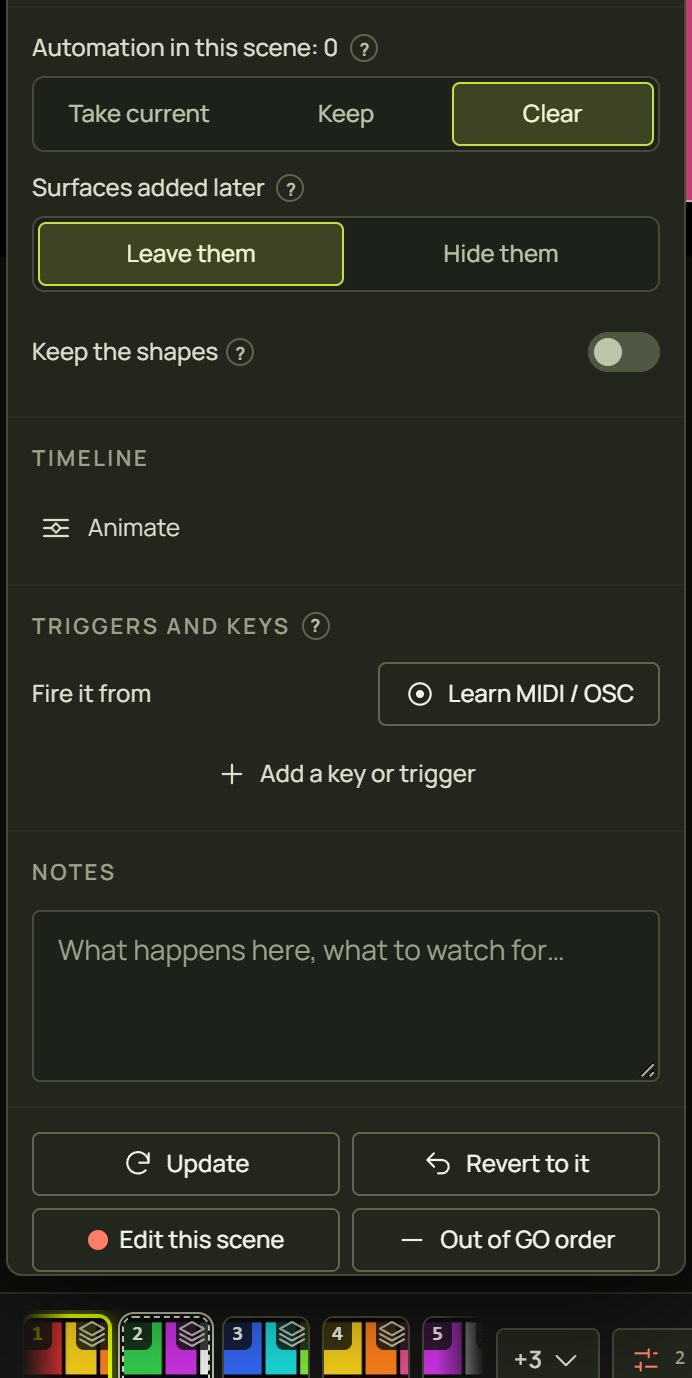
A tile's options open in a panel that floats over the canvas, so nothing else moves. Open it with ✎ on the tile, Options… in its menu, or a double-click. It follows the tile you select, so clicking another tile shows that one's options.
| Part | What it is |
|---|---|
| Picture, name | Update image takes a new picture; the name field saves when you press Enter or click away. |
| Crossfade | See Crossfades. |
| In the GO order | Then, Next on GO, and (Advanced) Plays: which scene or cue this tile plays. |
| Automation Advanced | Automation in this scene: Its own, Keep or Clear. See Automation in scenes and cues. |
| Scene options Advanced | Surfaces added later: Leave them (default) or Hide them when the scene fires. Keep the shapes: firing it also puts every surface's shape back as it is now (off by default, so realigning a surface never needs every scene updated). |
| A cue's settings Advanced | For a cue: Sets N settings, each with × to take it out. See Edit cues. |
| Timeline Advanced | Animate, or Open timeline and Stop animating. See The timeline. |
| Triggers and keys Advanced | Fire it from a key, a MIDI note or an OSC message: Learn MIDI / OSC, Add a key or trigger. See Triggers. |
| Notes Advanced | What happens here, what to watch for: your own cue notes. |
| Buttons | Update, Revert to it, Edit this scene, Out of GO order (or Add to GO order), Duplicate, Delete… (it asks first). |
Drag the panel's header to move it; double-click the header to put it back; Esc or ✕ closes it. In Simple, the Advanced parts wait behind More… at its end.
9Changed since it fired: Update and Revert
When what shows no longer matches the scene that fired (you changed a look, a colour, a setting), its tile gets an orange dot and the strip shows two buttons beside it:
- Update (“Update “Scene 1” with what shows”) saves what shows into it, with a new picture. A scene takes the whole look again; a cue takes the new values of the settings it holds, and adds none.
- Revert (“Revert to “Scene 1” (fire it again)”) Advanced fires it again, so what shows goes back to what it holds.

10Cues Advanced
- Click + Cue. An empty cue appears in the Cues row, selected, and Edit cues turns on.
- Change what it should set (the Wall's colour, the Door's brightness), or click the red markers beside settings. Each change goes into the cue.
- Leave Edit cues (the red button, or Esc).
- Fire it: Cues in the strip opens the Cues row; a click on a cue fires it on top of what shows. The popover stays open, so you can fire several.
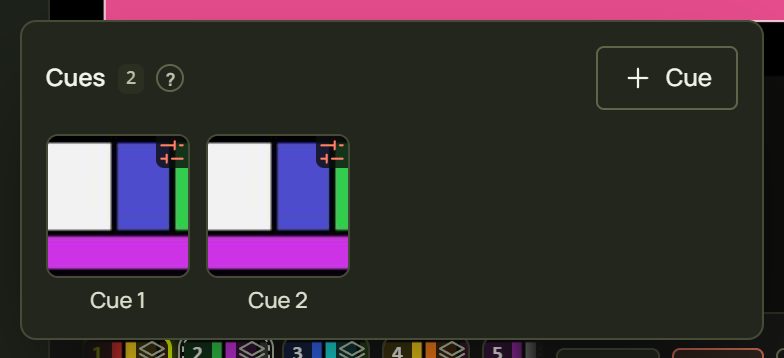
Cues also fire from triggers, keys, MIDI and OSC (see MIDI, OSC, keys and triggers), and from GO if you add them to the GO order.
11In and out of the GO order
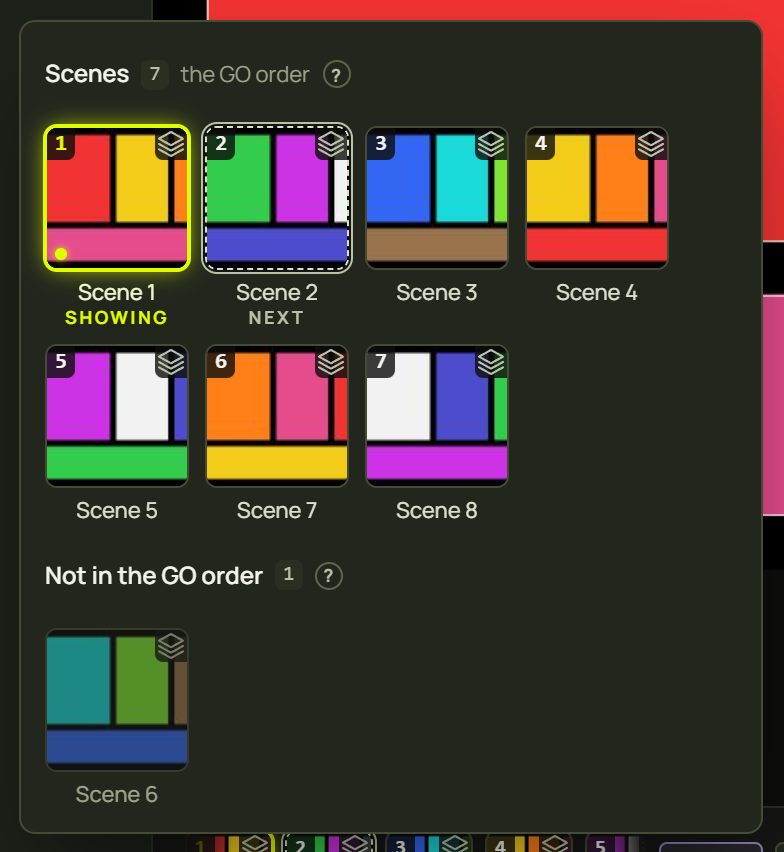
- Take out of the GO order (tile menu) removes the tile from the Scenes row: GO skips it. A scene stays, dimmed, after the GO order; a cue stays in the Cues row. A click still fires it.
- Add to the GO order (the menu of a dimmed scene or of a cue) gives it a tile at the end of the Scenes row. A cue in the GO order keeps its red cue badge.
- Move earlier / Move later (or Alt + ← / → on a focused tile) change the order; in Live control you can also drag tiles.
- +N ▾ in the strip shows the whole GO order and the scenes outside it, when they don't all fit.
12Pictures
A tile's picture is a small copy of the projector's whole frame. + Scene, + Cue and Update take one by themselves; Update image (the tile's camera button, its menu, or its options) takes a new one any time, from what the projector shows now. Ctrl + Z puts the old one back. Pictures are only for you: they are never sent to the projectors. Scenes from older projects show a placeholder until you update their image.

13Live control ▸ Scenes & cues Advanced
The first tab of Live control shows both rows at once, with bigger tiles and their names.
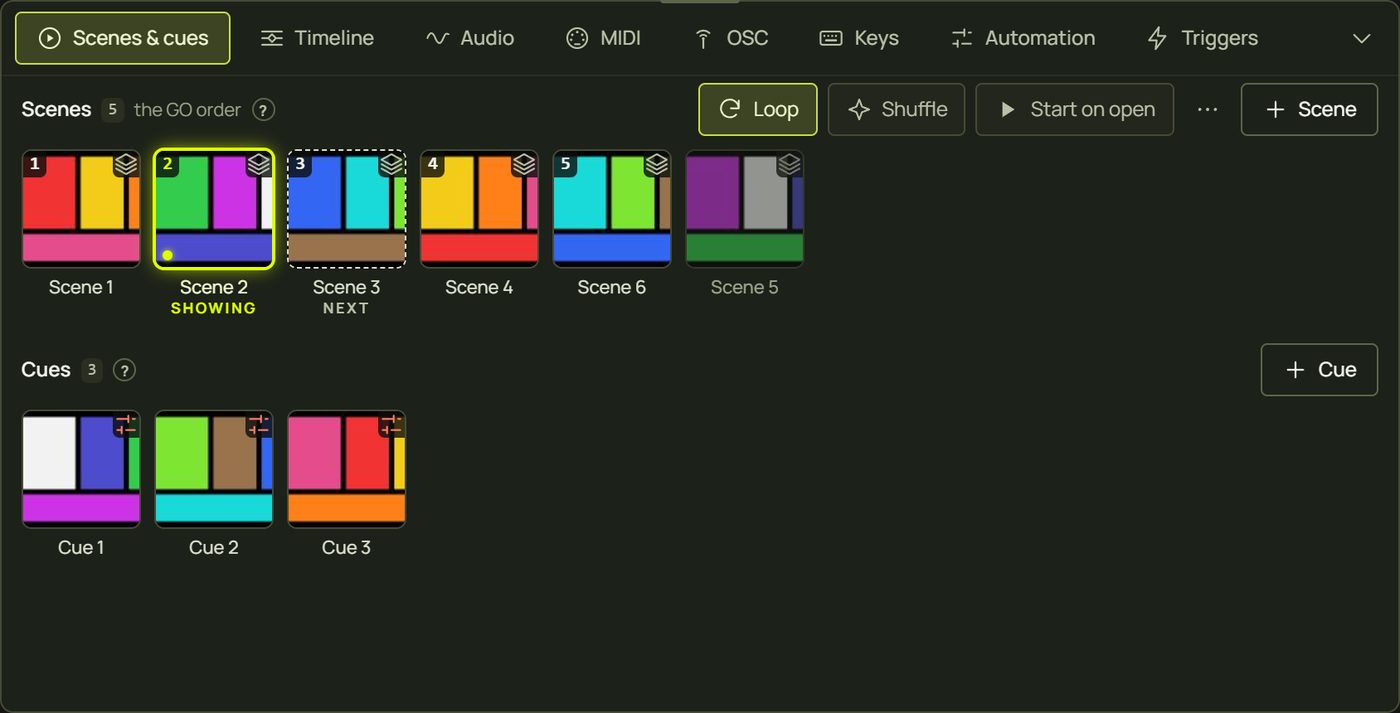
- Drag a tile of the Scenes row to reorder it.
- … (More options of the GO order): the show's Crossfade quality; Run by itself with Every one: auto after and Apply; Put every scene in the GO order; Save scene outside the GO order.
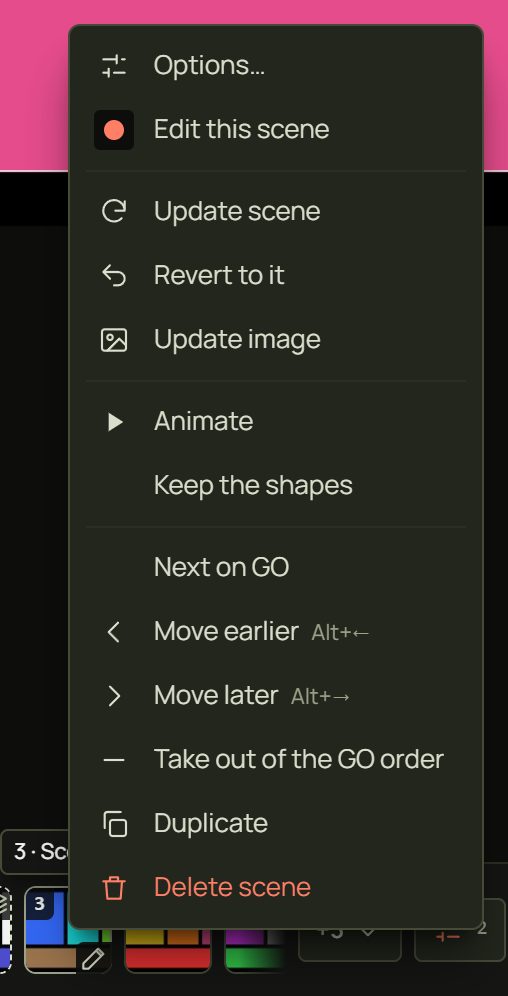
14The tile menu
| Item | What it does |
|---|---|
| Options… | Opens the options panel (as a double-click does). |
| Edit this scene / Edit this cue Advanced | Selects it and turns on Edit cues: the changes you make go into it. |
| Update scene / Update cue | Saves what shows into it, with a new picture (“(edited)” when it has drifted). |
| Revert to it Advanced | Fires it again. |
| Update image | A new picture from what the projector shows now. |
| Animate / Open timeline / Stop animating Advanced | Its timeline. |
| Keep the shapes Advanced | Scenes: firing it also puts every surface's shape back. |
| Next on GO | GO fires it next. |
| Move earlier / Move later | Moves it in the GO order (Alt + ← / →). |
| Take out of the GO order / Add to the GO order | See In and out of the GO order. |
| Duplicate | A copy (“Scene 1 copy”). |
| Delete scene / Delete cue | Deletes it and every tile that plays it, at once; Ctrl + Z brings it back. |
15Hints and tips
- Build the show in order. Make the look, + Scene, change it, + Scene: the GO order is your running order.
- Use cues for accents. A cue that only turns the pillar red, fired on top of any scene, saves you making a red copy of every scene.
- Keep scenes up to date with Update. Fire the scene, fix it, Update. Don't make a new scene for every small change.
- Give the intro a follow. “After 16 beats” on the first scenes lets the show start itself while you watch the room.
- Next on GO for surprises. Pin the finale with Next on GO when the moment comes, without reordering.
- Big shows stay fast. prism is built for about 150 surfaces and 100 scenes; a GO takes a few milliseconds. If crossfades stutter on a heavy look, choose Light quality.
16When something looks wrong
| You see | Why | Fix |
|---|---|---|
| No GO button | The GO order is empty. | Click + Scene. |
| GO changes nothing | The next tile looks the same, or it is a cue whose settings already show. | Check which tile is next (dashed); Update it with the right look. |
| “End of the GO order…” | You reached the last tile with Loop off. | Turn on Loop, or press previous. |
| A scene is skipped | It is outside the GO order (dimmed). | Its menu ▸ Add to the GO order. |
| The show moves on by itself | A tile's Then is After time or After beats. | Set it to Wait for GO, or pause following (S). |
| An “after beats” scene never moves on | Following is paused, or the tempo is very slow. | Press GO or ▶; check the tempo (Sound and tempo). |
| An orange dot you didn't expect | Something changed what shows: a trigger, a cue on top, automation. | Revert to go back, or Update to keep it. |
| Firing a scene moved a surface back | The scene keeps the shapes. | Turn off Keep the shapes, or Update the scene after realigning. |
| A new surface disappears when a scene fires | That scene hides surfaces added later. | Set Surfaces added later to Leave them, or update the scene. |
| A crossfade stutters | Two heavy looks are drawn at once. | Crossfade quality ▸ Light. |
| A tile shows a grey placeholder | It has no picture yet (an older project). | Update image. |
17Mouse and keyboard
| Action | How |
|---|---|
| GO | Space (Design and Show) · the GO button |
| Stop following | S |
| Next / previous tile | → / ← in Show · the ⏭ / ⏮ buttons |
| Fire a tile | Click it · Enter on a focused tile |
| Select without firing | Ctrl/⌘-click · Shift-click for a range |
| Options / menu | Double-click or ✎ · right-click, ▾, Shift + F10 or the Menu key |
| Move between tiles | A row is one Tab stop: ← → Home End; Tab reaches the focused tile's buttons |
| Reorder | Alt + ← / → on a focused tile · drag in Live control |
| Options panel | Drag its header to move · double-click the header to dock · Esc closes |