Edit cues
Edit cues is a recording mode. While it is on, every change you make is also written into the scenes and cues you selected, and a small marker beside each setting shows whether it is in them. It is how you build cues that change only a few settings, and how you fix several scenes at once. If you know MadMapper, it is its Edit Cue Mode.
1Make a cue
- Click + Cue in the strip. An empty cue appears in the Cues row (“Cue 1”), selected, and Edit cues turns on.
- A message tells you what to do next.
- Change what the cue should set: a colour, a brightness, a look. Or click the hollow markers beside settings to put them in as they are.
- Leave Edit cues. Fire the cue from the strip's Cues button: only its settings change.

2Turn Edit cues on and off
- On: the red Edit cues button in the strip, Ctrl + Shift + C (it works even while you type in a field), Edit this scene / Edit this cue in a tile's menu or options, or + Cue.
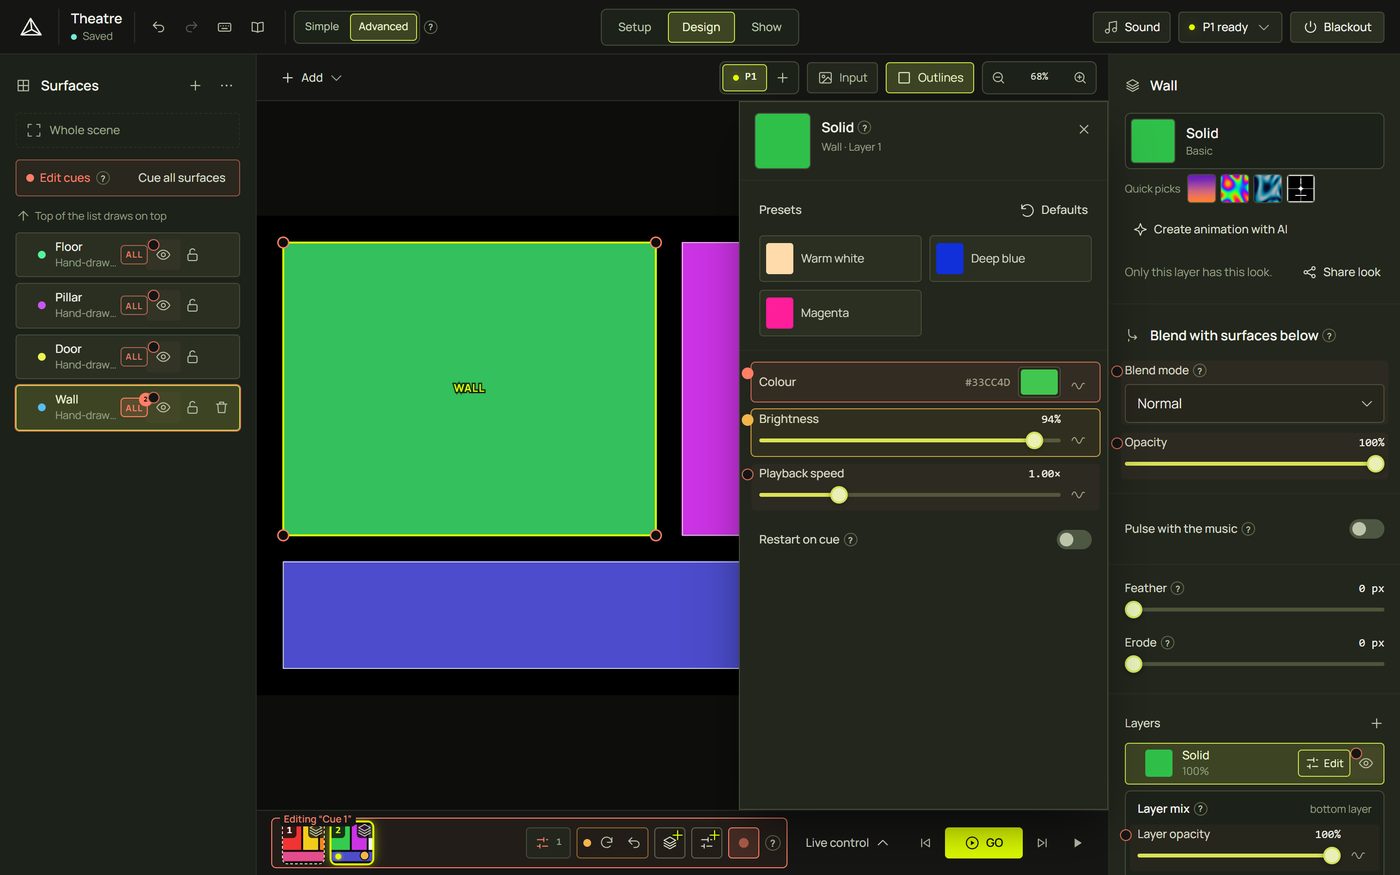
- While it is on: the strip has a red outline with Editing “Cue 1” on it, the selected tiles have a red ring, the canvas's handles turn red, and every setting that a cue can hold has a marker.
- Off: the button again, Ctrl + Shift + C, or Esc (once nothing else is waiting for it, such as a drawing or an open panel). Leaving Design, switching to another tool, or switching to Simple also turns it off.

3Choose what you edit
Edit cues writes into the selected tiles:
- A click on a tile fires it and selects it.
- Ctrl/⌘-click adds or removes a tile without firing; Shift-click selects a range along its row. With several selected, the strip says Editing 2 cues and every change goes into all of them.
- With nothing selected, turning Edit cues on selects the tile that shows.
4The markers
A small round marker sits on the left of each setting. It tells you whether the selected cues hold it:
| Marker | Means | A click |
|---|---|---|
| ○ hollow | Not in the selected cue. | Puts it in, with its value now. |
| ● red | In the cue, as it shows now. | Takes it out. |
| ● orange | In the cue, with another value than what shows. | Updates the cue to what shows (right-click to revert instead). |
| striped | The selected cues disagree: some lack it, or hold other values. | Puts this value into all of them. |
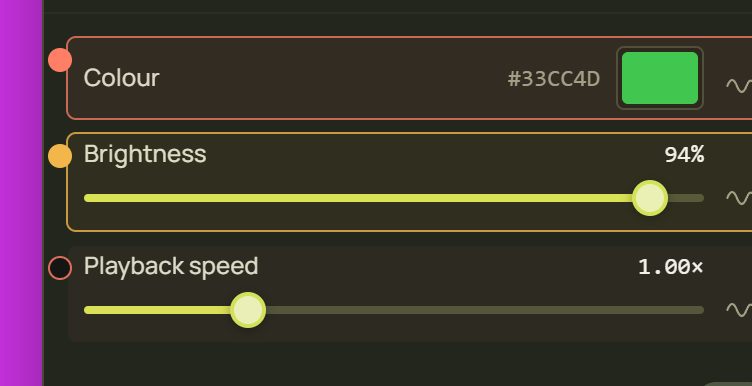
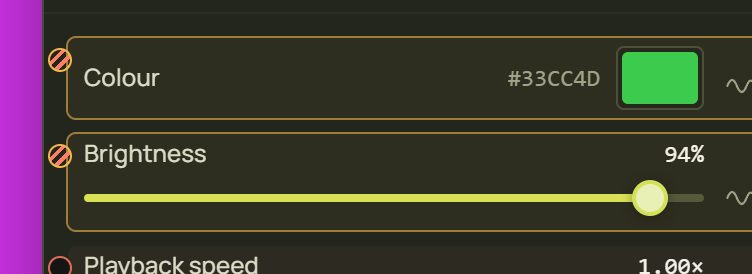
The setting's area is tinted faintly red while Edit cues is on, outlined red when it is in the cue and orange when it differs. Right-click a marker (or Shift + F10 on it) for its menu:
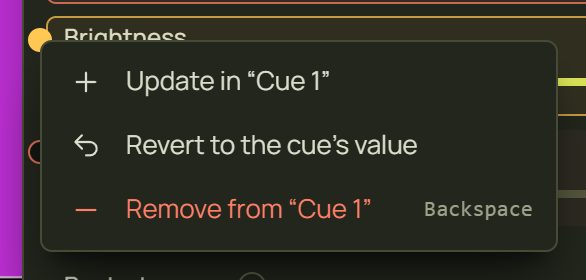
A setting's own right-click menu has the same three items under an Edit cues heading. Every marker action is one undo step (“Add Wall · Colour to “Cue 1””).
5Record changes
- Any change goes in. While Edit cues is on, whatever you change (drag a slider, pick a colour, choose a look, hide a surface) is written into every selected scene and cue, in the same undo step as the change itself.
- Hold Shift to change without recording. Shift-drag, Shift-click, or Shift + an arrow key changes what shows but not the cue. The marker turns orange if the cue holds the setting.
- Take a setting out: click its red marker, or focus the setting and press Backspace (or Delete).
6Shapes
A surface's shape (its corners and curves) can be part of a cue too, so a cue can move a surface. With Edit cues on, click the surface that is already selected on the canvas (without dragging): its shape goes into the cue (“Wall · Shape: in the cue (click the surface again to take it out)”). Click again to take it out. The shape's marker in the shape inspector does the same.
7Cue a whole surface
While Edit cues is on, the Surfaces list gets an Edit cues bar with Cue all surfaces, and each row gets an ALL button.
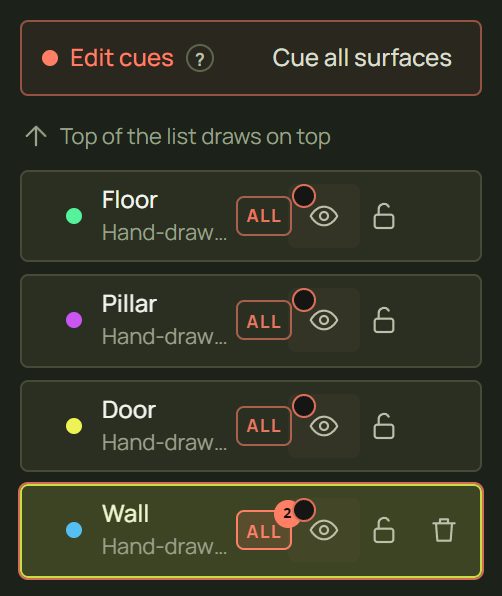
- ALL puts every setting of that surface into the selected cues: its layers, visibility, opacity, blend and input (not its shape). Its badge counts how many the cue holds, and the row is outlined red when it holds any. Right-click it to take them all out.
- Cue all surfaces does it for every surface of this projector.
8A cue's settings
A cue's options panel (✎ on its tile) lists what it sets: Sets 3 settings, one row each, with × to take one out.
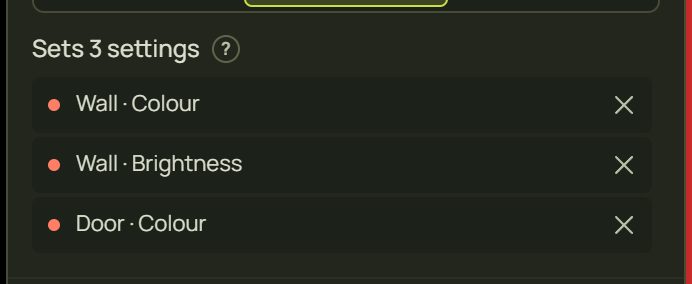
Update on a cue gives its settings the values they show now; it never adds or removes settings. To add one, use Edit cues.
9Scenes in Edit cues
- A scene keeps the whole look, so it can't drop a setting: with a scene selected, changes still go in, but a red marker's click explains that Update saves the whole look.
- Selecting several scenes and changing one thing fixes that thing in all of them at once, for example the Door's colour in every scene.
- The master brightness and a projector's soft edge and trim belong to cues only; their markers ask you to select a cue.
10Where the markers are
Every look setting (pictures, videos and text too) and Playback speed; a layer's opacity, mix, visibility, fit and position; a surface's blend, opacity (one surface selected), visibility (the eye in the list), shape and input mapping; a group's visibility, opacity and blend; the master brightness; a projector's soft edge and trim.
11Hints and tips
- Small cues are powerful. A cue that only sets one surface's colour works on top of every scene: one cue instead of a variant of each scene.
- Check before you leave. The markers show exactly what a cue holds; the options panel lists it.
- Edit several cues at once. Ctrl-click their tiles, then change a setting: striped markers show where they differ, a click makes them agree.
- Use Shift for the show, not the cue. During rehearsal, hold Shift to try things without touching the saved cues.
- MIDI, OSC and triggers aren't recorded. They count as running the show. Change the setting by hand to record it.
12When something looks wrong
| You see | Why | Fix |
|---|---|---|
| Changes went into a cue by accident | Edit cues was still on. | Ctrl + Z undoes the change and its recording together; leave Edit cues. |
| Ctrl + Shift + C opens the developer tools | The focus was outside the page (the address bar). | Click in the page, then press it again. |
| Esc doesn't leave Edit cues | Esc first cancels a drawing, closes a panel, or deselects. | Press it again, or click the red button. |
| Grey markers: “Select a cue in the strip first” | No tile is selected. | Click (or Ctrl-click) a tile. |
| “A scene keeps every setting” | You tried to take a setting out of a scene. | Use a cue for partial changes; Update saves a scene's whole look. |
| Backspace: “The cue holds this surface's whole layer stack” | The cue holds the surface with ALL. | Take out “Wall · Layers” (its marker or the options list) instead. |
| A cue does nothing when fired | It is empty, or its settings already show. | Check Sets N settings in its options. |
| Firing a cue moved a surface | Its shape is in the cue. | Take “Shape” out (click the selected surface in Edit cues, or × in its options). |
13Mouse and keyboard
| Action | How |
|---|---|
| Edit cues on / off | Ctrl + Shift + C (⌘ ⇧ C) · the red button · Esc leaves |
| Change without recording | Hold Shift: drag, click or arrow keys |
| Take a setting out | Focus it and press Backspace (or Delete) · click its red marker |
| A marker's menu | Right-click it · Shift + F10 |
| Select tiles without firing | Ctrl/⌘-click · Shift-click |
| Put a shape in | Click the selected surface on the canvas (no drag) |
| Undo | Ctrl + Z: the change and its recording are one step |