The timeline
A timeline animates a scene or a cue: its settings change over time, from key to key, in seconds or in beats. Fire the scene and its timeline plays from the start, on every projector at once. Music reactions and automation keep working on top.
1Animate a scene or cue
- Save the look as a scene (+ Scene), then click its tile so it is selected.
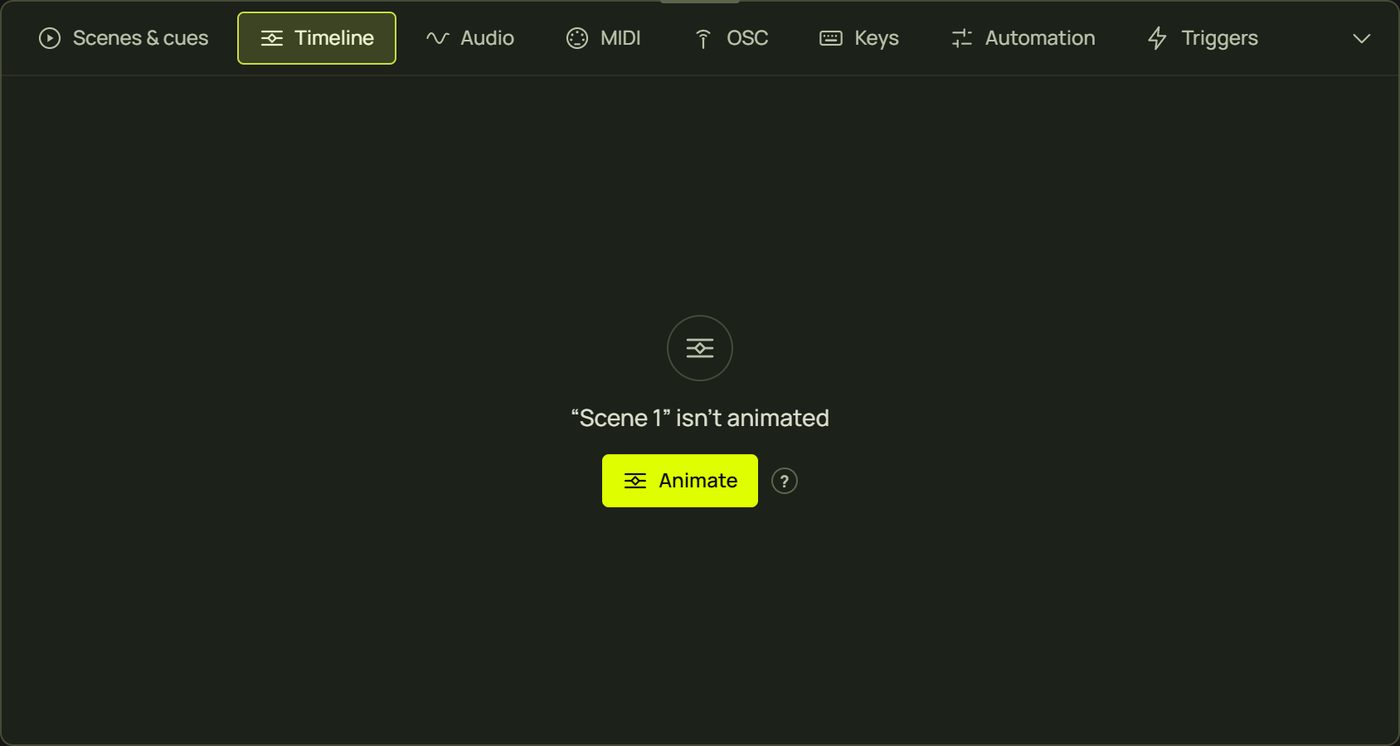
- Open Live control ▸ Timeline. It shows the selected tile's timeline, or says it isn't animated.
- Click Animate (or right-click the tile ▸ Animate). The scene gets an 8-second timeline. A scene starts empty; a cue's settings become its first tracks, each with a key at 0.
- Add settings and keys (next sections), then press Shift + Space to play it.
An animated tile shows a lavender timeline badge. Its menu then has Open timeline and Stop animating (which takes the timeline away; Ctrl + Z brings it back).
2The Timeline tab
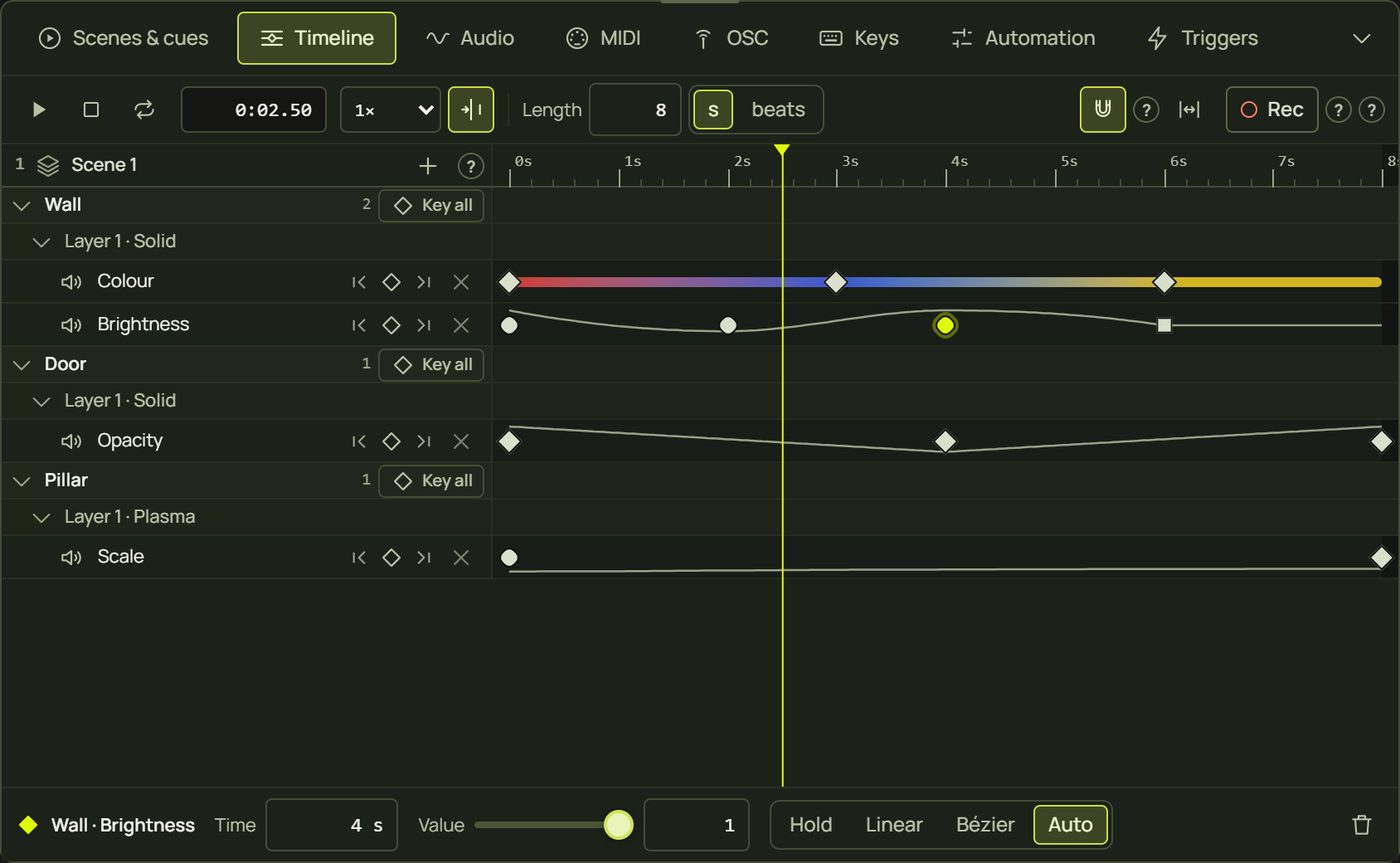
The transport, left to right
| Control | What it does |
|---|---|
| ▶ / ❚❚ | Play and pause (Shift + Space). Paused, the values hold at the playhead. |
| ■ | Stop: back to the start, and the scene's saved values show again. |
| Loop | Play the loop again and again. Off: it plays once and holds its last values. |
| Position | Where the playhead is, for example 0:02.50. Click it to switch between seconds and bars:beats. |
| Speed | 0.25× to 4×. |
| Follow | The view scrolls to keep the playhead in sight while it plays. |
| Length, s | beats | The timeline's length, in seconds or in beats of the tempo. |
| “Cue 2” plays | Shown when another scene's timeline is playing. |
| N taken over ↺ | Settings a control has taken over; ↺ gives them all back (Take-over). |
| Snapping | Keys snap to beats, other keys and the playhead. |
| Zoom to fit | Shows the whole timeline. |
| Rec | Every change writes a key at the playhead (Rec). |
Tracks and lanes
- On the left, the tracks are grouped surface ▸ layer ▸ setting. Each surface has a Key all button; groups fold.
- Each track has a mute button (it keeps its keys but doesn't play), its name, ◀ ◆ ▶ (previous key, a key at the playhead, next key) and × to remove it.
- The lanes show the keys as diamonds. A number draws its value curve; a colour draws a strip through its colours; switches and choices draw steps with their values.
- The ruler on top shows seconds, or bars:beats. Press and drag on it to move the playhead: the preview and the projector show the timeline at that moment.
3Put settings on the timeline
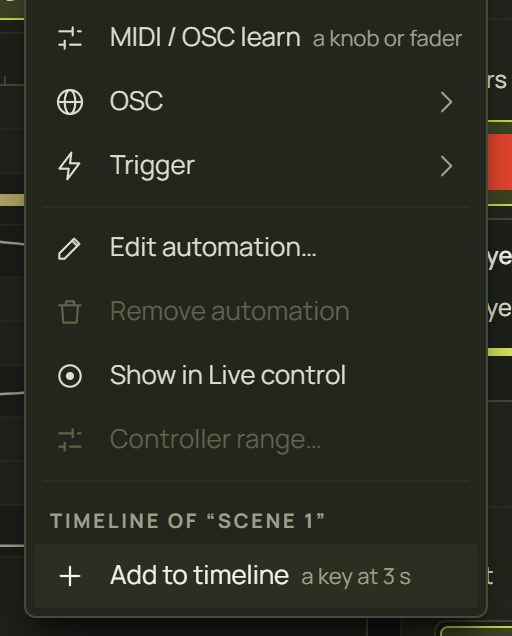
- From a setting: right-click it in the look panel or inspector ▸ Add to timeline, under the heading Timeline of “Scene 1”. It adds a track with a key at the playhead holding its value now.
- A whole surface: right-click the surface ▸ Key all on the timeline of “Scene 1”, or Key all on its row in the timeline: a key on every setting of its layers.
- From the timeline: + beside the scene's name ▸ A setting…, with a search field: any surface's settings, Key all, and the Master brightness.
What can be animated: a look's settings (numbers, colours, switches and choices, positions), the layer's opacity and playback speed, and the master brightness. Colours fade through a perceptual colour space, so fades look even; switches and choices change at the key. Not yet: a layer's visibility and blend, a surface's or group's opacity and visibility, and shapes.
4Keys
| To… | Do this |
|---|---|
| Add a key | Double-click a lane · ◆ on the track (at the playhead) · a diamond in the look panel (section 9). A new key holds what the track plays there, so the animation doesn't change until you change the key. |
| Select keys | Click · Shift or Ctrl-click to add · drag a box on an empty lane · Ctrl + A · double-click a track's name for all its keys |
| Move keys | Drag them (they snap); Alt-drag copies; Shift-drag moves freely; ← → nudge by the grid |
| Change a key | The key editor under the lanes: Time (seconds, m:ss or bars:beats), Value (the setting's own control) and how it moves to the next key |
| How it moves on | Hold H (stays, then jumps) · Linear L · Bézier B (eases in and out) · Auto A (a smooth curve through the keys that never overshoots) |
| Copy and paste | Ctrl + C, then Ctrl + V pastes at the playhead, into the tracks you picked (a colour only into a colour) |
| Delete | Delete or Backspace (never the canvas's surface) |
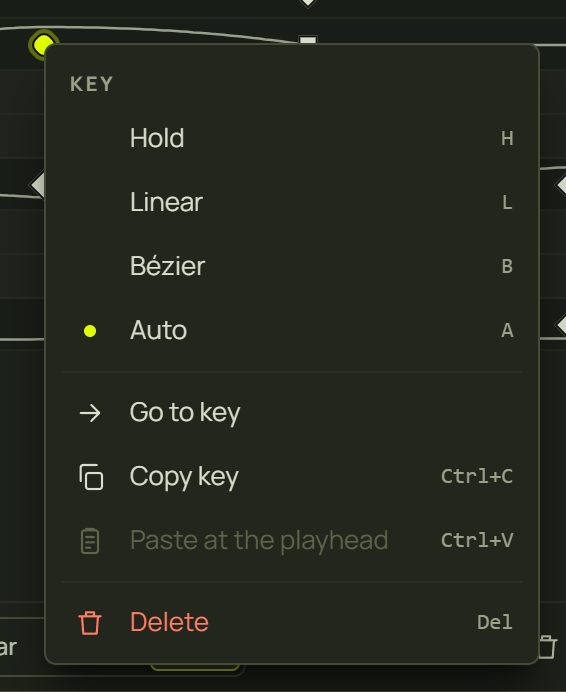
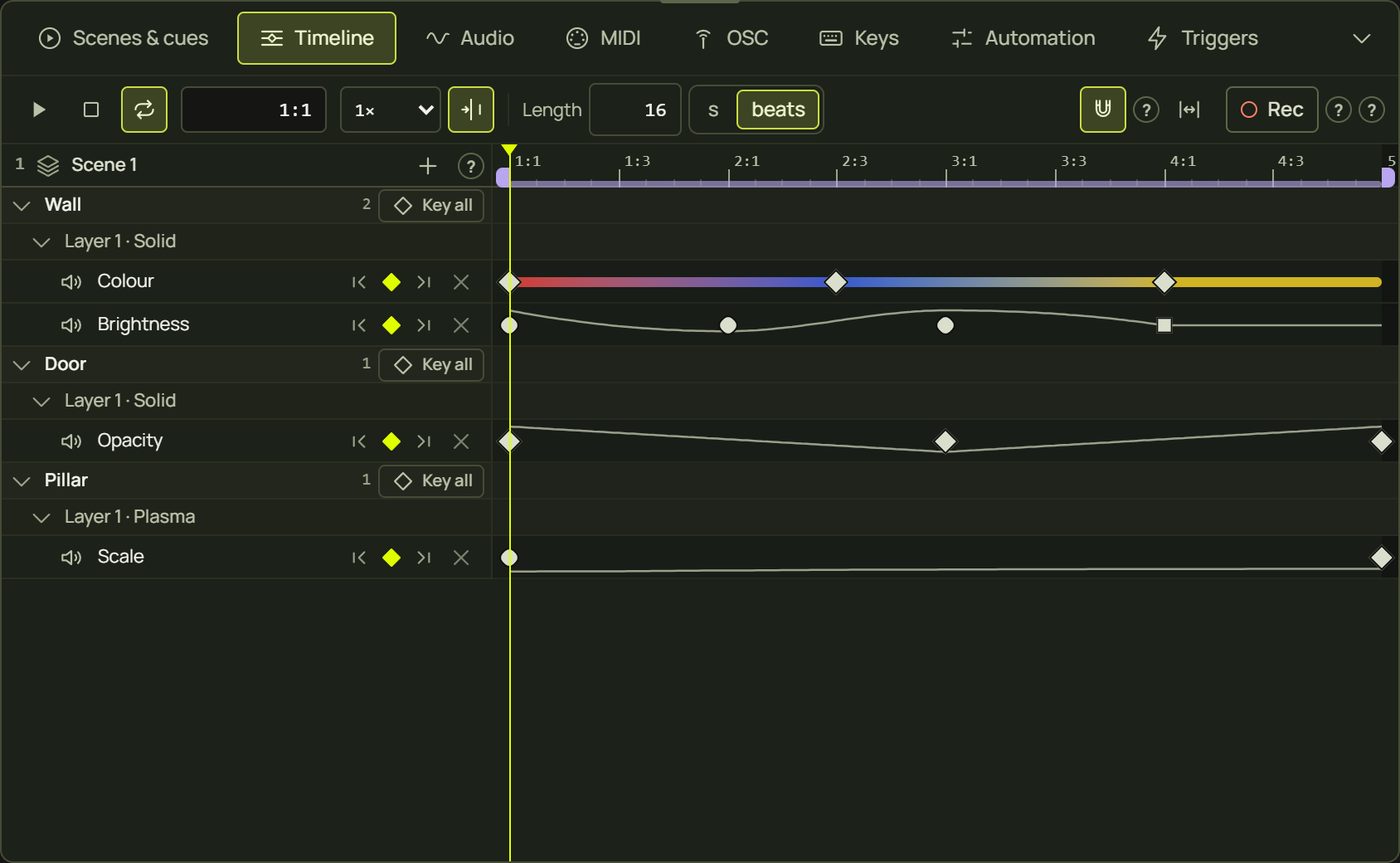
Key shapes tell you how they move on: a diamond is linear, a square holds, a round key eases (Bézier or Auto). Every edit is one undo step (“Move 3 keys”, “Set 2 keys to Hold”).
5Rec
- Move the playhead to where the change should be.
- Click Rec. It turns red, the view gets a red outline, and the playhead and the scene's name turn red.
- Change settings in the look panel or inspector. Each change writes a key at the playhead (“Key Wall · Colour at 2.5 s”), making a track if needed.
- Move the playhead and change again. Click Rec to stop.
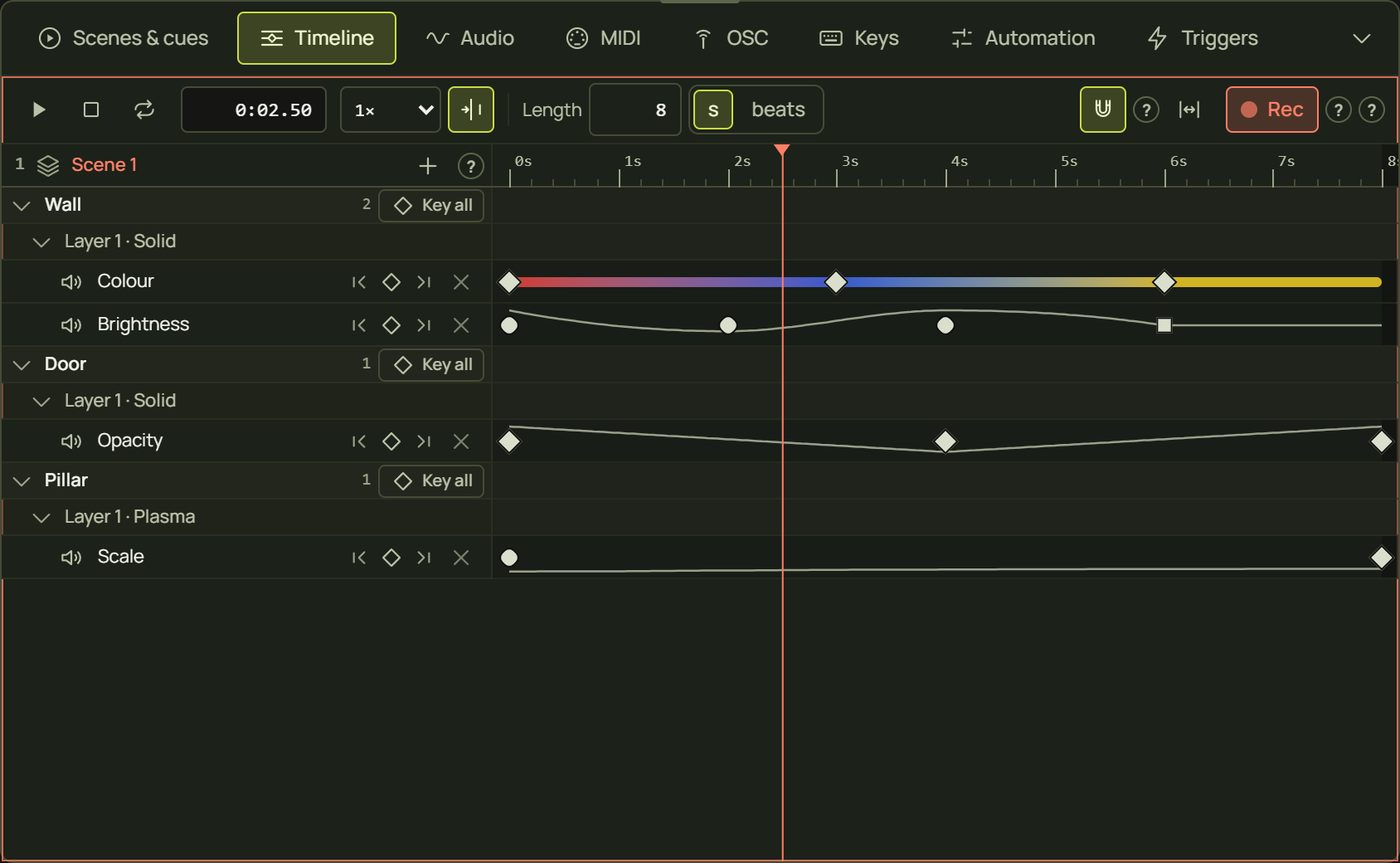
- Rec writes only the key: the scene's saved values stay, so Stop shows the scene as saved.
- Rec keeps going while the timeline plays: a slider you drag while it plays leaves a trail of keys, in one undo step.
- Hold Shift to change a setting without keying it.
- Settings the timeline can't play change as usual.
6Playing, and firing scenes
- Shift + Space plays and pauses anywhere in Design (Space alone is still GO).
- Firing an animated scene or cue (GO, a click, a trigger, OSC, Show) plays its timeline from the start, on every projector and in the preview. One timeline plays at a time: firing another animated tile replaces it.
- A scene without a timeline stops the one playing.
- A cue without a timeline leaves the timeline playing, and takes over the settings it holds (next section).
- No jump at GO: the outgoing scene keeps playing its timeline while it crossfades out.
- A timeline without Loop pauses at its end and holds its last values.
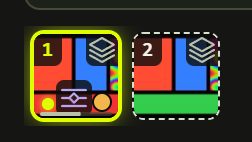
- An animated tile shows a lavender badge, and a thin bar along its bottom for the progress (lavender while it plays, grey when paused): see the picture in section 9.
7Take-over
While a timeline drives a setting, you can still grab it. A change by hand (without Rec), a MIDI or OSC control, a trigger, or a cue fired on top takes the setting over: it follows the new value, not the timeline. The track shows Taken over by hand (or by MIDI, OSC, a key, “Cue 2”…) and its lane is hatched.
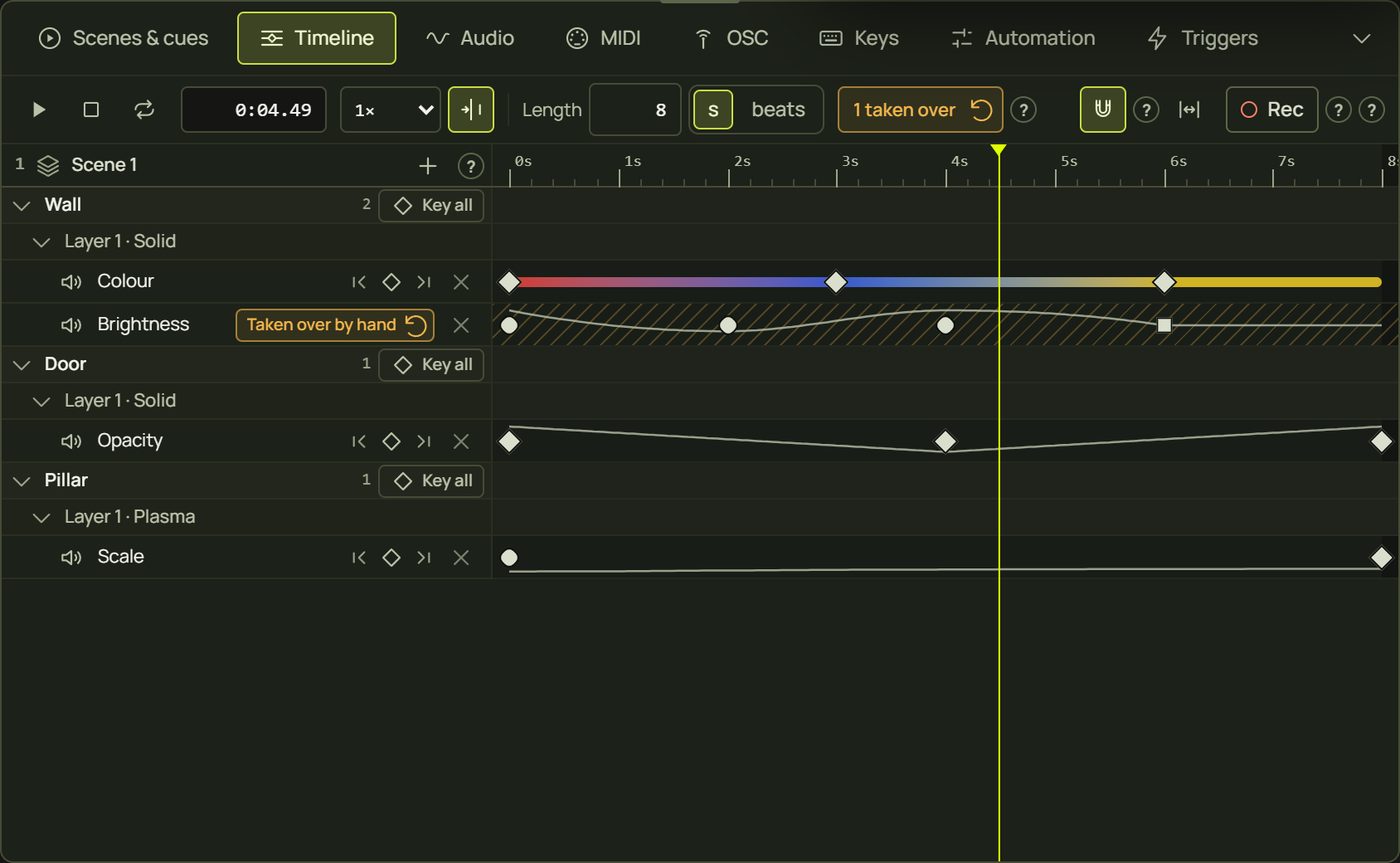
↺ on the track (or right-click ▸ Back to the timeline) gives it back; ↺ in the transport gives all of them back. Stop, firing another timeline, and a Rec key on that setting also give it back. Undo doesn't.
8Beats, snapping and loops
- Seconds or beats. s | beats switches the unit and converts every key at the tempo now. A timeline in beats follows the music's speed: at 128 BPM it plays faster than at 120, and on a wireless projector it is drawn early like other beat effects.
- Bars on the ruler. The ruler counts bars:beats for a timeline in beats, and for one in seconds while a real tempo drives the clock (the music or a MIDI clock). Click the position to choose.
- Snapping pulls keys and the playhead to the beat grid (from ¼ beat to 8 bars, whatever fits the zoom), to other keys, the playhead and the ends. Hold Shift to place freely, or switch snapping off.
- Loops. Loop on plays the whole timeline again and again. Drag the lavender band's ends on the ruler, or right-click the ruler ▸ Loop from here / Loop up to here, to loop a part.
9Key diamonds and tile badges
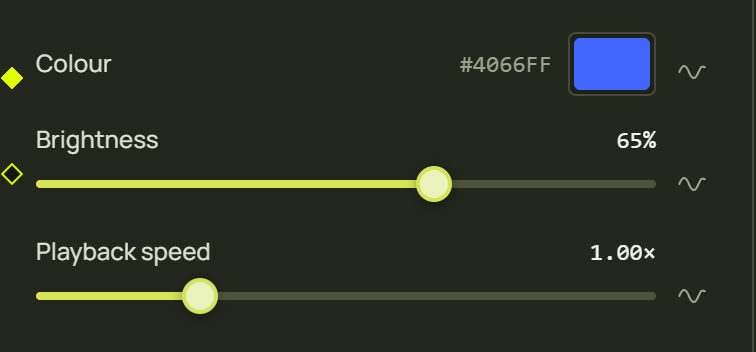
For each setting on the selected scene's timeline, the look panel and inspector show a small lime diamond on the left of the setting: filled when a key sits at the playhead, hollow otherwise. Click it to add a key there (holding what plays at that moment) or to remove the one there.
The song lane Advanced editing
A scene's timeline can play one imported song. Choose Add a song, select a library song or A song file from this computer…, or drop a file onto the lane beneath the ruler. MP3, WAV, OGG and M4A are common choices; the browser must decode the codec and the file must be at most 300 MB. Simple mode can play a scene that already has a song.
| Control | Use it for |
|---|---|
| Waveform | See the song's shape; drag it to change its offset relative to the timeline. Song options can start it at the playhead or put it back at the timeline start. |
| Detect beats | Find tempo, bars and sections. The ruler and snapping follow the detected grid; detection is a starting point to check by ear. |
| Song options | Replace or remove the song, halve/double tempo, move Beat 1 a beat earlier/later, or remove the grid. |
| Song volume | Adjust -30 to +12 dB; double-click for the recorded level (0 dB). Check the computer's sound-output level too. |
| Play, GO, scene tile or Shift+Space | Start timeline and song together. The song is the timeline clock. Pause, seek and loop follow the same transport. |
A song timeline uses seconds, even when the ruler counts musical bars. It cannot switch to beat units with a song attached. The audio plays in the editor window on this computer; projector windows follow its timing, rather than playing duplicate sound. The song also feeds the sound analyser while playing.
Missing song: restore the archive containing the file or choose a replacement in the lane. Browser blocks playback: click Play in the editor to grant the required user gesture. No steady beat: some music will not yield a reliable grid; listen, correct half/double tempo and beat placement, or remove the grid. Changing or removing the song does not delete the source file from the library.
Follow A show to one song, then export a complete project including its audio.
10Hints and tips
- Work in beats for music. A 16-beat timeline stays in time with the track and loops on the bar.
- Key the start first. Put a key at 0 on every setting you'll animate (Key all), then change them later on the timeline: the scene starts exactly as saved.
- Use Auto for smooth motion. Auto curves pass through every key without overshooting, so a brightness never goes above the value you keyed.
- Hold for cuts. Hold keys switch cleanly on the beat: a colour change on each bar, a pattern that jumps.
- Scrub to check. Drag on the ruler with the projector running: the wall shows each moment.
- Automation still adds on top. Keyed brightness plus a bass route: the timeline sets the base, the music pushes it.
11When something looks wrong
| You see | Why | Fix |
|---|---|---|
| “Select a scene or cue” | No tile is selected. | Click a tile (Ctrl-click selects it without firing). |
| “This setting can't be keyed on a timeline yet” | Visibility, blends, group and surface opacity and shapes aren't animated yet. | Use a layer's opacity, or scenes and cues for those. |
| A setting ignores its keys | It is taken over (hatched) or its track is muted. | ↺ Back to the timeline; unmute the track. |
| Keys went into the wrong scene | Rec keys the scene the transport is on, which moves when you fire another tile. | Undo, select the right tile, Rec again. |
| The timeline plays once and stops | Loop is off. | Turn on Loop. |
| Play pauses another scene's timeline | Another timeline was playing (“Cue 2” plays): the transport acts on it. | Fire this scene (click its tile): its timeline plays from the start. |
| The ruler switches between seconds and bars | It follows the tempo while the tracker is sure of it. | Click the position to fix the display you want. |
| A beats timeline speeds up and slows down | It follows the live tempo. | Lock the tempo (Audio ▸ Lock), or use seconds. |
12Mouse and keyboard
These keys work while the timeline has the focus (click a key, a lane or a track name first).
| Action | How |
|---|---|
| Play / pause | Shift + Space (anywhere in Design) |
| Next / previous key | Tab / Shift + Tab (at the last key the focus moves on) |
| Start / end | Home / End |
| Nudge keys, or move the playhead | ← → (Shift: a bigger step) |
| Interpolation | H Hold · L Linear · B Bézier · A Auto |
| Copy, paste, select all | Ctrl + C · Ctrl + V (at the playhead) · Ctrl + A |
| Delete keys | Delete or Backspace |
| Deselect | Esc |
| Copy while dragging · drag freely | Alt + drag · Shift + drag |
| Zoom time · track height · scroll time | Alt + wheel · Ctrl + wheel · Shift + wheel |
| Menus | Right-click a key, a lane, a track name or the ruler · Shift + F10 |