Choosing looks
A look is what a surface shows: a colour, a moving pattern, a picture, a video or some text. You choose looks from the library, which opens beside the inspector, and you can give one look to many surfaces at once, so changing it once changes them all.
Advanced Map across shows straight away (Simple: under More…)
1Looks, materials and layers
- A material is the kind of picture: Plasma, Fire, Edge Chase, an image or a video. prism has 93 of them built in (see Every look).
- A look is a material with its settings: the colours, the speed, the size. The same material can make very different looks.
- A layer holds one look. A surface can stack up to four layers, like sheets of glass; see Layers.
The app uses both words: the slot and the library say material (Change material), and the panel where you change its settings is the look panel.
2Open the library
- In Design, select a surface: click it on the canvas or click its row in the Surfaces list.
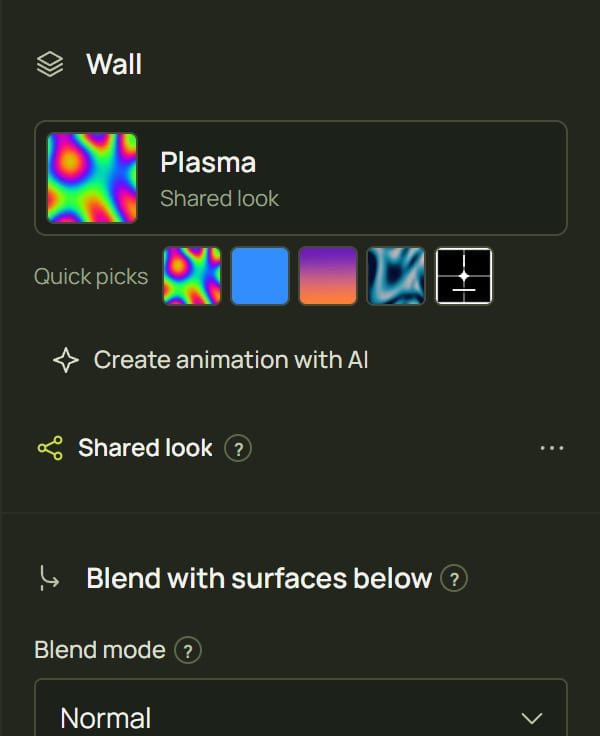
- At the top of the inspector on the right, click the surface's look: the slot with a small picture and the look's name. A surface with no look says Choose a material.
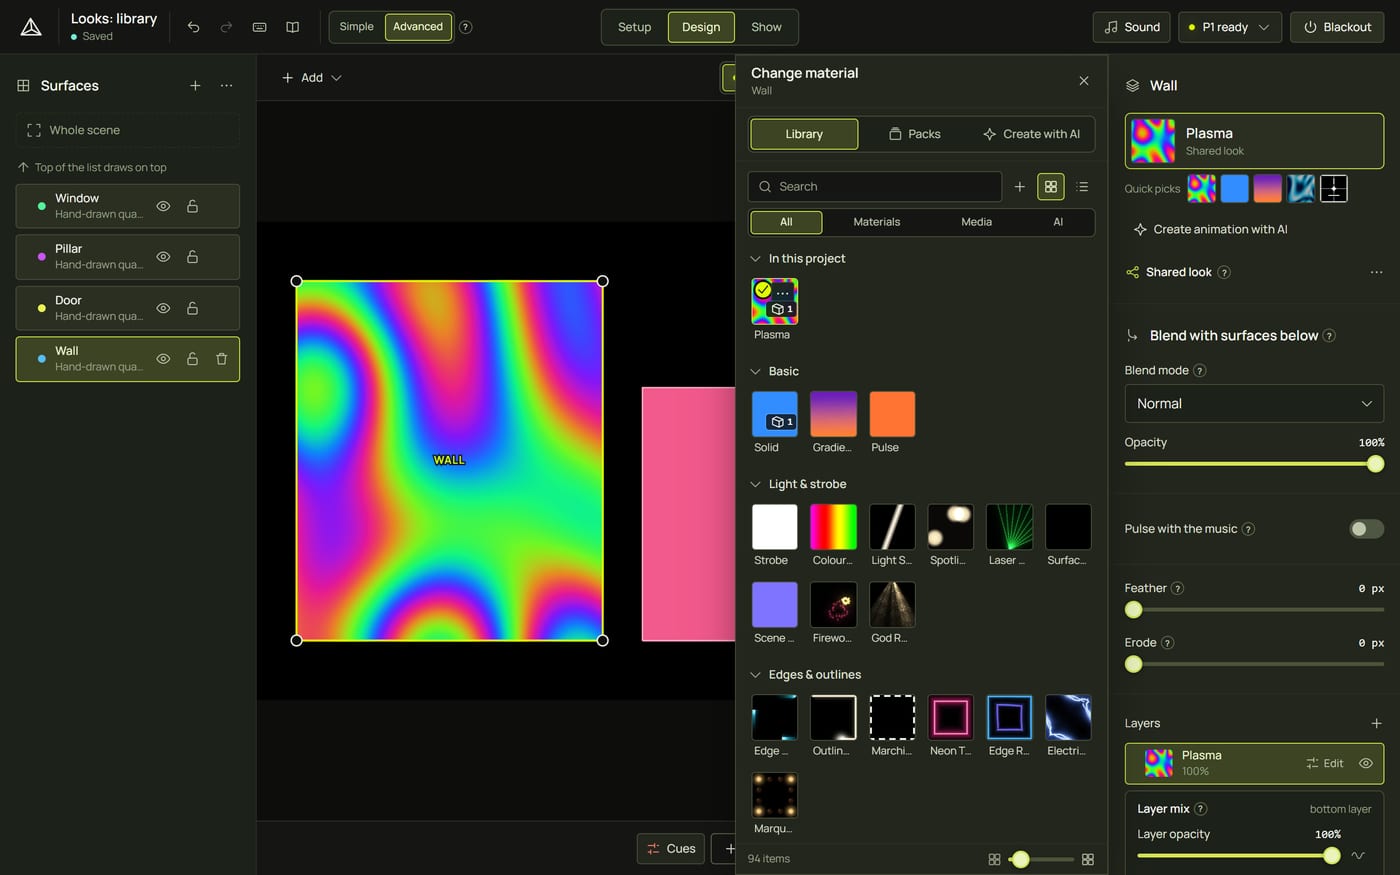
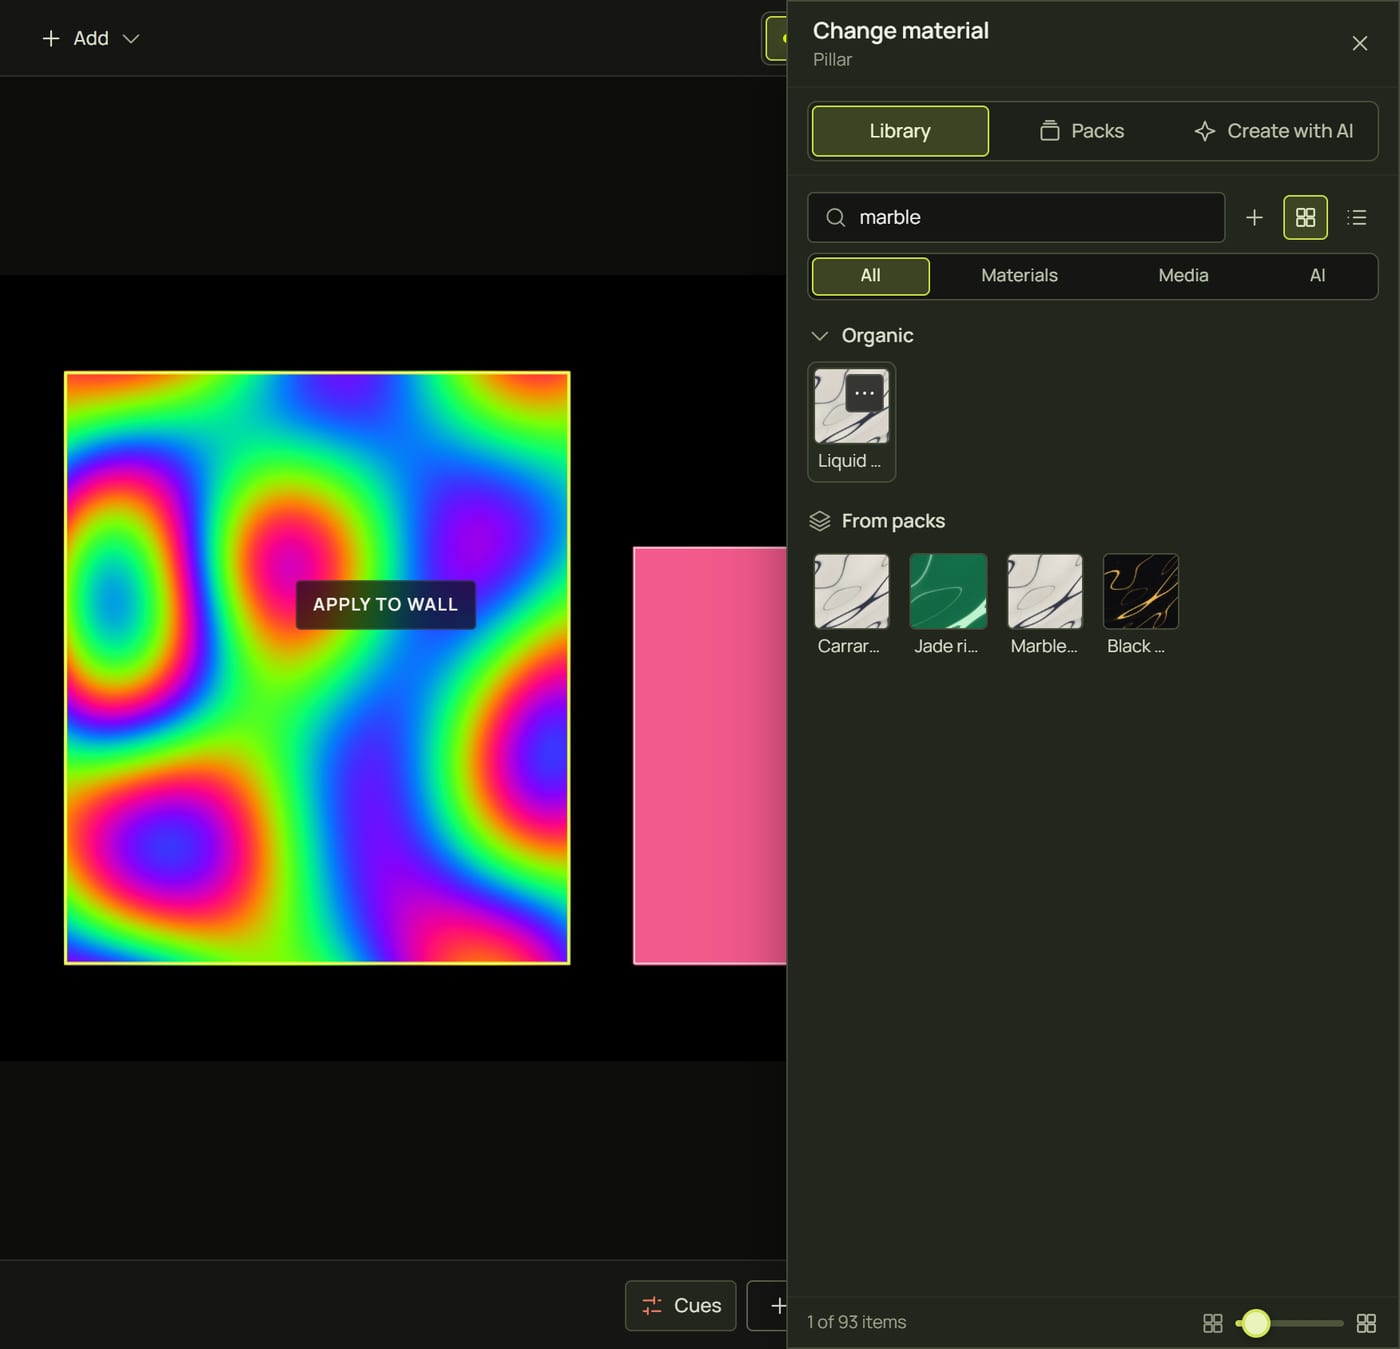
- The library opens beside the inspector, over the edge of the canvas, so your surfaces stay in view. Its title says what you are changing: Change material for this layer, or Add a layer if you pressed + in Layers.
- To close it, press Esc, click the slot again or click anywhere outside it.
3Find a look
- Groups. The looks come in groups, in this order: In this project (the shared looks you have made), Basic, Light & strobe, Edges & outlines, Audio-reactive, Patterns, Geometric, Organic, Nature & elements, Retro & glitch, Illusions, Wipes & reveals, Utility and Media & text, then Your materials, AI shaders, AI textures, Images and Videos. Click a group's heading to fold it away.
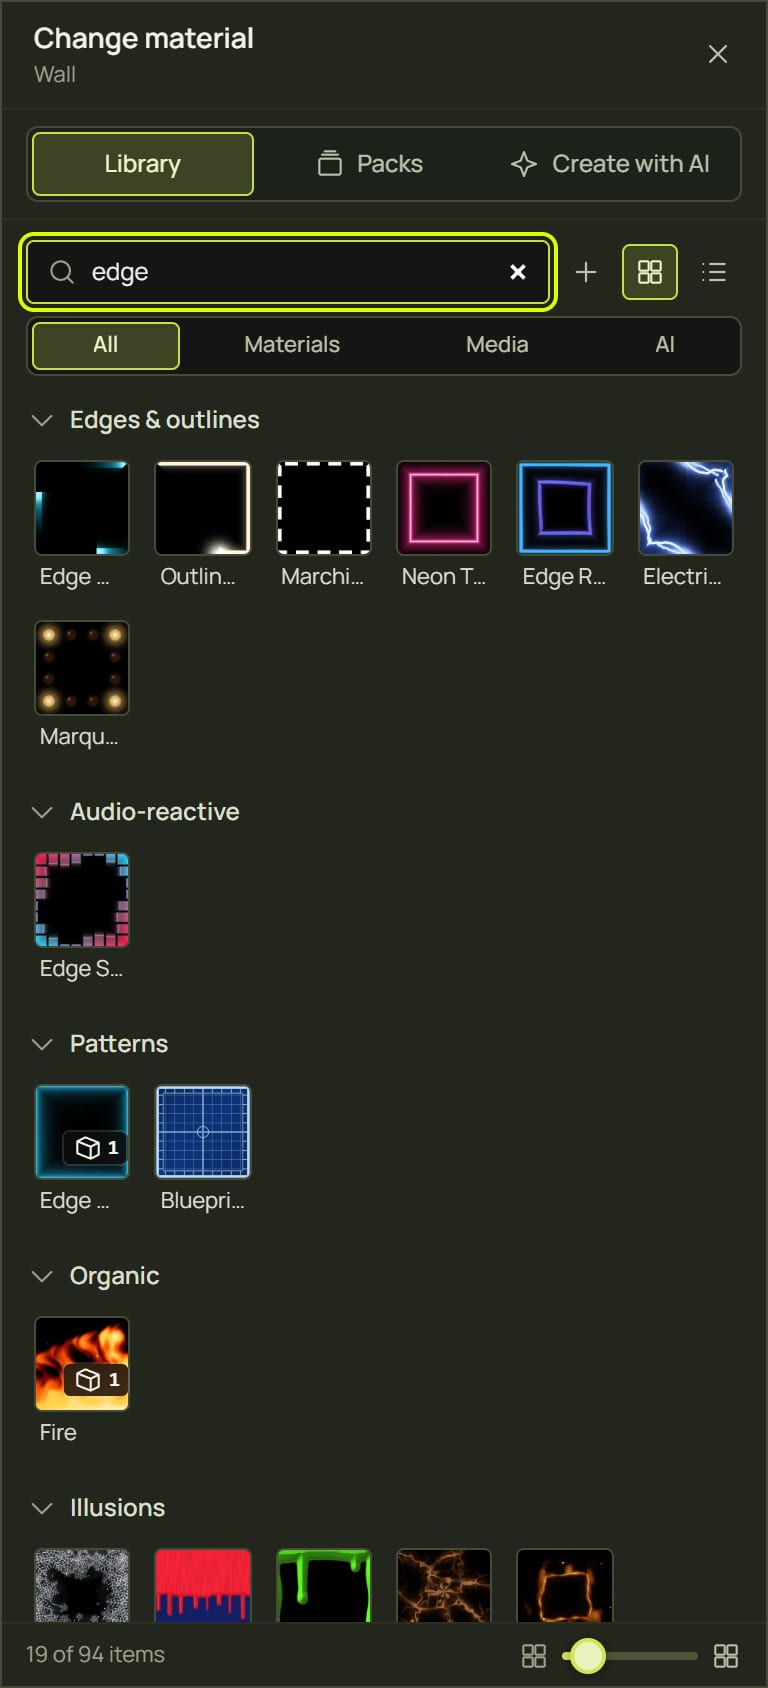
- Search. Type in Search. Every word must match the look's name, its group or its description, so edge finds the outline looks and water finds Caustics and Water Fill. While you search, matching looks from packs show too, under From packs.
- Show. All, Materials, Media (your pictures and videos) or AI.
- See it move. Hover a tile with the mouse and its picture plays.
- Grid or list. Grid view and List view are next to the search box; in the grid, Thumbnail size at the bottom makes the tiles bigger or smaller. The library remembers these, and the Show choice too; a search that finds nothing under that choice offers Search everything.
4Put it on
- Click a tile, or press Enter on it. The look replaces the look of the layer you opened the library from, and keeps that layer's blend, opacity, speed and placement.
- The library closes and the look panel opens in its place, with the look's presets and settings.
- Didn't like it? Ctrl+Z puts the old look back. Each pick is one undo step, such as Apply Plasma to Wall.
Several surfaces at once. Select them first (Ctrl+click in the list or on the canvas), then open the library from one of them. Its title says For the 3 selected surfaces, and a pick puts the look on all of them in one undo step, replacing each one's top layer (from the layer stack's +, it adds a new top layer to each). Masks and locked surfaces are skipped, and a message says so.
Details before you choose
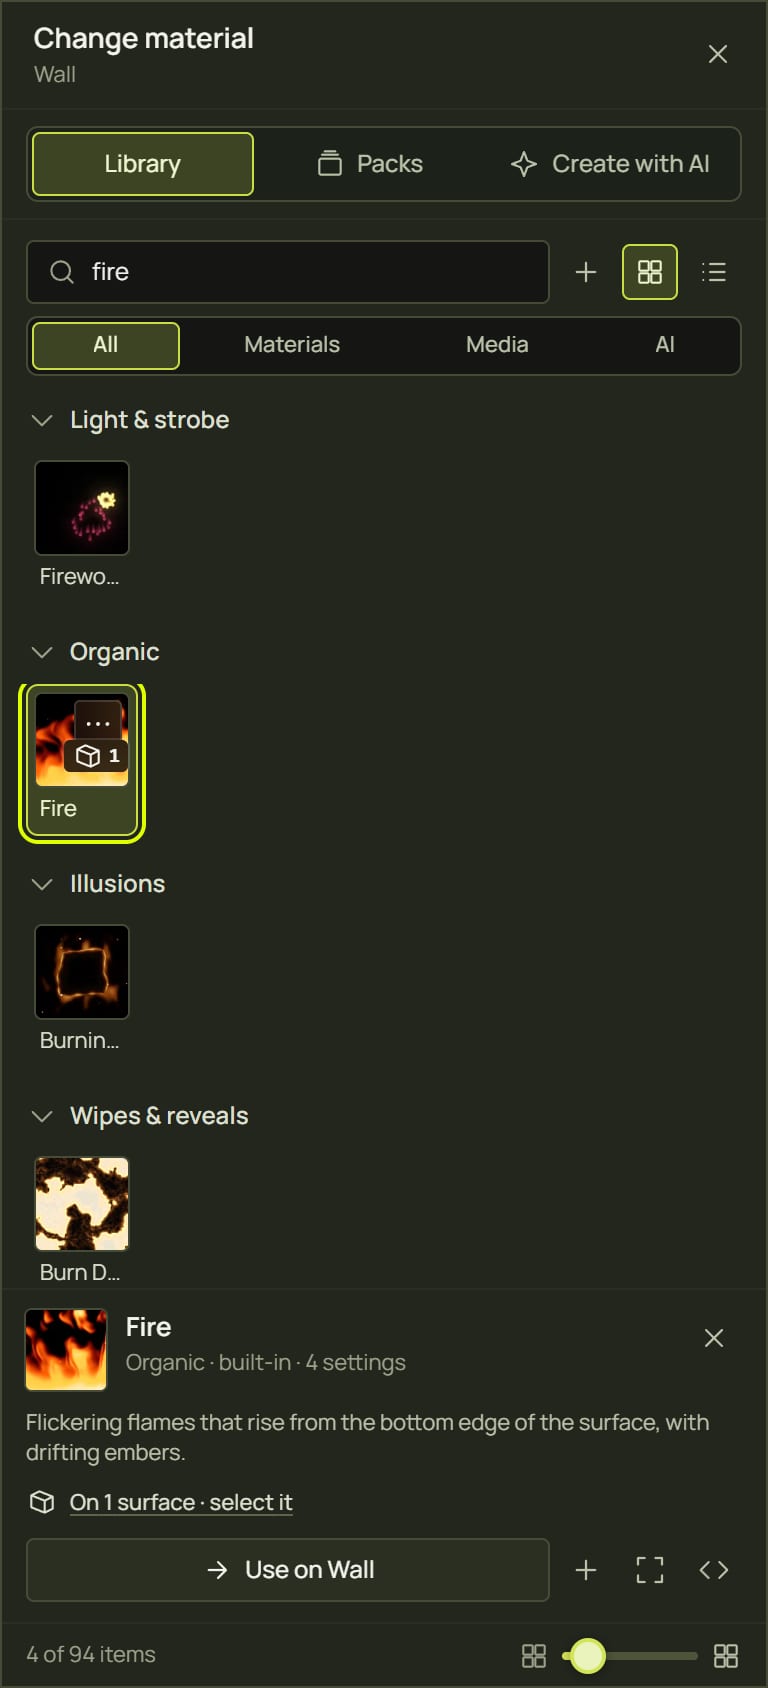
Press Space on a tile, or click the ⋯ that appears in its corner, to see its details under the grid: what it is, how many settings it has and which surfaces use it. The buttons there:
| Button | What it does |
|---|---|
| The main button | Puts it on, and says where: Use on Wall, Add to Wall or Apply to 3 surfaces. When it can't, it says why (Wall is locked). |
| + | Add it as a new layer instead: keeps the current look and puts this one on top. |
| Whole scene | One layer spanning every surface (see Whole scene). |
| View code | The look's shader code (GLSL), for the curious. |
| Delete | For your own pictures, videos and looks (built-in looks can't be deleted). It asks first, and says how many layers use it. |
The tile's right-click menu
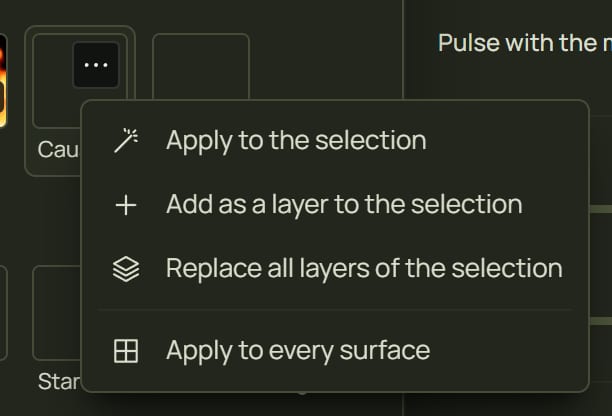
Right-click a look's tile for Apply to the selection, Add as a layer to the selection, Replace all layers of the selection and Apply to every surface. These work on the surfaces you have selected (not only the layer the library was opened for), and the library stays open so you can carry on.
5Quick picks
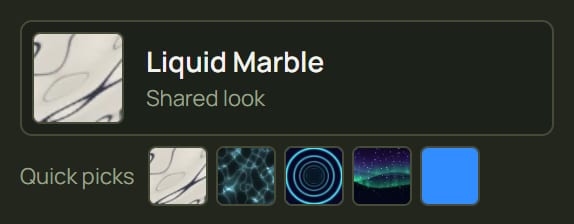
Under the slot, Quick picks shows up to five looks you used recently, as small pictures. Click one to put it on this layer without opening the library; the look panel opens as after any pick. Until you have used five looks, prism fills the row with Solid, Gradient, Plasma, Noise Flow and Test Grid.
6Drag a look onto a surface
You can drag any tile out of the library and drop it where you want it:
| Drop it on | What happens |
|---|---|
| A surface on the canvas | A label by the pointer says Apply to Door. On the selected surface it replaces the selected layer's look; on another surface it replaces its top layer (or becomes its first layer). |
| A row in the Surfaces list | The same as dropping on that surface. |
| The slot in the inspector | While you drag, the slot says Drop to use it here; it goes on that layer. |
| Whole scene | It spans every surface (see Whole scene). |
7One look on several surfaces
When you put a look from the library on a surface, prism keeps it as a shared look in your project. Put the same look on another surface and the two share it: change a colour in the look panel once and both change. This is how you keep a show consistent, and it keeps big shows light.
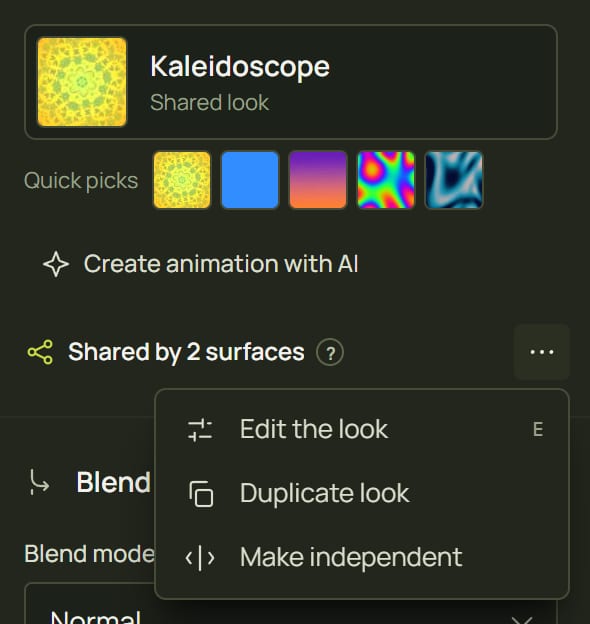
- Under the slot, the inspector says Shared by 2 surfaces (or Shared look while only this surface uses it), with a ? and a ⋯ button, Look options.
- ⋯ (or a right-click on that line) offers Edit the look, Duplicate look and Make independent. The layer's right-click menu has them too.
- Your shared looks are the first group in the library, In this project. Pick one there to link another surface to it.
| To… | Use | What happens |
|---|---|---|
| Change one surface only | Duplicate look | This surface gets its own copy (Kaleidoscope 2), which starts identical and appears in In this project. The others keep the original. |
| Freeze one surface as it is | Make independent | This surface keeps the look but stops following the shared one. Nothing is added to the library. |
| Share a look that isn't shared | Share look | For a layer that says Only this layer has this look.: adds it to In this project so other surfaces can use it. |
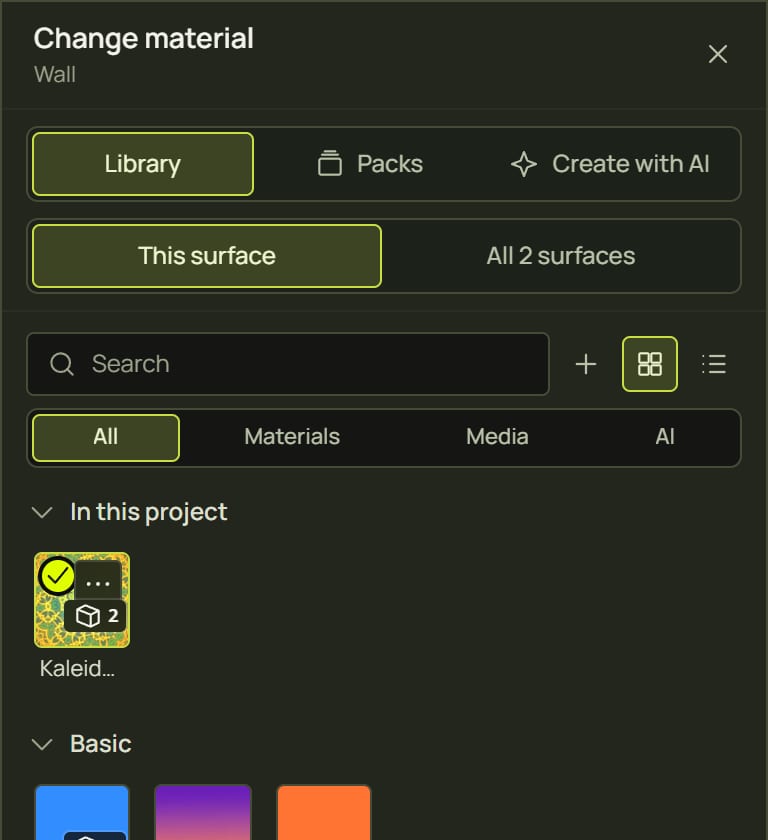
Changing a shared look for everyone. Open the library from a surface with a shared look and a switch appears under its title, Change the material for: This surface (the default) or All 2 surfaces. With All, the pick changes the shared look itself, so every surface sharing it follows.
8Whole scene
Normally each surface shows its own copy of a look, fitted to it. Whole scene does the opposite: one picture is laid across all your surfaces at once, as the audience sees them, as if one big image were projected over the whole room but visible only on your surfaces. Great for a picture or a pattern that should flow from one object to the next.
- Click Whole scene at the top of the Surfaces list (it appears once you have surfaces). The library opens with the title Whole scene: One layer spanning every surface.
- Pick a look, a picture or a video. The button reads Span every surface.
- Every surface gets a new layer on top that shows its part of the one picture. Masks, locked surfaces and full ones (four layers) are skipped. It is one undo step.
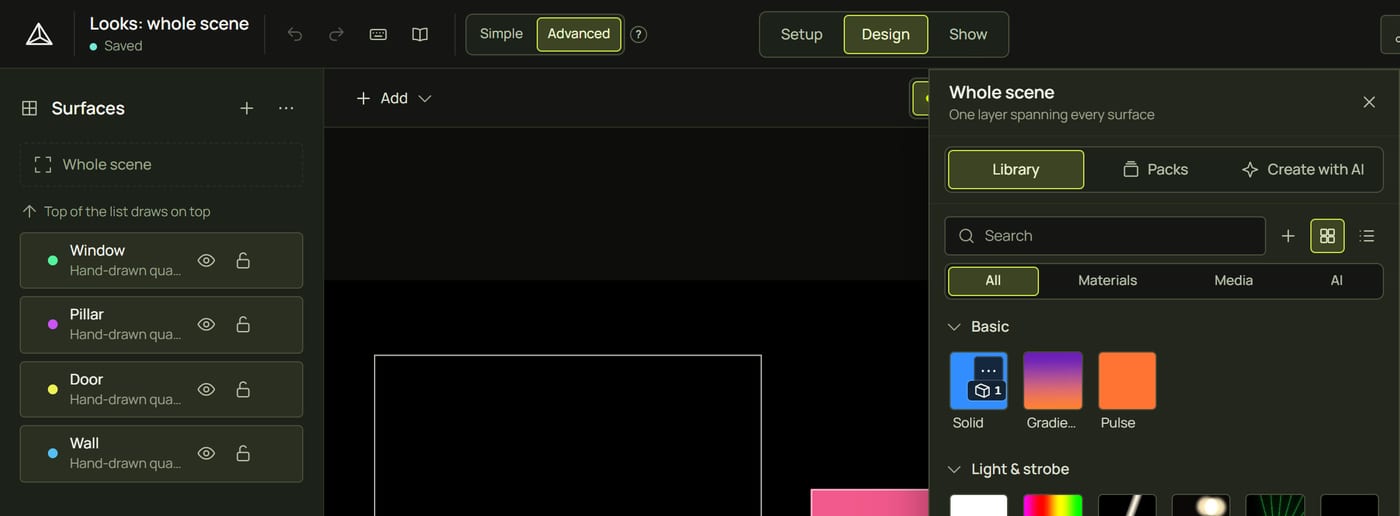
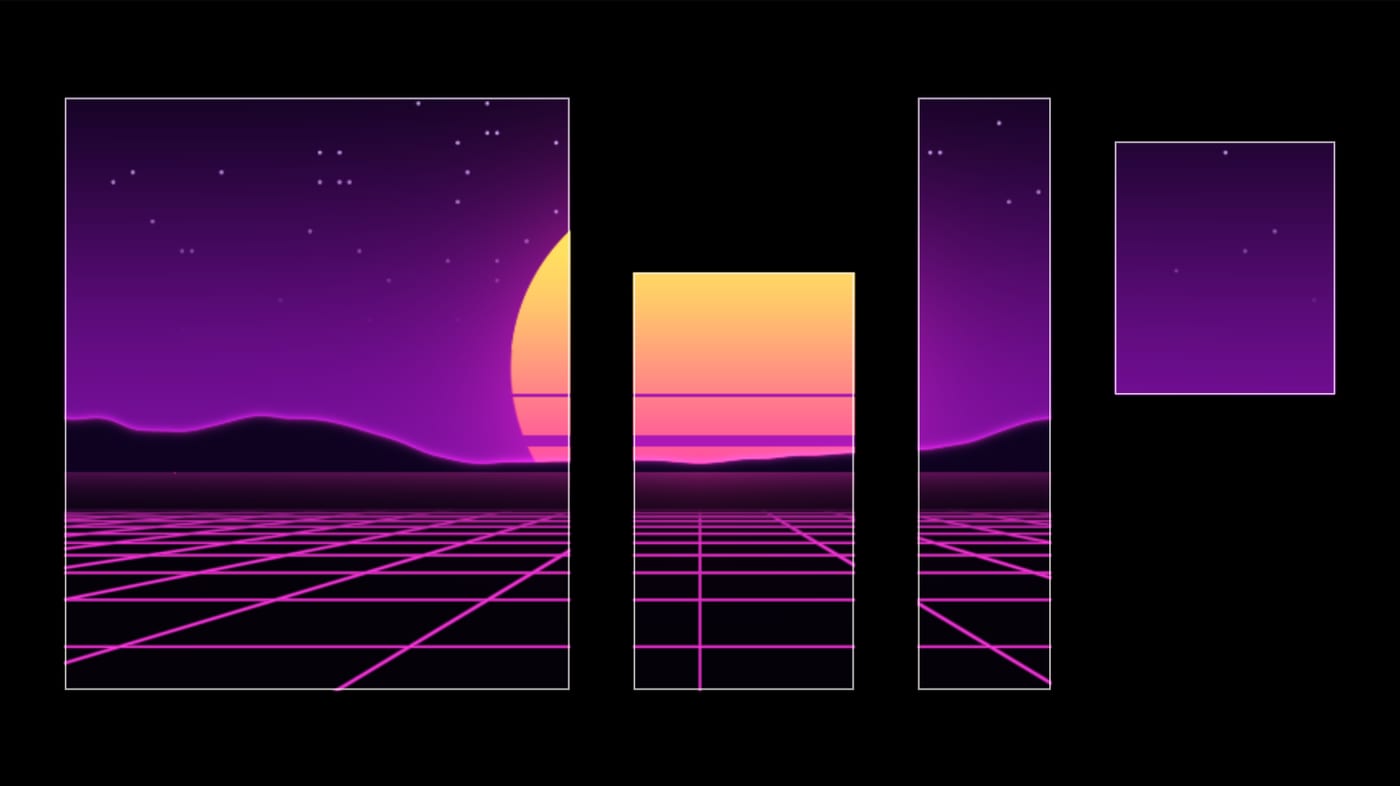
You can also drop a tile on the Whole scene row, or use the Whole scene button in a tile's details. A layer that spans the scene says · whole scene in its row. Each layer's own choice is under Position & fit ▸ Map across: This surface or Whole scene (in Simple mode, click More… in Position & fit to see it).
9Hints and tips
- Browse the catalogue first. Every look shows all 93 with what each is good for; then type the name in the library.
- Space before Enter. Space shows a look's details without putting it on.
- Share on purpose. Give related surfaces (all the windows, all the pillars) one shared look: one change updates them all, and a 150-surface show stays smooth.
- Select from the library. The small number on a tile selects every surface that uses it: a quick way to find them.
- The right-click shortcut. Right-click a surface ▸ Material ▸ gives a searchable menu of every material with a Recent list, without opening the library.
- Everything at once. The Surfaces list's More menu ▸ Apply to all… puts one look on every surface, with a choice of preset and Replace their layers or Add on top.
10When something looks wrong
| You see | Why | Fix |
|---|---|---|
| “Pick a surface first” | Nothing is selected. | Click a surface on the canvas or in the list. |
| “Wall is locked” | The surface, or its group, is locked. | Unlock it with the padlock in the Surfaces list. |
| “Wall is a mask” | Masks cut the surfaces below them; they have no looks. | Right-click it ▸ Make it a surface if you want a look on it. |
| “already has four layers” | A surface holds four layers at most. | Delete a layer, or replace one instead of adding. |
| Changing one surface changed others | They share the look. | Duplicate look or Make independent first. |
| The new look shows black | It is see-through where nothing is lit (rain, sweeps, most wipes), or a transition that hasn't started. | Put another look on a layer below it; see the badges. |
| A dropped look went nowhere | It was dropped on the canvas but not on a surface. | Drop it on a surface, a row in the list, or Whole scene. |
11Mouse and keyboard
| Action | How |
|---|---|
| Open or close the library | Click the look's slot (or Enter when it has focus) · Esc or click outside to close |
| Open the look panel | Double-click the slot · E · Edit on the layer's row |
| Move between tiles | Arrow keys · Home / End for the first and last |
| Put a look on | Click · Enter · drag it onto a surface |
| Details | Space · the ⋯ in a tile's corner |
| Search | Start typing · ↓ back to the grid · Esc clears it |
| Tile menu | Right-click · Shift+F10 or the Menu key on a focused tile |
| Undo a pick | Ctrl+Z |