3D objects
Map a real box, a plinth, a speaker or a doorway as one solid object instead of separate flat shapes. You place a virtual shape over the real one, pin its corners to the real corners, and prism works out every face exactly as your projector sees it. Each face then gets its own look, or one picture that wraps all the way round.
Advanced numbers, lens, lock and fine-tune, content mapping
1Before you start
- Put the real object in the beam so the faces you want are lit, for example the front, one side and the top of a box. Faces the projector can't reach can't be lit.
- Measure it (width × height × depth in cm) if you can. It's optional, but a measured size gives the best fit.
- Open the projector window (Setup ▸ Outputs) so you can watch the result on the real object while you work.
- Dim the room a little so you can see the projected corners on the object.
2Add a 3D object
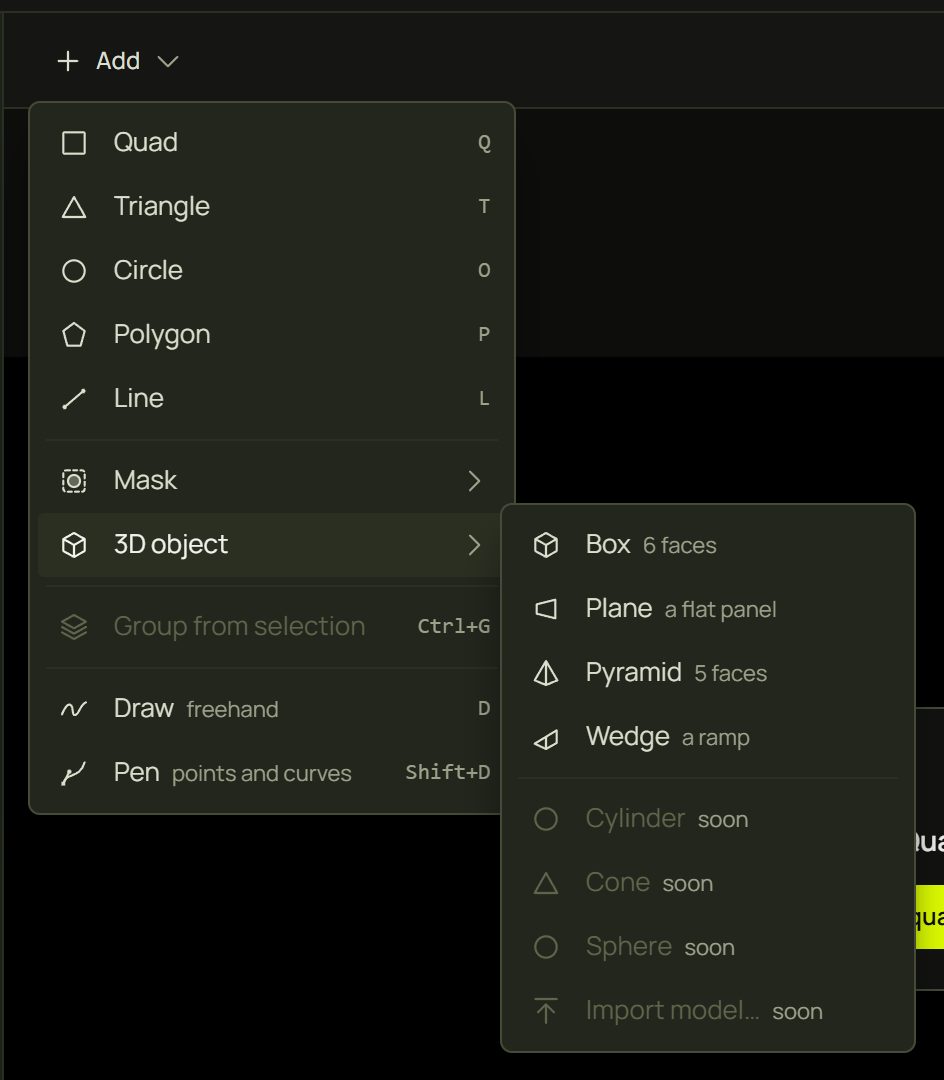
- In Design, press Add in the canvas tool bar and choose 3D object. (Right-click the canvas ▸ 3D object puts it where you clicked.)
- Pick the shape closest to your real object: Box (6 faces), Plane (a flat panel), Pyramid (5 faces) or Wedge (a ramp).
- The object appears in the middle of the picture, already selected and turned three-quarters towards you. In the Surfaces list it's a group named after it (Box 1), with one surface per face (Box 1 front, Box 1 top…). The canvas switches to the projector view, where the object's handles are.
- If you measured the object, type its size in the card on the right (Size, cm).
3Place it
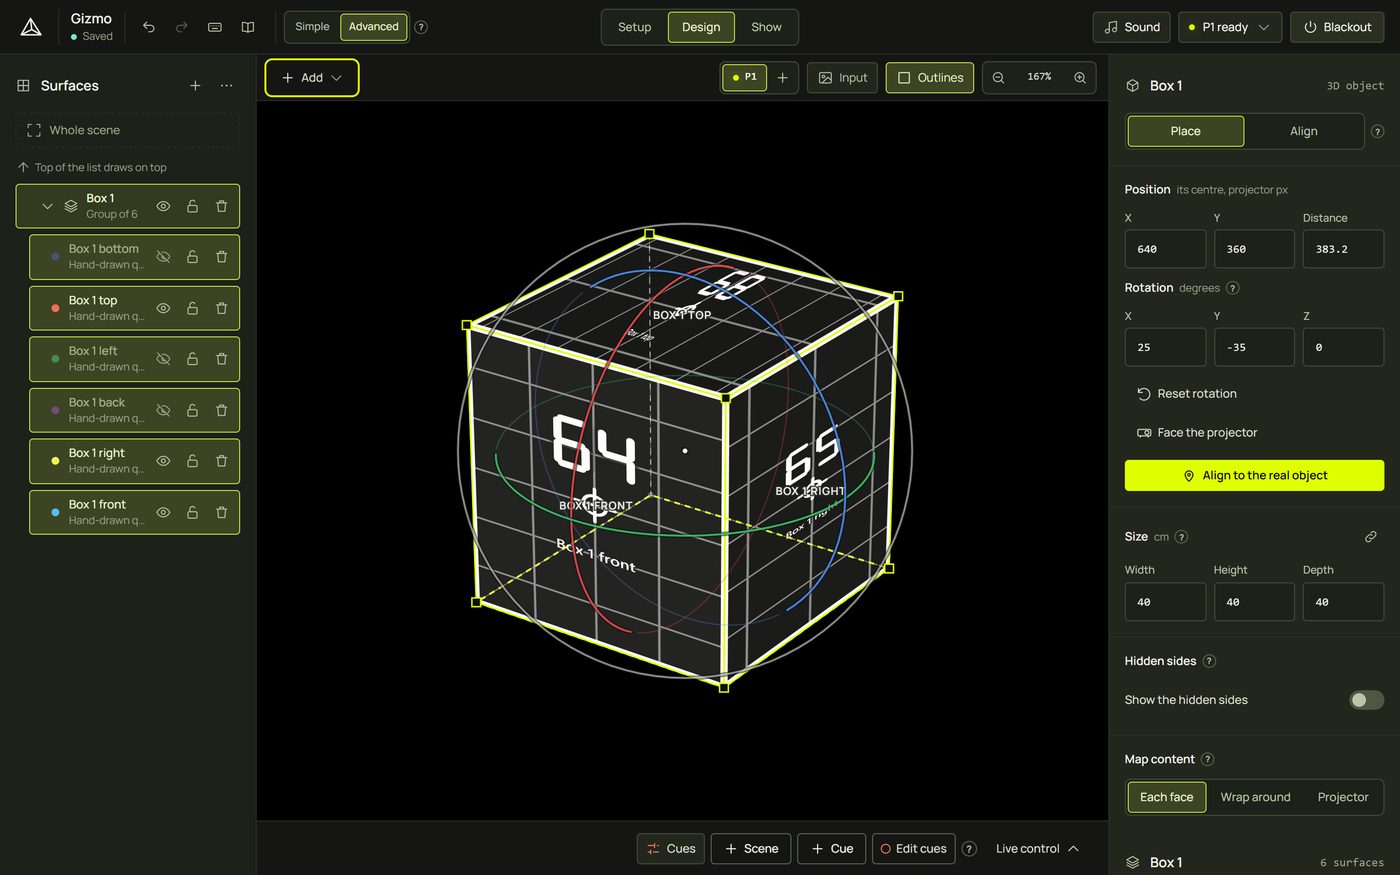
A new object starts in Place, where you move it roughly over the real object. Watch the projector window as you go.
| To… | Do this |
|---|---|
| Move it | Drag anywhere on its body. It slides across the picture and keeps its size. |
| Resize it | Drag a corner square. The opposite corner stays put; hold Alt to grow from the centre, and Shift to step in 5 % jumps. (With a measured size, it moves nearer or further instead: on the projector that looks the same.) |
| Turn it | Drag a ring: red tips it forward and back (X), green swings it left and right (Y), blue rolls it (Z), and the outer ivory ring spins it flat, like a steering wheel. Hold Shift to snap to 15°. |
| Nudge it | Arrow keys move it 1 px; Shift + arrows move it 10 px. |
| Start over | Reset rotation returns it to how it was added; Face the projector turns its front squarely towards the projector. |
4Align it to the real object
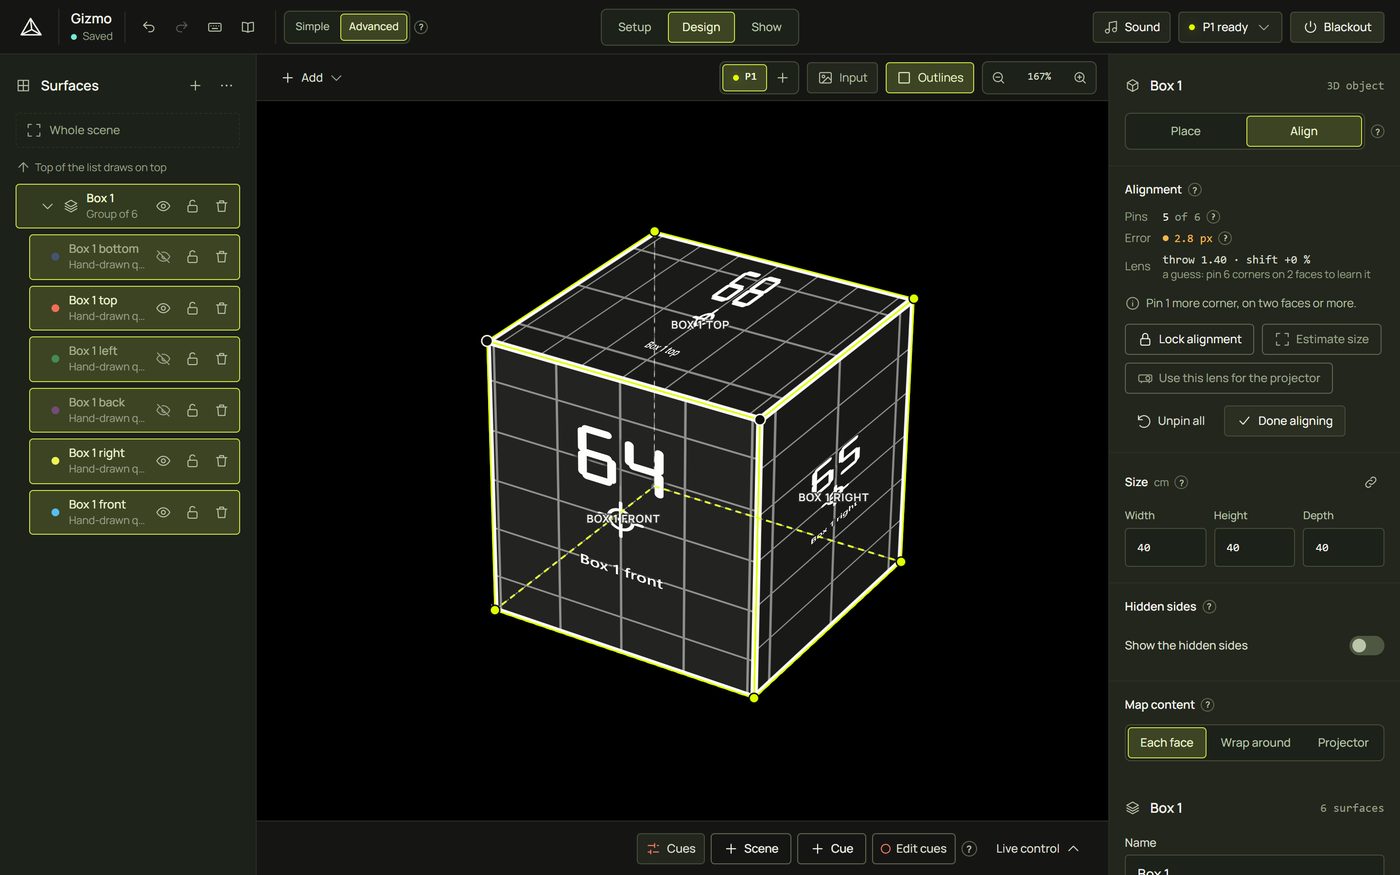
Now tell prism where the real corners are. Press Align to the real object in the card (or switch the card to Align). The rings disappear and every visible corner becomes a handle you can pin.
- Zoom in on the canvas (mouse wheel, or Shift + 2 to zoom to the selection). Precision matters here.
- Drag a corner and watch the projector: move it until the corner of the projected picture sits exactly on the real corner. The corner is now pinned (a solid lime dot), and the object fits itself to its pins.
- Pin more corners, on at least two faces. Four pins place the object; six or seven (every corner you can see) make it exact and let prism learn your projector's lens.
- Watch Error in the card: green below 1.5 px is excellent, amber (below 4 px) is close, red means something doesn't match (see When something looks wrong).
- Press Done aligning to go back to placing, or Lock alignment when you're happy (next section).
Size and lens
- Advanced Estimate size works out the real proportions from your pins if you didn't measure. It needs six pins that aren't all on one face. A typed, measured size is always better.
- Advanced Use this lens for the projector saves what prism learned about your projector's lens. After that, any new object on this projector needs only four pins.
- To start again, press Unpin all. To take back one pin, select its corner and press Delete, or right-click it ▸ Unpin.
5Lock it and fine-tune Advanced
Lock alignment freezes the object exactly as it looks now: nothing moves when you press it. After locking, dragging a corner no longer re-fits the whole shape; it moves just that corner, and the faces bend smoothly to follow. Use this to correct the last pixel where a real box is slightly squashed or its edges aren't quite straight.
- A locked object can't be moved or turned by accident. Unlock it in the card to place it again.
- Unlocking removes the fine-tune bends (one undo step).
- In Simple mode, Lock alignment is behind the card's More….
6Give it a look
Each face is an ordinary surface, so everything you know from other surfaces works: click a face to select it, then pick a look from the library, change its settings in the look panel, set a blend mode, make it react to music, save it in scenes and cues. A new object's faces share one Test Grid look named after the object.
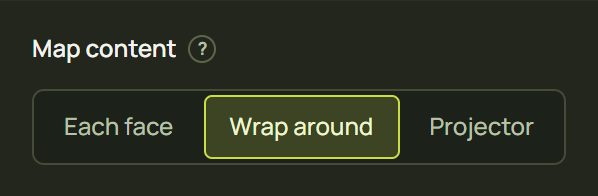
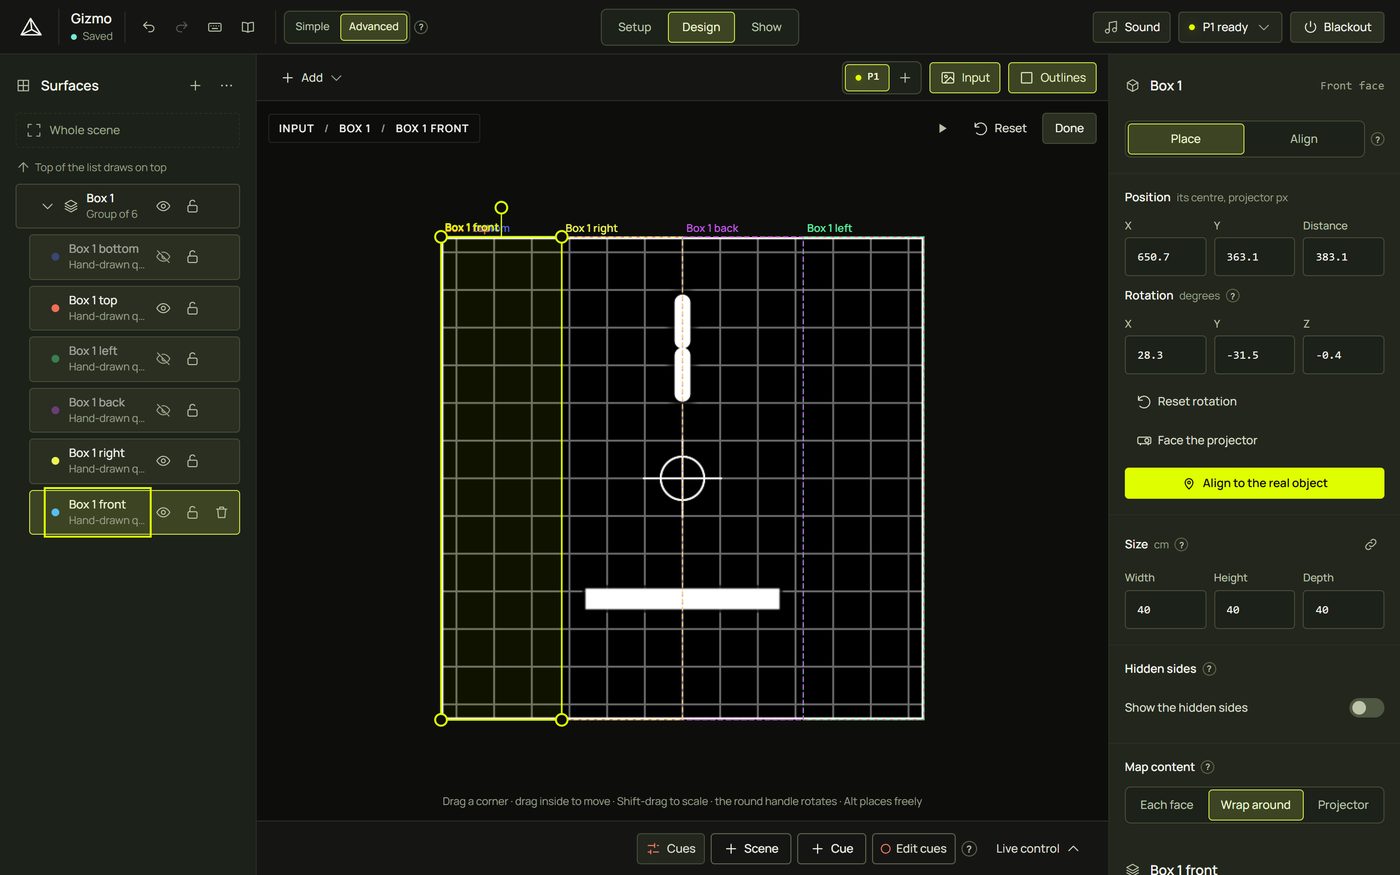
Advanced Map content
| Setting | What happens | Good for |
|---|---|---|
| Each face (default) | Every face shows its own copy of its look, in correct perspective. | Different colours per face, test grids, edge looks |
| Wrap around | One picture wraps round the sides like a label on a tin; top and bottom show the whole picture. | A video or pattern that flows round the object |
| Projector | One flat picture across the whole object, as the projector sees it. | Big reveals, projected text, “it's just light” illusions |
7See-through: the glass-box effect
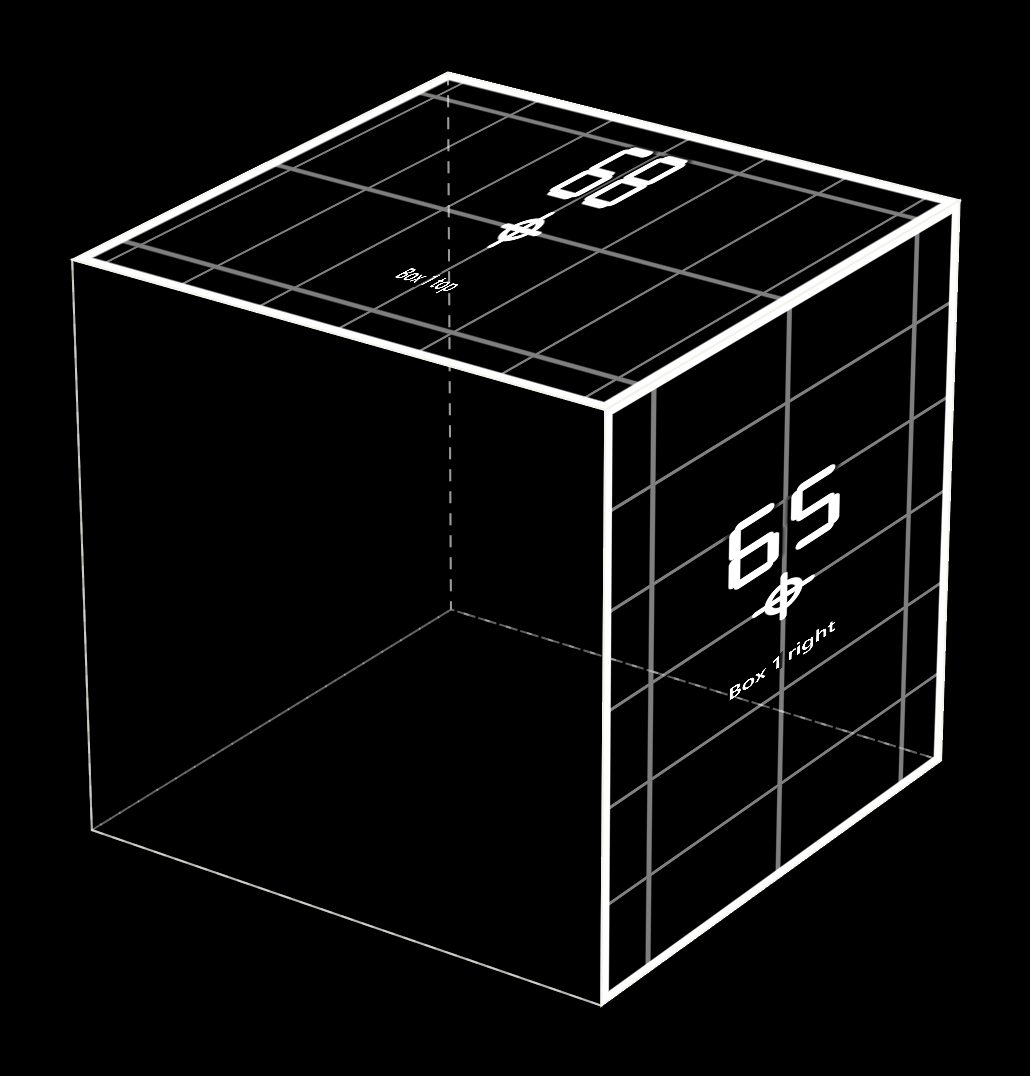
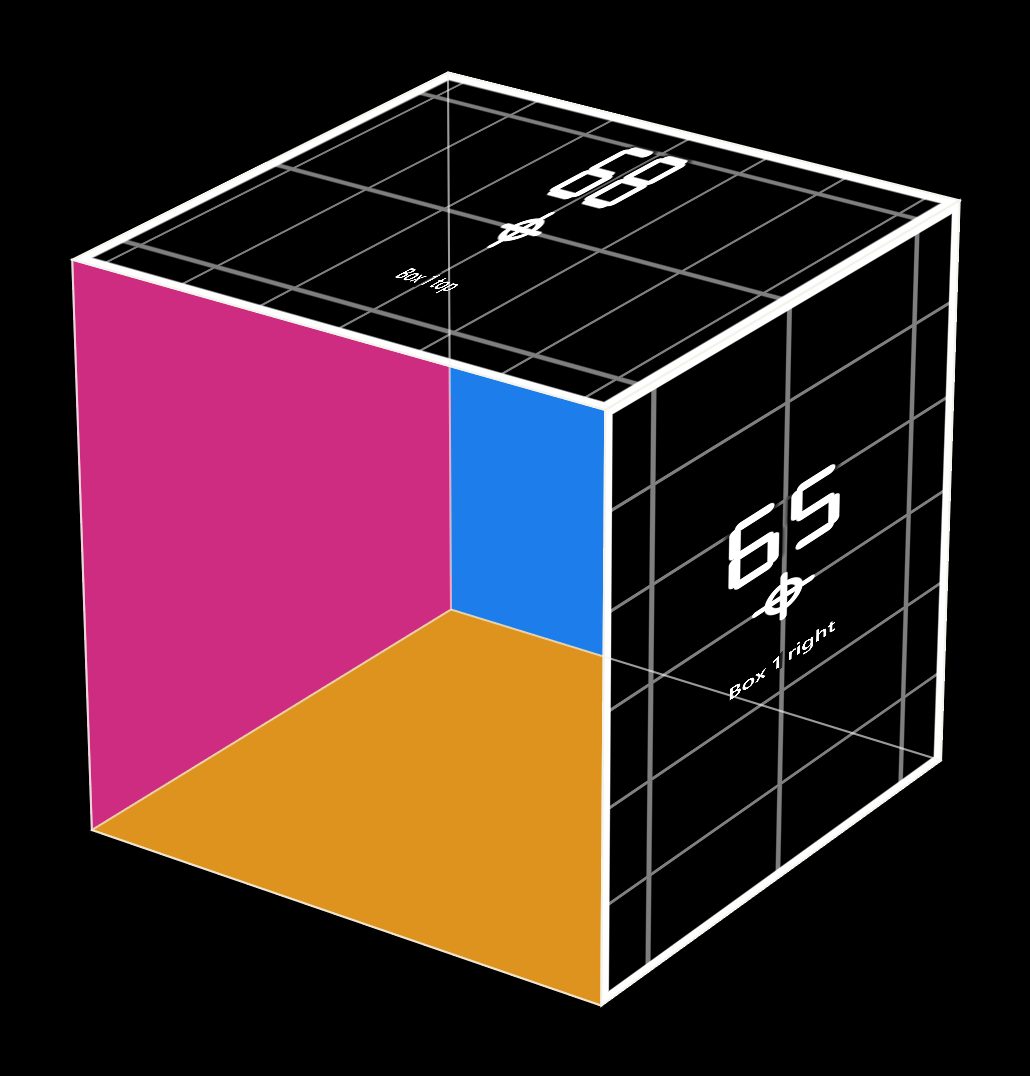
Normally prism hides the sides that face away from the projector, because on a real box the light can't reach them. Turn on Show the hidden sides and those sides are drawn underneath the front faces. Then set a front face's blend mode to Multiply, Screen or Add, or lower its opacity, and the back of the box shows through, as if it were glass.
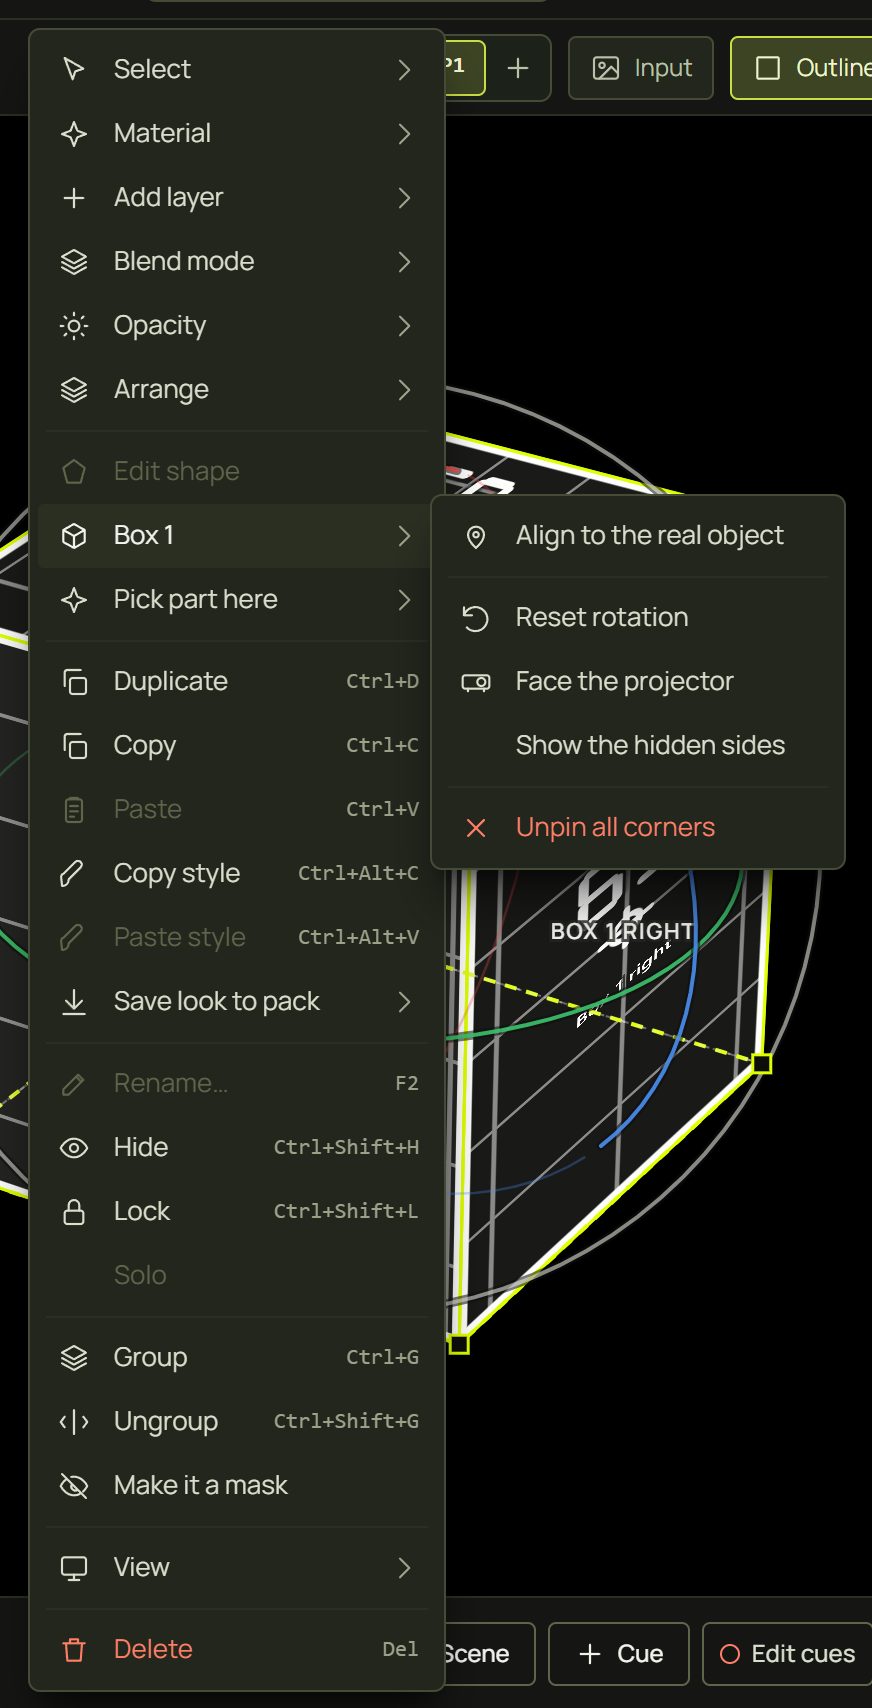
- Select the object and turn on Show the hidden sides in the card (or right-click ▸ Box 1 ▸ Show the hidden sides).
- Give the hidden sides looks: select them in the Surfaces list (they can't be clicked on the canvas; they're behind).
- Select a front face and set its blend mode to Multiply (or Screen or Add), or lower its opacity. See Blend modes.
8More than one projector Advanced
An object can be lit by several projectors. In the card's Projectors list, press Add here for another projector. The object gets its own faces there, with the same looks, and you pin its corners again from that projector's point of view. Each projector keeps its own pins, position and lens; the object's size is shared. See Several projectors.
9Hints and tips
- Pin corners that are far apart, on different faces. Four corners bunched together on one face give a wobbly fit.
- Measure the real object. Size and distance look identical to a projector, so a typed size removes the biggest source of error.
- Zoom to 200–400 % when pinning. Each screen pixel is then less than a projector pixel.
- Use the Test Grid look while aligning. Its lines make crooked edges obvious on the real object; swap to your real looks afterwards.
- A plinth under a box? Add a second Box for it. Objects are independent and can overlap.
- Doorways and alcoves: a Box sunk into the wall (only its inside faces lit), or the Recessed Box look on a flat surface, both give depth.
- Mesh-warp a face (select it, press M) for objects that aren't quite flat. The whole object shares one warp, so edges stay glued. See Mesh warping.
10When something looks wrong
| You see | Why | Fix |
|---|---|---|
| Error stays amber or red | The shape doesn't match the real object (wrong proportions), or a pin sits on the wrong corner. | Type the measured size or press Estimate size; check for one long dotted line and re-pin that corner. |
| The object jumps when you pin | With only 1–3 pins prism has to guess the rest. | Keep pinning: from 4 pins (on 2 or more faces) it settles. |
| A face is missing | It faces away from the projector, so it's hidden (the light can't reach it). | That's expected; for the glass effect turn on Show the hidden sides. |
| Can't drag the object | Its alignment is locked. | Unlock it in the card, move it, then lock again. |
| No rings or handles on the canvas | The canvas is in the camera view; the object's handles are in the projector view only. | Press Projector in the canvas tool bar. |
| Edges are a pixel off after locking | The real object isn't perfectly square. | Drag that corner: after Lock, corners move exactly and the faces bend to follow. |
| Multiply on a face goes black | Nothing is drawn underneath it. | Turn on Show the hidden sides, or put another surface behind it. |
11Mouse and keyboard
| Action | How |
|---|---|
| Move the object | Drag its body · arrows (1 px) · Shift + arrows (10 px) |
| Resize | Drag a corner square · Alt from the centre · Shift in 5 % steps |
| Turn | Drag a ring · Shift snaps to 15° |
| Pin a corner (Align) | Drag it · Alt places it without snapping · arrows nudge a selected corner · Delete unpins it |
| Zoom to it | Shift + 2 · mouse wheel to zoom |
| Object menu | Right-click a face or the object's row ▸ Box 1: Align to the real object or Back to placing, Reset rotation, Face the projector, Show the hidden sides, Unpin all corners |
| Undo | Ctrl + Z: one gesture at a time |