What do you want to map?
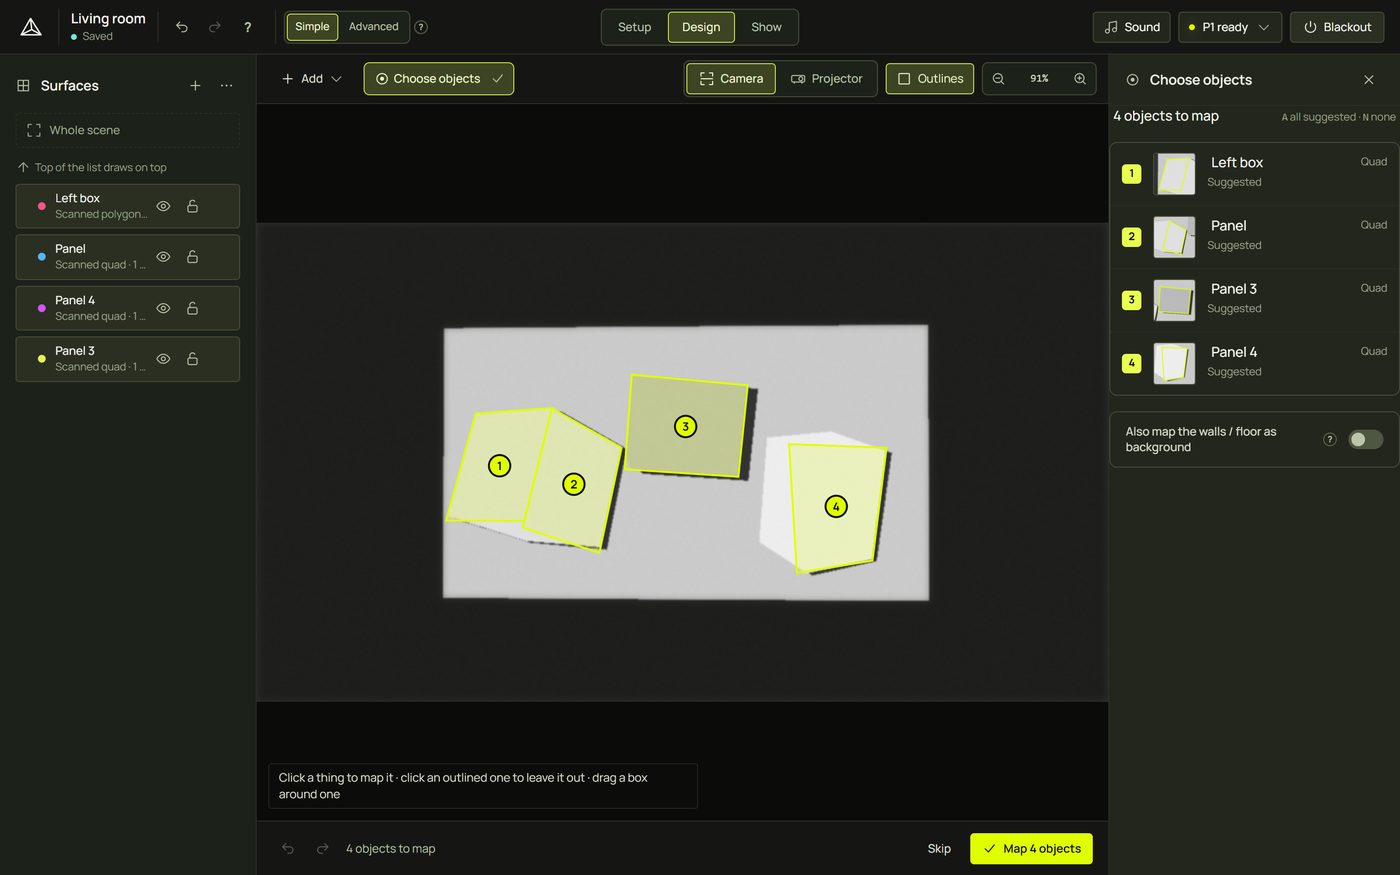
After a scan, prism shows the photo your phone took, outlines the objects it found and asks which ones you want to light. A click adds a thing or leaves it out. Everything you don't choose stays dark, unless you also map the walls and floor as a background.
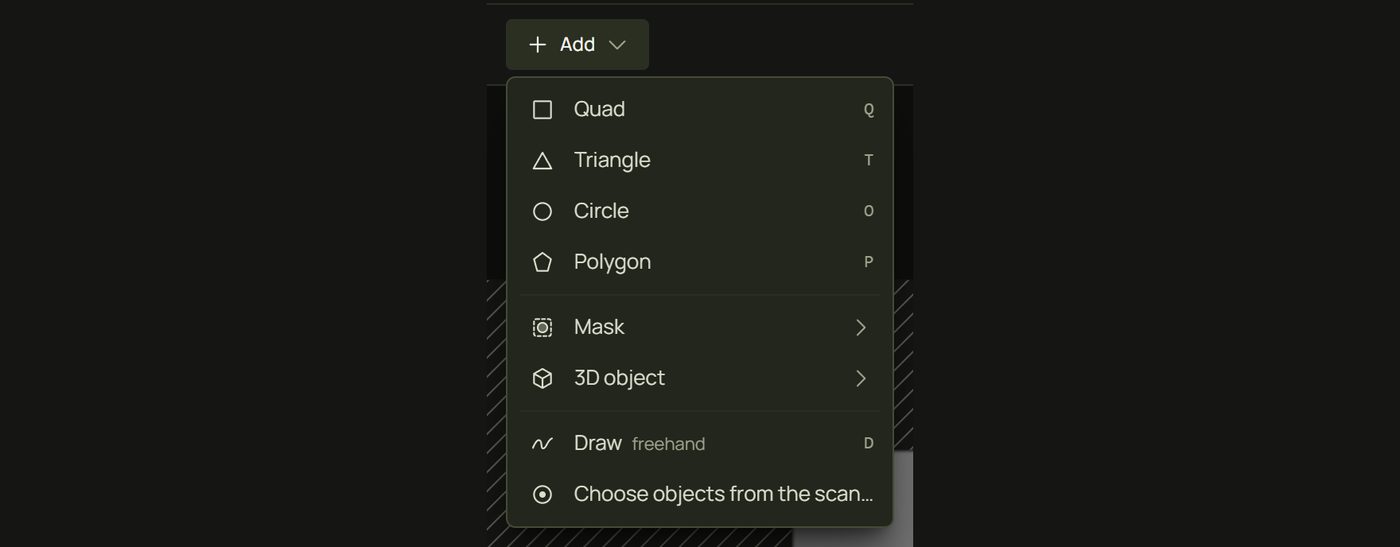
Design ▸ Add ▸ Choose objects from the scan…
Advanced Re-detect
1When it appears
Right after a scan, when you click Review surfaces, the Review step opens with What do you want to map?. It appears once per scan. Nothing in your project changes until you finish, so you can try things freely.
Meanwhile the projector goes black and draws outlines on the real objects: white for the chosen ones, lime for the one under your pointer. Look up from the laptop to check you've got the right thing.
2Reading the photo and the list
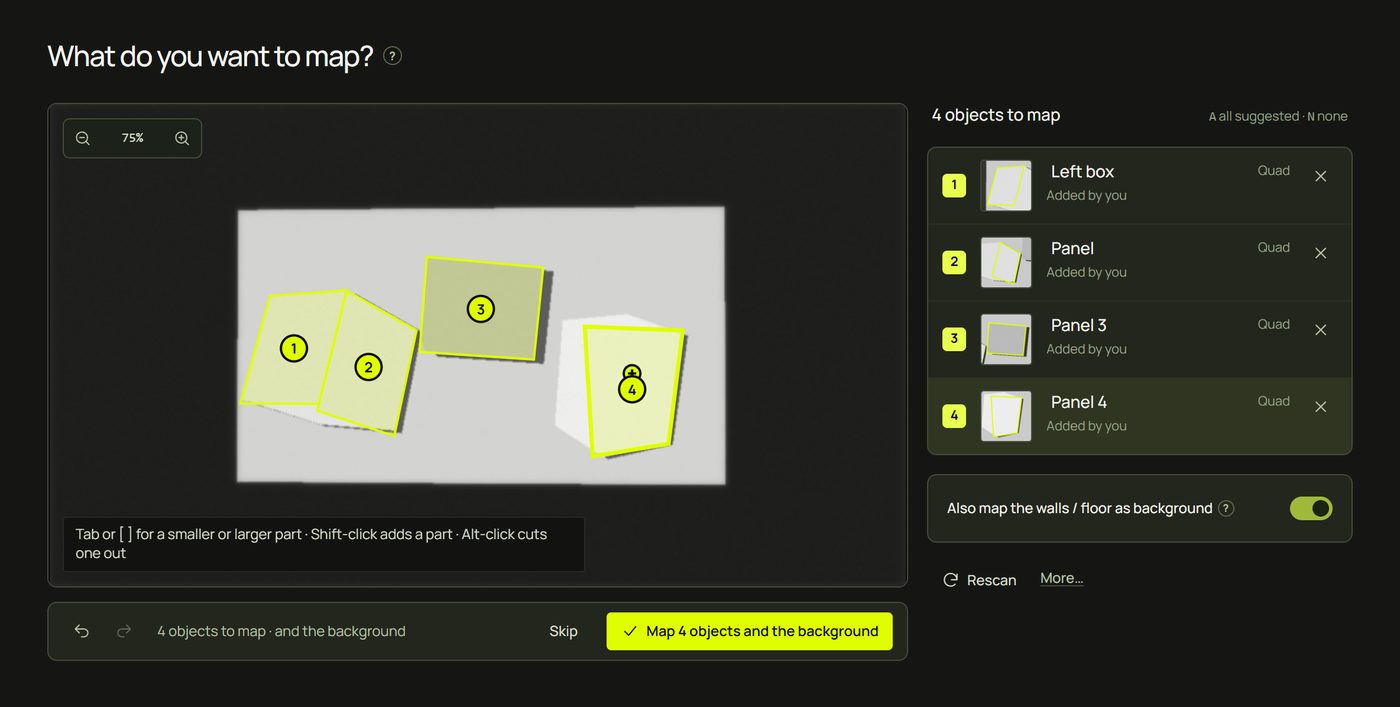
- The photo is the one the phone took. The parts the projector can't reach are veiled: nothing can be lit there.
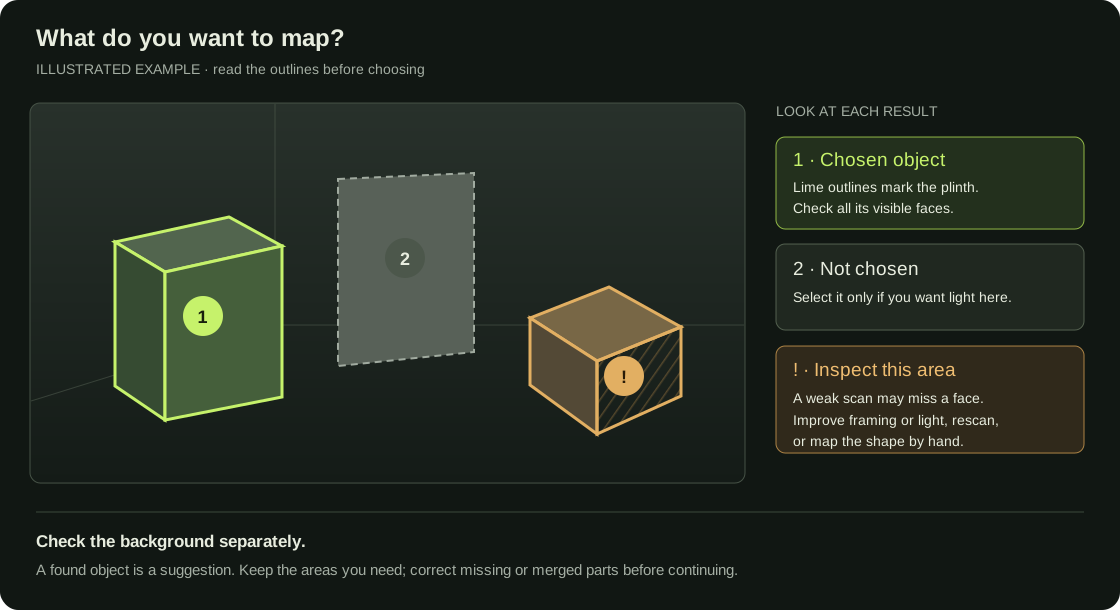
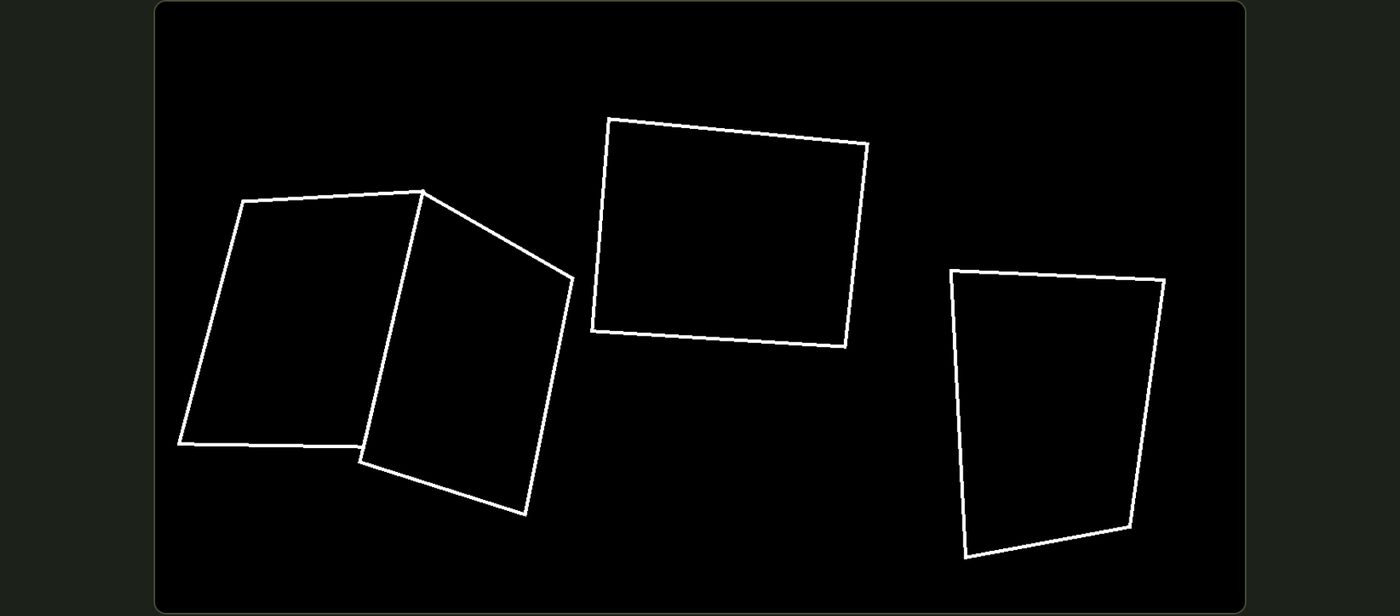
- Found objects are outlined with the shape they'll get and numbered left to right. Chosen ones are lime with a lime number; the others are dashed; ones the scan couldn't place well are amber.
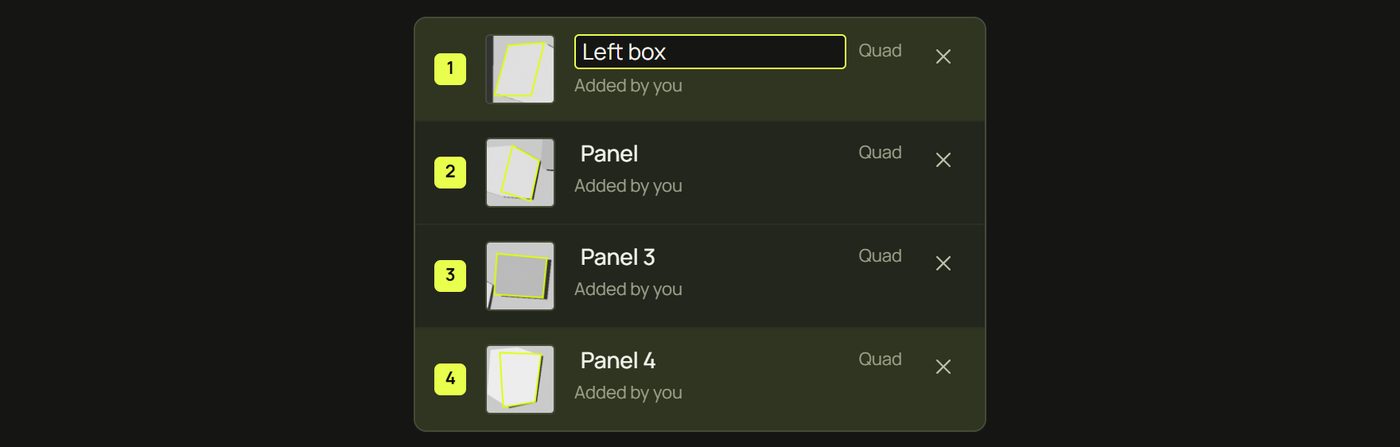
- The list on the right has the same numbers. Each row shows the object's picture, its name, its shape (Quad, Circle, Outline, or By hand) and why it is or isn't chosen: Suggested, Added by you, Small: not chosen, or Seems to lie on the floor: not chosen.
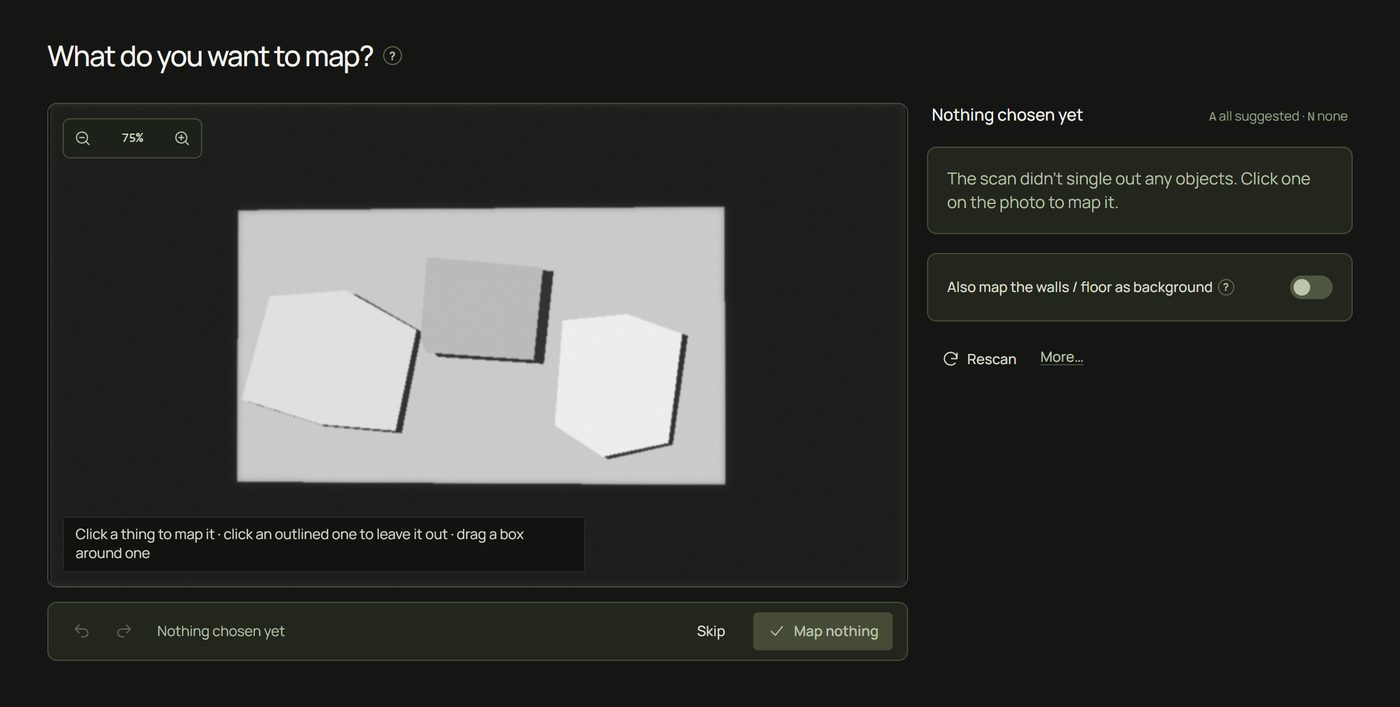
- Above the list: how many objects are chosen, and the keys A (all suggested) and N (none).
3Pick and unpick
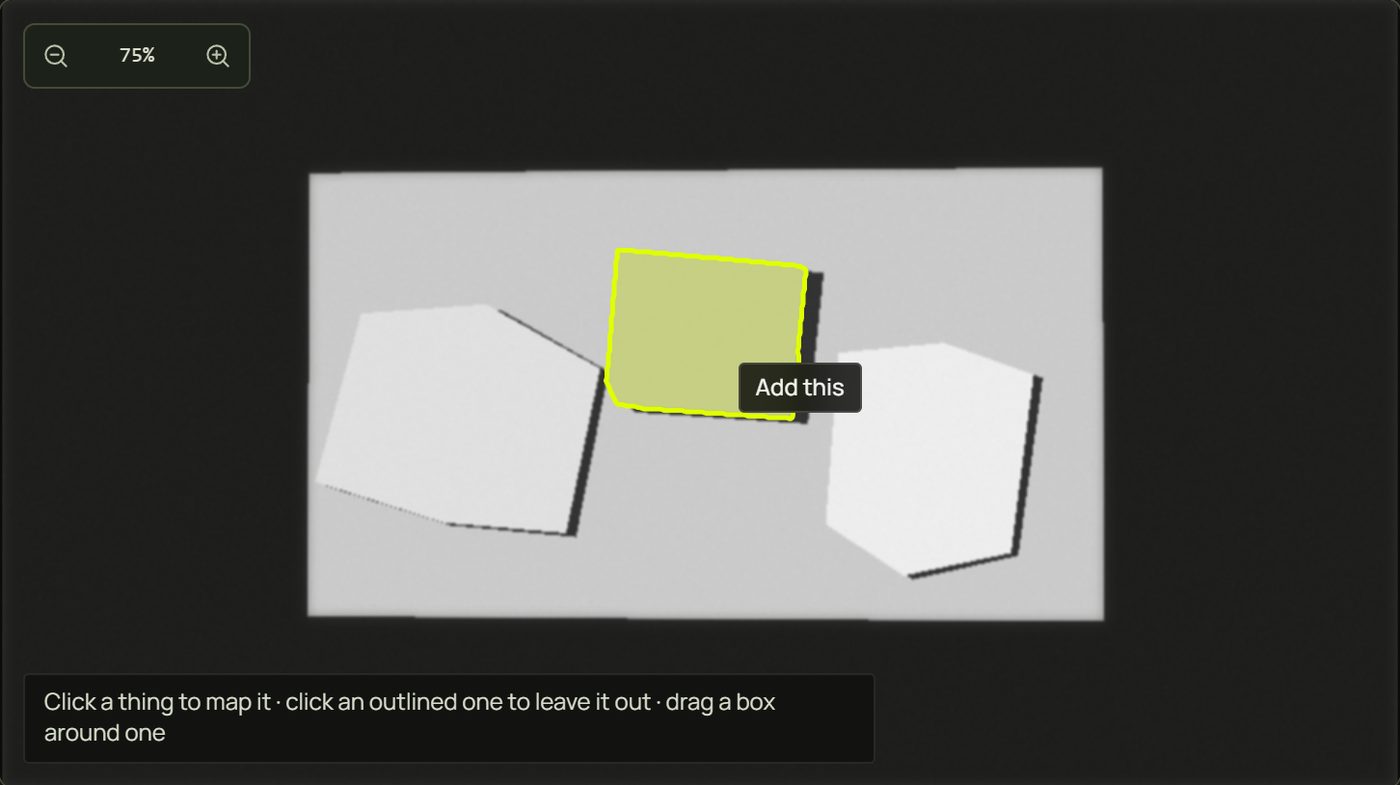
- Hover over the photo. Over an outlined object, a label says what a click does: Remove: Column or Add: Column. Anywhere else, prism's object finder previews the region a click would add, filled, with Add this.
- Click to add or leave out. The list and the projector's outlines follow at once.
- Can't hit it? Drag a box around the thing.
- Changed your mind? Ctrl + Z undoes the last change inside this step; the × on a row removes an object you added.

4Parts and wholes
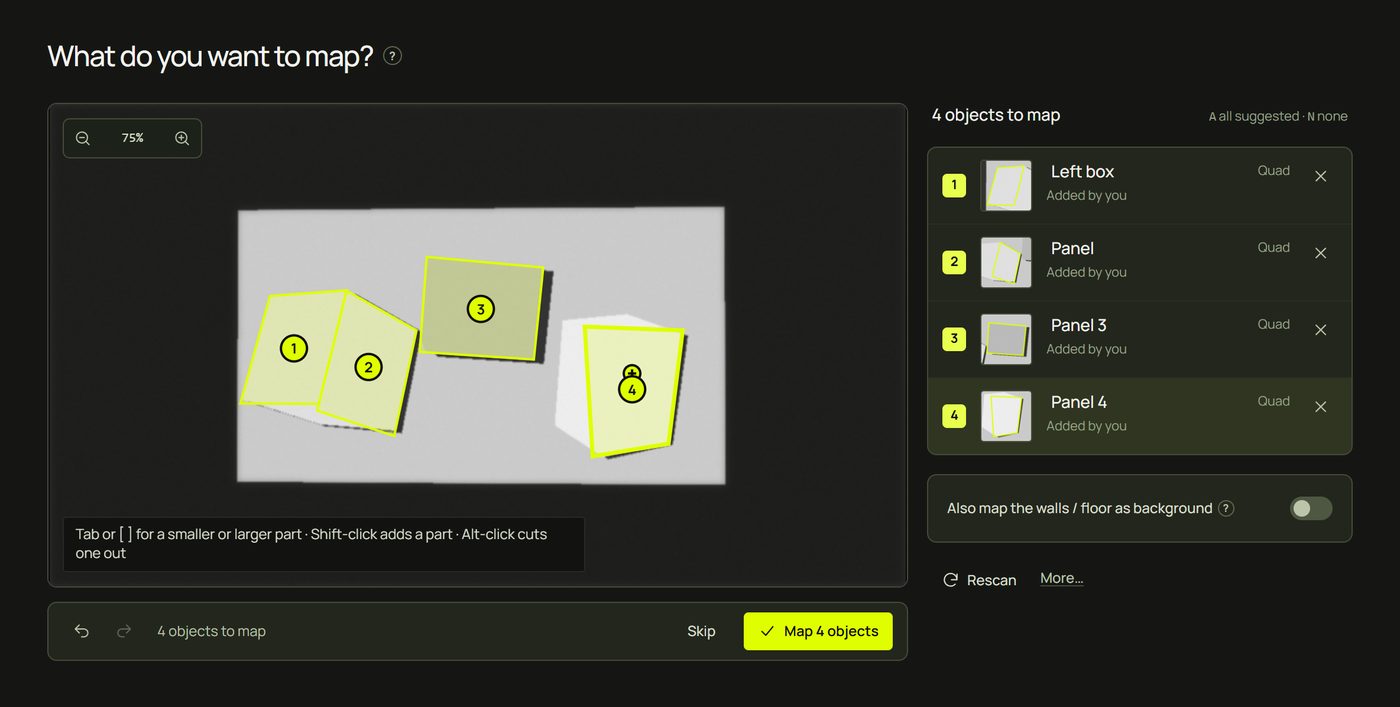
Things are made of parts: a speaker has a cone, a cabinet has doors, a box has faces. When you click, prism picks one size; you can step between them.
| To… | Do this |
|---|---|
| Take a smaller or larger part | Tab, or [ and ], or Alt + mouse wheel, on the object you last clicked. |
| Add a part to it | Shift-click the part. |
| Cut a part out of it | Alt-click (or right-click) the part. |
| Trace an outline yourself | Alt + drag along it. |
5Names
prism names objects by their shape: Disc (a circle), Column (three times taller than wide), Board (a big, wide rectangle), Panel (a four-sided shape), otherwise Object 1, Object 2… Numbers are added when a name repeats (Panel 2).
Click a name in the list to rename it, then press Enter. The surfaces keep these names in Design.
6Walls and floor as background
Also map the walls / floor as background decides what happens to everything you didn't choose.
- Off (the default): only the objects light up; the rest stays dark.
- On: the rest of the projection becomes background surfaces too, named Wall, Floor or Ceiling, kept together in a group called Background. The finish button then reads Map 4 objects and the background.
7Finish, or skip
- Map 4 objects (or Enter; the number is how many you chose) makes exactly those surfaces, with their shapes (a quad, a true circle, a curved outline), and opens Design. Each new surface starts with the Test Grid look so it shows on the projector straight away. It is one undo step.
- Skip (or Esc) keeps what the scan made by itself: the background as Wall and the objects it grouped.
8Choose again later
You can come back at any time; the objects you keep keep their looks.
- In Design: Add ▸ Choose objects from the scan…
- In Setup ▸ Review: Choose objects to map…
9Rescan
Rescan goes back to the Scan step: do it when the projector or the objects moved, or when the scan was poor. Advanced Re-detect surfaces from this scan (under More… in Simple) finds the surfaces again from the saved scan, without scanning: each new surface keeps the name and look of the old one it covers.
Hints and tips
- Look at the real objects, not only the laptop. The projector's outlines are the fastest check.
- Fewer, bigger things first. You can always add more later from Design.
- Leave the floor out unless you want light on it: projected light on a floor under objects is rarely pretty.
- Name things now. “Speaker left” is easier to find than “Panel 3” once you have twenty surfaces.
- Zoom the photo for small things: mouse wheel or pinch, and Space + drag to move around.
When something looks wrong
| You see | Why | Fix |
|---|---|---|
| “The scan didn't single out any objects. Click one on the photo to map it.” | Nothing stood out clearly, or Geometry only detection was used. | Click the things you want; or rescan with the lights lower. |
| “Loading the detection model…” | The object finder is downloading for the first time (about 450 MB). | Wait; it's stored on this computer afterwards. |
| “Picking needs the detection model, which isn't available.” | The model couldn't be loaded (no internet on first use). | Choose among the outlined objects, or connect once so the model can download. |
| A click takes the wall behind the object too | prism picked a bigger part. | Tab or [ for a smaller part; Alt-click to cut the wall out. |
| An amber object: “Scan data too poor here” | The scan read that area badly (common over Wi-Fi, or on shiny floors). | Rescan over HDMI, or choose it and align it by hand. |
| A thing at the edge of the photo can't be picked | It's outside the projector's picture (veiled). | Only what the projector lights can be mapped; aim the projector to include it and rescan. |
| The projector shows no outlines | The projector window isn't open or fullscreen. | Setup ▸ Outputs. |
Mouse and keyboard
| Action | How |
|---|---|
| Add or leave out | Click · drag a box around a thing |
| Smaller or larger part | Tab · [ ] · Alt + wheel |
| Add a part · cut one out | Shift-click · Alt-click or right-click |
| Trace an outline | Alt + drag |
| All suggested · none | A · N |
| Remove an added object | Delete · the × on its row |
| Zoom · move around | Mouse wheel or pinch · Space + drag |
| Undo · redo (inside the step) | Ctrl + Z · Ctrl + Shift + Z |
| Map them · skip | Enter · Esc |